
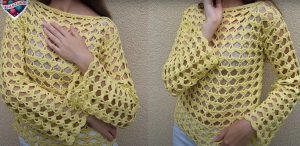
Crochet Multi-Purpose Blouse, Shawl, Runner Model

The Hummingbird Crochet Pattern is a delightful project that captures the elegance and grace of one of nature’s most fascinating creatures — the hummingbird. This crochet design allows crafters to bring the magic of these tiny, colorful birds to life using only yarn, a hook, and a bit of creativity.
Whether you are looking to make a charming decoration, an ornament for your home, or a thoughtful handmade gift, this pattern offers endless possibilities for personalization and joy.
Crocheting a hummingbird may look intricate at first glance, but with a well-structured Hummingbird Crochet Pattern, the process is surprisingly easy to follow.
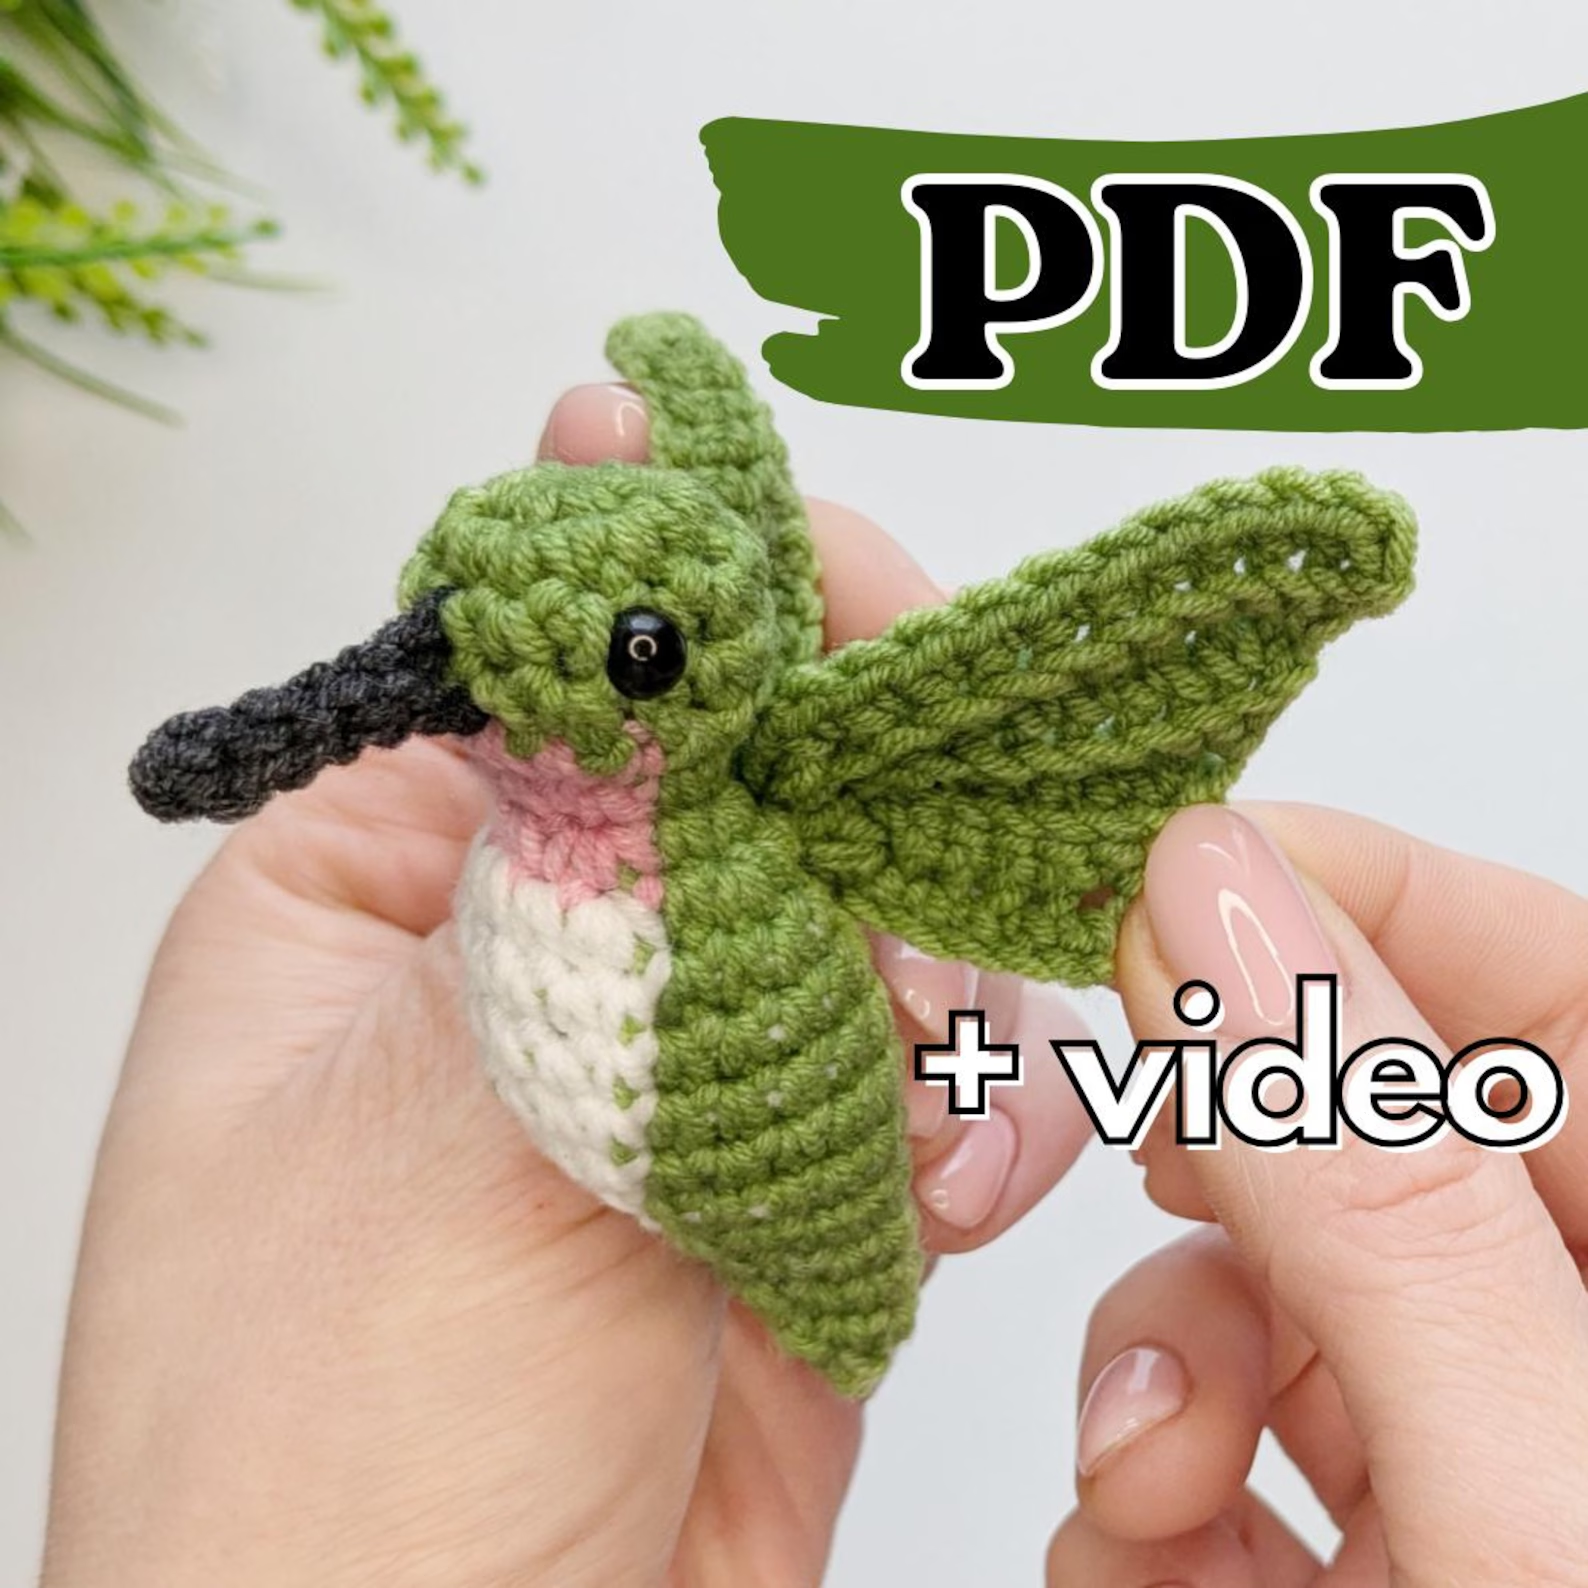
The pattern uses basic crochet stitches combined with color changes and shaping techniques to achieve the bird’s unique form. From its delicate wings to its pointed beak, each part comes together beautifully, resulting in a lifelike and detailed little bird.
The beauty of the Hummingbird Crochet Pattern lies not only in its appearance but also in its versatility. You can use lightweight yarns for a realistic, airy effect, or opt for cotton yarn to make it sturdier and easier to handle.
The finished piece can be used as a keychain, wall hanging, or even an embellishment for other crochet projects like blankets, bags, and hats. It’s a fun and rewarding pattern that lets your imagination take flight.
Before beginning your Hummingbird Crochet Pattern, it’s important to gather the right materials to ensure your project turns out beautifully. For this design, lightweight yarns work best — such as cotton or acrylic in size 2 or 3. The lighter the yarn, the more delicate your hummingbird will appear. Choose colors that reflect the vibrancy of real hummingbirds, like emerald green, sky blue, ruby red, and soft white.
A small crochet hook, usually between 2 mm and 3.5 mm, is ideal for achieving the fine details of the Hummingbird Crochet Pattern. You will also need a yarn needle for sewing pieces together, scissors for trimming ends, and a small amount of stuffing to give the bird some structure. For those who like extra details, a bit of metallic thread or embroidery floss can be used to add shimmer to the wings or body.
Having a good workspace is key to the success of your crochet project. Make sure you have good lighting and a flat surface where you can lay out your work as you progress. Keeping your materials organized helps you stay focused and enjoy the process. The Hummingbird Crochet Pattern is a great opportunity to relax and let your creativity flow.
Before starting, take a look at your color combinations. Hummingbirds are known for their iridescent feathers, so don’t hesitate to mix shades or use variegated yarn to add realism. Experimenting with colors is part of what makes this project so enjoyable and personal.
If you plan to make several hummingbirds, consider creating a small color palette chart. This way, you can recreate your favorite designs consistently and even make sets that coordinate with specific themes or decorations. The Hummingbird Crochet Pattern lends itself perfectly to themed collections, such as spring or garden-inspired crafts.
Lastly, prepare your pattern by reading through all the steps before you begin. Familiarizing yourself with the stitch count and assembly process will make your work smoother and more enjoyable. Once everything is ready, you’re set to start crocheting your very own hummingbird masterpiece.
The Hummingbird Crochet Pattern is typically worked in small pieces that are later assembled. Start with the body by creating a small oval base using single crochet stitches in the round. This forms the core of your hummingbird. Gradually increase the stitch count to shape the body and then decrease as you approach the neck area.
Next, you’ll crochet the head. Use a slightly lighter color to create a soft transition from the body. The head is a simple round piece, which can be stuffed lightly before being attached. For a realistic effect, embroider small eyes with black yarn or use miniature safety eyes if you prefer a polished finish.
The beak is one of the defining features of a hummingbird. It’s made by chaining a few stitches and tapering them with slip stitches to create a pointed look. Once done, sew it firmly to the center front of the head. Even though it’s small, this detail gives your Hummingbird Crochet Pattern its characteristic charm.
Now, onto the wings. Wings are what make this project so captivating. Each wing is crocheted separately using double crochet stitches, often in layers to add depth and texture. You can slightly shape the wings by adjusting the stitch tension, making them appear as if they are mid-flight. Adding a touch of shimmer thread along the edges creates a realistic glimmer.
The tail is usually a short fan-shaped piece made with half double crochets and chains. Depending on your design preference, you can make it simple or layered. Attach the tail to the back of the body to complete the bird’s shape.
Once all parts are finished, carefully sew them together. Use invisible stitches where possible for a clean finish. Adjust the wings’ position for balance and character. Your Hummingbird Crochet Pattern creation will come to life, ready to brighten any space with its delicate beauty.
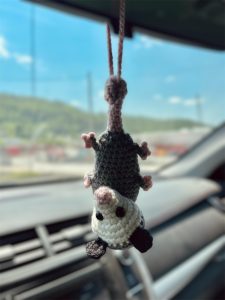
The Hummingbird Crochet Pattern can be used in a variety of creative and decorative ways. One of the most popular ideas is to turn your crocheted hummingbird into a hanging ornament. Simply attach a small loop of thread or ribbon to the top, and you have a lovely piece for decorating windows, plants, or even your Christmas tree.
Another creative use is to incorporate the hummingbird into wall art. By attaching several crocheted hummingbirds onto a canvas or embroidery hoop background, you can create a stunning piece that brings nature indoors. This type of project is perfect for adding a handmade touch to your living space.
For those who enjoy accessorizing, you can use your Hummingbird Crochet Pattern to create keychains or bag charms. Their lightweight size makes them perfect for carrying around as a daily reminder of nature’s beauty. Simply attach a metal ring or clasp, and your unique crochet charm is ready to use.
If you love gift-giving, consider using these crocheted hummingbirds as decorative additions to wrapped presents. Tied onto a gift box, they serve as both decoration and a small handmade keepsake. Friends and family will appreciate the thoughtfulness and craftsmanship behind your work.
Another fun idea is to combine multiple hummingbirds into a mobile for a nursery or craft room. Using transparent thread, hang several crocheted birds at varying heights to create a whimsical, floating effect. The gentle movement of the mobile adds life and charm to any space.
Lastly, you can use your Hummingbird Crochet Pattern as an applique for larger projects. Sew it onto blankets, scarves, or tote bags for a delightful finishing touch. It’s a wonderful way to personalize your handmade items and showcase your crochet talent.
When working with the Hummingbird Crochet Pattern, precision and patience are key. Because the project involves small stitches and delicate shaping, it’s important to maintain even tension throughout. This ensures your hummingbird looks neat and proportional.
One useful tip is to keep your yarn tails longer than usual when finishing off each part. Longer tails make it easier to sew the pieces together securely, which is especially helpful for small details like wings and beaks.
Blocking is another helpful step, particularly for the wings. Lightly dampen your finished pieces and pin them into shape on a soft surface. Once they dry, the wings will hold their shape beautifully, giving your Hummingbird Crochet Pattern a professional and polished appearance.
If you want to add more realism, use embroidery techniques to create feather details or to accentuate the color transitions. This extra step adds depth and makes your crochet hummingbird truly stand out.
Don’t be afraid to experiment with size variations. By changing your hook size or yarn weight, you can create different sizes of hummingbirds. A set of small, medium, and large birds displayed together makes a stunning collection.
Lastly, always handle your finished piece with care. If you’re gifting or selling your crocheted hummingbird, consider packaging it nicely in a small box with tissue paper. This not only protects it but also enhances the handmade presentation.
1. Is the Hummingbird Crochet Pattern suitable for beginners?
Yes, it is! The pattern uses basic stitches, and with careful attention to detail, even beginners can achieve beautiful results.
2. What type of yarn works best for this project?
Lightweight cotton or acrylic yarn works best for creating the delicate shape and vibrant colors of the hummingbird.
3. How long does it take to complete one hummingbird?
Most crafters can complete one in about 2–3 hours, depending on their experience and the level of detail they add.
4. Can I make the hummingbird larger?
Absolutely! Simply use a thicker yarn and a larger hook to scale up the size while keeping the proportions the same.
5. How can I add sparkle to my hummingbird?
You can use metallic or iridescent threads along with your main yarn to give the wings and body a shimmering effect.
6. What can I do with my finished hummingbird?
Your crocheted hummingbird can be used as a decoration, keychain, applique, or even a part of a mobile or wall display.
The Hummingbird Crochet Pattern is a delightful project that combines creativity, detail, and the beauty of nature. From gathering materials and crocheting each part to assembling and styling the final piece, every step brings a sense of satisfaction and artistry. You’ve learned how to customize colors, create lifelike textures, and find unique ways to use your handmade hummingbird.
Crocheting a hummingbird is more than just making a craft — it’s about capturing the grace and wonder of a tiny creature that symbolizes joy and freedom. Whether you’re a beginner or a seasoned crocheter, this pattern offers a rewarding experience filled with creativity and inspiration.
If you enjoyed this project, I’d love to hear your thoughts! Leave your opinion and suggestions below — your feedback helps inspire others and makes our creative crochet community even stronger.


