
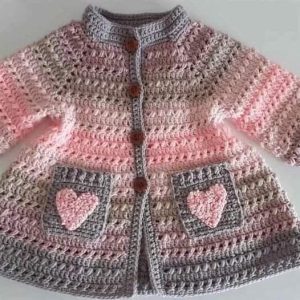
Crochet Multi-Purpose Blouse, Shawl, Runner Model

DIY Autumn Crochet Wreath – Handmade Fall Floral Decoration is the perfect project to bring warmth and charm into your home this season. As the leaves begin to change color and the air turns crisp, creating a handmade crochet wreath allows you to celebrate the beauty of autumn in a cozy, creative way.
Whether you’re an experienced crocheter or just starting out, this project is a fun and satisfying way to decorate your home with texture, color, and a personal touch. A DIY Autumn Crochet Wreath makes a stunning door decoration, a centerpiece, or even a thoughtful handmade gift.
The beauty of making your own DIY Autumn Crochet Wreath lies in the freedom it gives you to combine different colors, stitches, and floral motifs that represent the heart of fall. Think warm shades of orange, golden yellow, deep red, and earthy brown—all crocheted into delicate leaves, flowers, and acorns.

It’s not just a craft project; it’s a way to capture the spirit of autumn and showcase your creativity. Each piece you make becomes a small work of art that tells your story.
Crochet wreaths are also eco-friendly and reusable. Unlike store-bought decorations that fade or break over time, your handmade wreath can be stored safely and brought out every year. Plus, it’s fully customizable—you can change the flowers, add pumpkins, or weave in little woodland creatures.
By making a DIY Autumn Crochet Wreath, you create something that perfectly matches your home and your personal style, while also embracing the joy of crafting during the coziest season of the year.
Now, let’s explore step-by-step how to make your own DIY Autumn Crochet Wreath – Handmade Fall Floral Decoration and fill your home with autumn’s charm.
To start your DIY Autumn Crochet Wreath, you’ll need a few basic crochet materials and some simple craft supplies. The magic of this project comes from how these materials come together to create a piece that looks intricate yet feels easy and enjoyable to make.
Start with your wreath base. You can use a foam or wire wreath form, available in different sizes. Foam bases are great because you can easily pin or glue your crochet pieces onto them. Wrap your base with yarn, fabric, or burlap ribbon in a neutral fall color to create a warm foundation.
For the crocheted decorations, choose a medium-weight yarn in autumn-inspired shades—pumpkin orange, mustard yellow, olive green, burgundy, and cream. Cotton or acrylic yarns work well for this type of project. They hold their shape and come in a wide range of colors perfect for your fall theme.
You’ll need a crochet hook that matches your yarn, usually size 3.5 mm to 5 mm. Keep a tapestry needle and some hot glue or floral pins handy for assembling your pieces later. Scissors, a bit of twine, and optional embellishments like buttons or wooden beads can add extra charm to your wreath.
Before you begin, make sure your working area is well-lit and organized. It’s easier to enjoy crocheting small decorative pieces when your tools are in reach and your yarns are tangle-free. Preparing your materials in advance will help you stay focused and creative throughout the process.
Having everything ready means you can dive straight into crafting your DIY Autumn Crochet Wreath with inspiration and excitement.
The most delightful part of your DIY Autumn Crochet Wreath is the handmade floral and leaf elements that bring the entire piece to life. Each flower, leaf, or acorn adds character and color, turning a simple wreath base into a work of art.
Start with crochet leaves—an essential element of any fall decoration. Use shades of green, gold, and rust to make small and large leaves using basic stitches like single crochet, half-double, and double crochet. You can shape them naturally by slightly curling the edges or blocking them flat for a polished look.
Next, move on to flowers. Sunflowers, daisies, and mums are classic choices for an autumn theme. Begin with a magic ring and crochet petals in layers, using warm tones like golden yellow and burnt orange. Adding a brown or dark center gives your flowers a realistic touch.
To add more texture, include some crocheted acorns or tiny pumpkins. These can be made quickly using small scraps of yarn. Combine them with leaves and flowers for a balanced, seasonal arrangement.
For an extra cozy detail, try crocheting small twigs or vines to connect your decorations. Chain stitches and slip stitches can create lovely winding shapes that tie the design together beautifully.
Once all your elements are complete, weave in loose ends and lightly block the pieces if necessary. This helps them hold their shape and makes the assembly process much easier later on. Every element you make adds a touch of personality to your DIY Autumn Crochet Wreath, making it uniquely yours.
After you’ve finished crocheting your leaves, flowers, and other fall decorations, it’s time to assemble your DIY Autumn Crochet Wreath. This step is where your creativity really shines, as you arrange and secure your handmade elements onto the base.
Start by wrapping the wreath base in yarn or fabric if you haven’t already. This adds softness and helps your decorations attach more securely. Choose a yarn color that complements your floral palette, such as deep brown, cream, or burgundy.
Lay out all your crocheted pieces before attaching them. Arrange them in clusters around the wreath to find a layout that feels balanced and visually appealing. Place larger flowers near the bottom or one side of the wreath for a focal point, and scatter leaves and smaller accents evenly around.
Use hot glue, sewing pins, or a tapestry needle with yarn to secure each piece. Work slowly and step back occasionally to check the overall symmetry. Remember, part of the charm of a DIY Autumn Crochet Wreath is its handmade, slightly organic look—so it doesn’t have to be perfectly uniform.
You can add ribbons, small wooden tags, or crocheted bows for extra decoration. A burlap or satin ribbon at the top can be used for hanging the wreath on your door or wall. This finishing touch enhances the rustic, homey vibe of your design.
Take your time during this stage—assembly is not just about construction; it’s about creative expression. When you see your crocheted flowers and leaves come together, you’ll feel proud of the beautiful fall decoration you’ve created by hand.
Once your DIY Autumn Crochet Wreath is finished, the next step is finding the perfect place to display it. Handmade fall decor adds instant warmth to any space, and your crochet wreath will become a standout piece wherever you hang it.
The most popular spot is, of course, the front door. It welcomes guests with a handmade touch and sets the tone for a cozy, inviting home. Make sure it’s securely fastened using a sturdy hook or ribbon to prevent it from falling in windy weather.
Indoors, you can hang your wreath above a fireplace mantel, on a mirror, or even as a centerpiece above your dining table. If you have multiple wreaths, consider creating a small wall display with different sizes and designs for a striking visual effect.
For smaller living spaces, a DIY Autumn Crochet Wreath can be used as a table centerpiece. Place it flat on a table and add a candle or small pumpkin in the middle to complete the arrangement. This makes your decor versatile and multifunctional.
When the season ends, store your wreath carefully to preserve its beauty. Wrap it in tissue paper and keep it in a cool, dry place away from direct sunlight. This ensures that your handmade piece remains in perfect condition for next year.
Displaying your wreath proudly reminds you of the creativity and effort you’ve put into crafting something by hand—a true reflection of your love for the season and your passion for crochet.
1. Is the DIY Autumn Crochet Wreath beginner-friendly?
Yes! The project uses simple crochet stitches, and you can adjust the complexity based on your skill level.
2. What type of yarn is best for crochet wreaths?
Medium-weight cotton or acrylic yarn works perfectly, as it holds its shape well and offers vibrant fall colors.
3. How long does it take to make a crochet wreath?
Depending on size and detail, it can take between one to three days of casual crocheting to complete.
4. Can I wash my crochet wreath?
It’s best not to wash it directly. Instead, gently dust it or use a soft cloth to keep it clean.
5. Can I change the colors for other seasons?
Absolutely! You can easily adapt your DIY Autumn Crochet Wreath with pastel tones for spring or red and gold for Christmas.
6. What can I use instead of a foam wreath base?
You can use a wire base wrapped in fabric or even create a crocheted ring as the foundation.
7. How can I make my wreath more unique?
Personalize it by adding initials, tiny animals, or even crocheted fruits like apples or berries to reflect your style.
Creating your own DIY Autumn Crochet Wreath – Handmade Fall Floral Decoration is more than just a seasonal craft—it’s an expression of creativity, warmth, and love for the cozy charm of autumn. Each stitch captures the essence of fall, transforming yarn into a beautiful handmade decoration that brightens your home.
This project is accessible for everyone and offers endless opportunities to experiment with colors, textures, and designs. Whether you make it for yourself or as a gift, it’s sure to bring smiles and compliments from everyone who sees it.
Now that you’ve learned how to make a DIY Autumn Crochet Wreath, it’s time to grab your yarn, choose your favorite autumn shades, and start creating! When you’re done, share your thoughts, experiences, and ideas in the comments below. Your feedback and creativity help inspire other crafters to embrace the beauty of handmade seasonal decor.


