
Crochet Multi-Purpose Blouse, Shawl, Runner Model

Crochet Candy Canes – Tutorial is the perfect holiday project for crochet lovers who enjoy adding a handmade touch to their Christmas decorations. Whether you’re an experienced crafter or just starting your crochet journey, this project offers a fun and festive way to bring warmth and creativity to your home during the holiday season.
With just a few materials and simple stitches, you can create adorable candy cane ornaments that make perfect gifts, tree decorations, or even embellishments for wrapping presents. The beauty of this Crochet Candy Canes – Tutorial lies in its simplicity and versatility—you can make them in traditional red and white or experiment with colors that match your holiday décor.
The charm of the Crochet Candy Canes – Tutorial is that it allows for endless customization. These small projects are quick to complete, making them ideal for last-minute gifts or bulk crafting for holiday fairs and events.
They’re also a great way to use up leftover yarn from other projects. Beyond being a beautiful handmade decoration, crocheting candy canes can be a relaxing and joyful experience that captures the spirit of Christmas through creativity. Each candy cane you make becomes a little piece of handmade happiness.
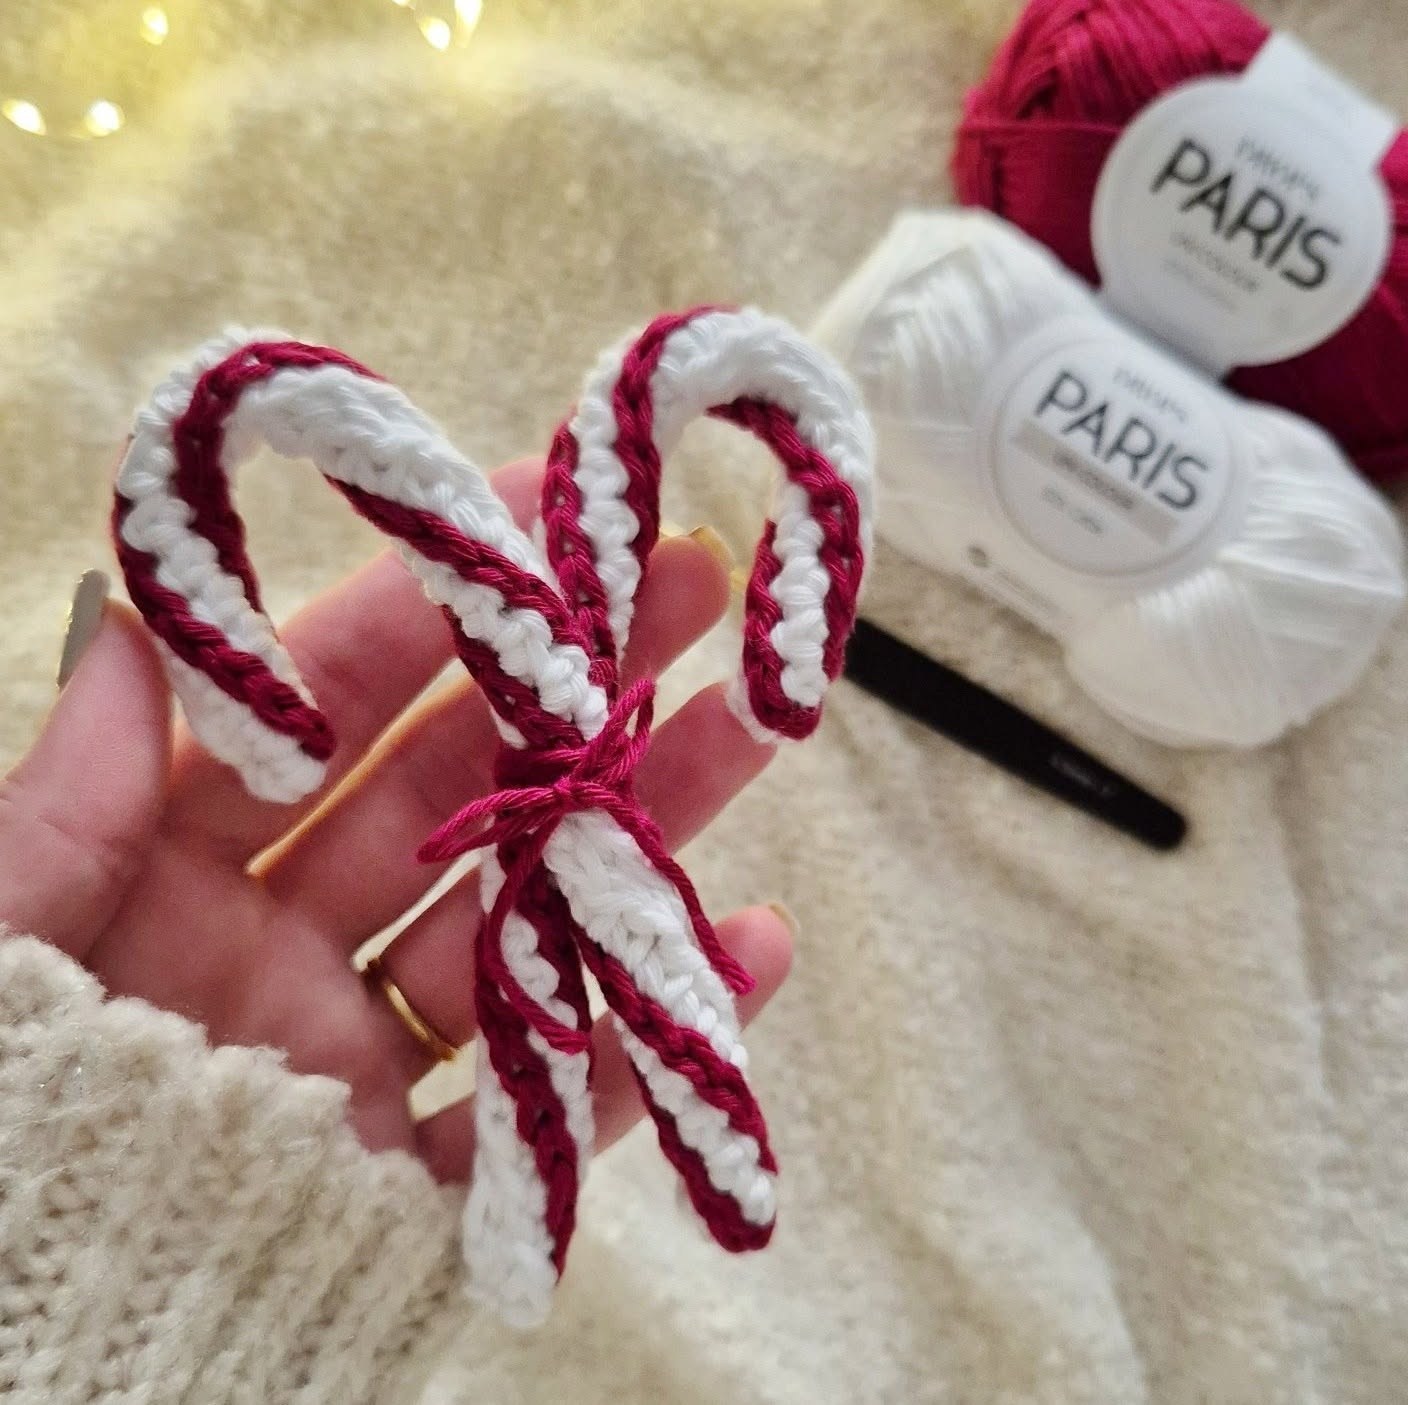
Before you begin, gather your materials: red and white yarn (or any two contrasting colors), a suitable crochet hook (usually 3.5mm to 4mm), stuffing if you want a fuller shape, a yarn needle, and scissors. The Crochet Candy Canes – Tutorial can be adapted for different skill levels—beginners can stick to basic stitches, while more experienced crocheters can add details such as stripes or glittery yarn for a festive sparkle.
Once you’ve completed a few, you’ll see how easily these charming ornaments come together and how satisfying it is to decorate your space with your own handmade creations.
To start your Crochet Candy Canes – Tutorial, choosing the right materials is key to achieving a beautiful finish. The traditional candy cane colors—red and white—work perfectly for a classic Christmas look, but you can also choose green, gold, or even pastel shades for a softer appearance. Acrylic yarn is a popular choice for this project because it’s affordable, lightweight, and holds its shape well. For a more luxurious touch, you can try cotton or sparkly metallic yarn.
The recommended hook size for this project is usually between 3.5mm and 4mm, depending on your yarn thickness. A smaller hook will give you a tighter stitch and a firmer candy cane, while a larger hook will produce a softer, more flexible result. You can adjust the hook size based on the texture you want.
You’ll also need a small amount of fiberfill stuffing if you want your candy canes to be plump. However, if you prefer a flat version that’s easier to hang on your tree, you can skip the stuffing step. Some crafters even insert a pipe cleaner inside to help the candy cane maintain its curved shape—this makes it easy to bend and style.
Before starting, prepare your work area with good lighting and organize your materials. Having everything within reach makes the crocheting process more enjoyable and efficient. If you’re making several candy canes, consider cutting your yarn lengths in advance to maintain consistency across all pieces.
Lastly, keep a yarn needle handy for sewing in ends and attaching details. It’s these small finishing touches that make your Crochet Candy Canes – Tutorial projects look neat and professional. Once your materials are ready, you can begin stitching with confidence, knowing that every detail will come together beautifully.
To begin your Crochet Candy Canes – Tutorial, start by creating a simple foundation chain. The number of chains will depend on how long you want your candy cane to be—around 25 to 30 chains usually works well for a small ornament. This will form the base of your candy cane’s body.
Next, work single crochet stitches into each chain across. This creates a sturdy and consistent texture. Once you reach the end of the row, fasten off and repeat the process with the second color of yarn. Alternating between red and white gives the candy cane its signature striped effect.
After crocheting both strips, align them side by side and stitch them together using a yarn needle. You can either whip stitch along the edges or crochet them together for a seamless look. As you go, add a bit of fiberfill stuffing if you want the candy cane to be thicker.
To create the signature curve at the top, simply shape your crochet piece into a “J” form. If you used a pipe cleaner inside, bend it gently to get a smooth curve. If not, lightly shape it by hand and stitch the form in place if necessary.
Once your Crochet Candy Canes – Tutorial piece is shaped, weave in all loose ends securely. Make sure the candy cane looks even and that the stitches are tight enough to hold the shape. You can add extra details like a small bow, bell, or ribbon to give it a festive touch.
Finally, attach a small loop at the top if you want to hang it as a Christmas ornament. You can use a piece of yarn or ribbon for this step. Your crochet candy cane is now ready to brighten up your holiday decorations!
The Crochet Candy Canes – Tutorial isn’t just about making ornaments—it’s also about discovering fun and creative ways to use them. These cute crocheted pieces are incredibly versatile and can be incorporated into a variety of holiday decorations and gifts.
One of the most popular uses is as tree ornaments. They hang beautifully and add a handmade charm to your Christmas tree. You can make a set of matching candy canes or mix and match colors for a playful look.
Another great idea is to use them as gift toppers. Tie a crocheted candy cane to a wrapped present with a piece of twine or ribbon—it instantly adds a personalized touch that shows love and effort. These handmade additions make every gift extra special.
If you enjoy crafting for friends and family, crochet candy canes make perfect stocking stuffers. They’re lightweight, adorable, and can be made in batches. Add a little note or tag to personalize each one and spread the holiday cheer.
You can also use your candy canes as table decorations or napkin holders during festive meals. Just wrap them around a napkin and tie with a ribbon. It’s a simple way to make your table setting look elegant and festive.
Lastly, if you sell handmade crafts, the Crochet Candy Canes – Tutorial offers an excellent opportunity for small business makers. They’re quick to make, appealing to buyers, and perfect for craft fairs and markets during the Christmas season.
To make the most out of your Crochet Candy Canes – Tutorial, pay attention to details that enhance the quality and finish of your work. Start by maintaining consistent tension throughout your stitches. Uneven tension can cause your candy cane to twist or look uneven. Practice a few rows before beginning your main project to ensure your stitches are even.
When changing colors, make sure to switch yarns neatly to create clean stripes. Carry the unused yarn along the edge to minimize loose ends. This technique keeps the back of your project tidy and prevents tangling.
If you want your candy canes to be more durable, consider using a smaller hook than usual to make the fabric tighter. This is especially useful if you plan to stuff them, as it prevents the filling from showing through the stitches.
For an added touch of sparkle, try using glitter yarn or metallic thread along with your main colors. This gives your candy canes a festive shimmer that catches the light beautifully on the tree.
Blocking your finished candy canes can also help improve their shape. Lightly steam or pin them into position to make sure the curve stays even. Just be cautious not to melt acrylic yarn if using heat.
Finally, don’t rush the process. Enjoy the creativity that comes with making each piece. Crocheting is about more than just the final product—it’s about the relaxing, joyful experience of creating something by hand.
What skill level is required for the Crochet Candy Canes – Tutorial?
This project is beginner-friendly and uses basic stitches like chain and single crochet. It’s perfect for those learning to work with color changes.
How long does it take to make a crochet candy cane?
Depending on your speed, each candy cane can take 20 to 40 minutes to complete. They’re quick projects great for making in batches.
Can I use different colors?
Absolutely! While red and white are traditional, feel free to experiment with green, gold, pink, or even blue to match your décor.
Do I need to stuff the candy canes?
Stuffing is optional. You can make them flat for a lightweight ornament or add fiberfill for a plush look.
How do I keep the candy cane shape?
If you want a firm structure, insert a pipe cleaner before closing the edges. This helps bend the top neatly into a hook.
Can I sell my finished candy canes?
Yes! Handmade crochet candy canes are popular at craft fairs and make lovely gifts for the holiday season.
The Crochet Candy Canes – Tutorial is a wonderful project that combines simplicity, creativity, and festive charm. These little handmade ornaments are easy to make, customizable, and full of holiday spirit. Whether you use them to decorate your home, give as thoughtful gifts, or sell at local markets, each candy cane carries a touch of your creativity and care.
Now that you’ve learned how to make them, why not try creating your own variations? Share your honest opinions and suggestions—we’d love to hear how your Crochet Candy Canes – Tutorial turned out and how you plan to use them in your holiday celebrations!


