
Crochet Multi-Purpose Blouse, Shawl, Runner Model

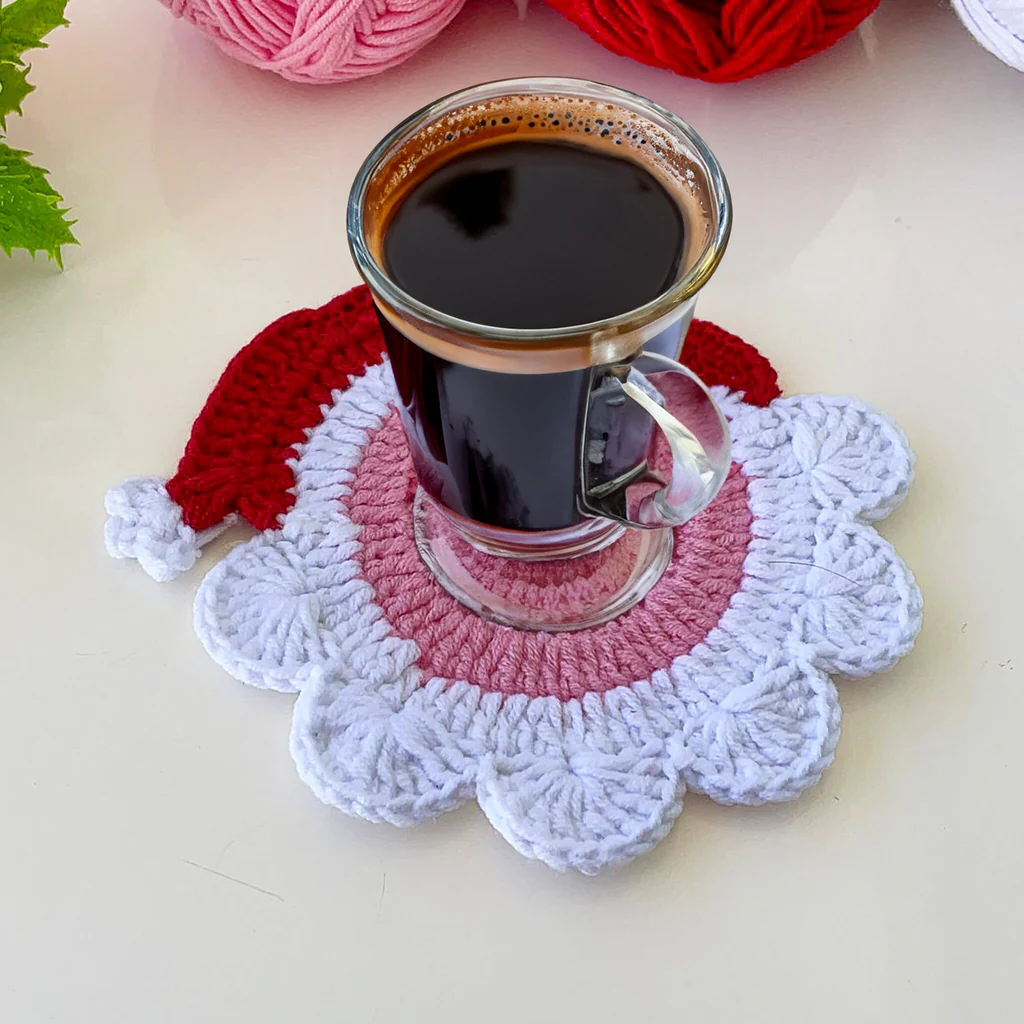
Crochet Santa Coasters Pattern is the perfect way to bring a festive and handmade touch to your holiday table. These charming coasters are not only practical but also full of Christmas cheer, making them a great addition to your seasonal décor.
Whether you’re enjoying a warm cup of cocoa or hosting a Christmas dinner, the Crochet Santa Coasters Pattern will keep your table surfaces safe while adding a playful, joyful atmosphere. This project is fun, quick, and ideal for both beginners and experienced crocheters looking to create something special for the holidays.
When you make your own Crochet Santa Coasters Pattern, you’re crafting more than just coasters—you’re creating small, meaningful pieces that bring a smile to everyone’s face.
Handmade items always carry a touch of love, and these Santa-themed coasters are sure to become a favorite part of your Christmas decorations. Plus, they make wonderful handmade gifts for friends, coworkers, or family members who appreciate festive crafts.
The best part about this pattern is how versatile and simple it is. You can use traditional Christmas colors like red, white, and black, or customize your Crochet Santa Coasters Pattern with different shades to match your own décor style.
From rustic farmhouse tones to bright modern palettes, there’s plenty of room to let your creativity shine while celebrating the holiday spirit.
To start your Crochet Santa Coasters Pattern, gather a few essential materials. You’ll need medium-weight yarn in red, white, black, and a touch of beige or cream for Santa’s face. Acrylic yarn is a popular choice because it’s affordable, durable, and easy to care for. If you want a more natural finish, cotton yarn works beautifully and absorbs moisture well, making it great for coasters.
You’ll also need a crochet hook suitable for your yarn weight—typically a 4.0mm (G) or 4.5mm (7) hook works perfectly. Always check your yarn label for recommendations. Using the correct hook size helps ensure your Crochet Santa Coasters Pattern has the right thickness and structure.
Other helpful tools include a yarn needle for weaving in ends, a pair of sharp scissors, and optionally, some small buttons or felt pieces for decoration. These can be used to add Santa’s eyes, belt buckle, or other details that bring your coasters to life.
Before starting, it’s a good idea to practice basic stitches if you’re new to crochet. You’ll mainly use simple stitches such as chain (ch), single crochet (sc), and double crochet (dc). These are beginner-friendly and easy to master, making the Crochet Santa Coasters Pattern accessible for everyone.
Make sure to have a clean workspace with good lighting. Crocheting in proper light helps you see your stitches clearly and ensures neat, even results. A comfortable seat and a cup of tea can make the experience even more enjoyable!
Lastly, remember to measure your finished coaster. The ideal size for a coaster is around 4–5 inches in diameter, but you can adjust the pattern to your preference. Larger coasters can hold mugs or small bowls, while smaller ones are perfect for teacups or glasses.
Begin your Crochet Santa Coasters Pattern by creating the circular base. Use red yarn to form a magic ring and crochet a set number of double crochets into it to form the foundation round. This step builds the main shape of the coaster and represents Santa’s red outfit. Close the round with a slip stitch to join.
In the next round, continue working double crochets while gradually increasing stitches to keep the circle flat. The goal is to have a smooth, even circle without curling. This technique is useful for all round crochet projects and ensures your Crochet Santa Coasters Pattern has a neat finish.
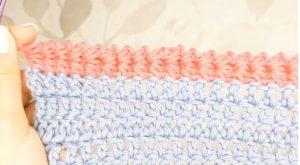
Once the red section is complete, switch to white yarn to form the fluffy edge of Santa’s coat. You can use puff stitches or single crochets to create a soft, textured border. This detail adds charm and captures the cozy essence of Santa’s outfit perfectly.
After finishing the white border, change to beige or cream yarn to crochet Santa’s face area. This section is small but essential for giving your coaster that recognizable Santa look. Work a few rows in this color to create a subtle, skin-toned area between the hat and the beard.
Next, use black yarn to form Santa’s belt or eyes, depending on the design variation you prefer. If you’re making the version with a belt, crochet a narrow black stripe across the red section and add a yellow or gold belt buckle using yarn or embroidery. If you’re creating Santa’s face, add eyes using small black buttons or crocheted circles.
Finally, finish your Crochet Santa Coasters Pattern with a round of single crochets in white to define the outer edge and make your coaster sturdy. Fasten off your yarn and weave in all loose ends using the yarn needle. Your festive coaster is now ready to use or gift!
The Crochet Santa Coasters Pattern can be personalized in countless ways. For instance, you can experiment with different facial expressions for Santa by adjusting the placement of his eyes or mustache. A small piece of pink yarn can even be used to give him rosy cheeks for a cheerful look.
If you want a more minimalist design, you can skip the face entirely and focus on the iconic red suit and belt. This simple yet elegant version still captures the Christmas spirit and pairs beautifully with other holiday decorations.
For a more detailed version, add a 3D pom-pom or fluffy yarn ball at the top of Santa’s hat. You can also crochet small holly leaves and berries to sew onto the hat brim for extra color and texture. These small embellishments make your Crochet Santa Coasters Pattern even more festive and fun.
Another creative option is to make an entire set with different Christmas characters. Combine Santa with crochet reindeer, elves, and snowmen coasters. This not only creates a cheerful collection but also adds variety to your table setting.
You can also play with yarn textures. Using sparkly or metallic yarn for Santa’s belt or hat trim gives your coaster a magical glow, perfect for capturing the twinkling charm of Christmas lights.
If you’re giving these coasters as gifts, consider wrapping them in a simple ribbon or placing them in a small box with a handwritten note. A set of Crochet Santa Coasters Pattern makes a heartfelt and affordable present that’s sure to impress anyone.
To ensure your Crochet Santa Coasters Pattern looks professional, pay attention to your tension. Consistent tension ensures your stitches are even, resulting in a smooth and symmetrical coaster. Practicing a few rounds on a sample swatch can help you find the right balance.
Blocking your coasters after finishing can make a big difference. Lightly steam them or pin them to shape on a foam board and let them dry completely. This will flatten any uneven edges and give your project a polished appearance.
If you plan to use your coasters regularly, consider adding a non-slip backing. You can sew or glue a small circle of felt to the bottom to prevent them from sliding on smooth surfaces. It also adds an extra layer of protection for your furniture.
Try to make your stitches tight enough that moisture doesn’t seep through. This is particularly important if you’re using cotton yarn, which absorbs liquid easily. You can also double the thickness by crocheting two coasters and stitching them together for a sturdier result.
When storing your Crochet Santa Coasters Pattern, keep them flat to maintain their shape. Avoid folding or stacking them under heavy objects. Place them in a dry place to prevent the yarn from losing color or texture.
Lastly, have fun while making them! Crocheting is not only a creative hobby but also a form of relaxation. Enjoy every stitch, and remember that imperfections only add character to your handmade creations.
1. Is the Crochet Santa Coasters Pattern suitable for beginners?
Yes! The Crochet Santa Coasters Pattern is beginner-friendly. It uses basic stitches like single crochet and double crochet, making it easy for anyone to follow.
2. How much yarn do I need to make one coaster?
You’ll only need small amounts of each color—typically less than 30 grams of red and smaller portions of white, black, and beige yarn.
3. Can I wash my crochet coasters?
Yes, most coasters can be hand washed or machine washed on a gentle cycle. Be sure to air dry them flat to prevent distortion.
4. What size should the finished coaster be?
The ideal size is about 4–5 inches in diameter, but you can adjust based on your preference or the type of cups you use.
5. Can I use different yarn types?
Absolutely! Cotton yarn is great for absorbency, while acrylic yarn is ideal for durability and vibrant colors. Mix textures for a unique look.
6. How long does it take to make one coaster?
It usually takes between 30 minutes to 1 hour, depending on your crochet speed and the level of detail you add.
The Crochet Santa Coasters Pattern is a joyful and festive project that combines creativity with practicality. It’s a simple yet delightful way to add handmade charm to your Christmas celebrations. With basic stitches, a few colors, and some imagination, you can create coasters that spread warmth and cheer throughout the season.
If this project inspired you, I’d love to hear your thoughts! Share your ideas, experiences, or your own versions of the Crochet Santa Coasters Pattern in the comments below. Your feedback and creativity help keep the spirit of handmade crafts alive and make our crafting community even more inspiring.


