
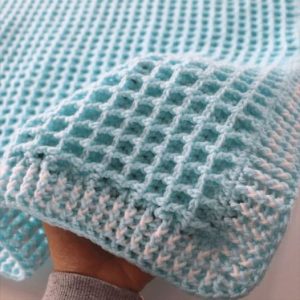
Crochet Multi-Purpose Blouse, Shawl, Runner Model

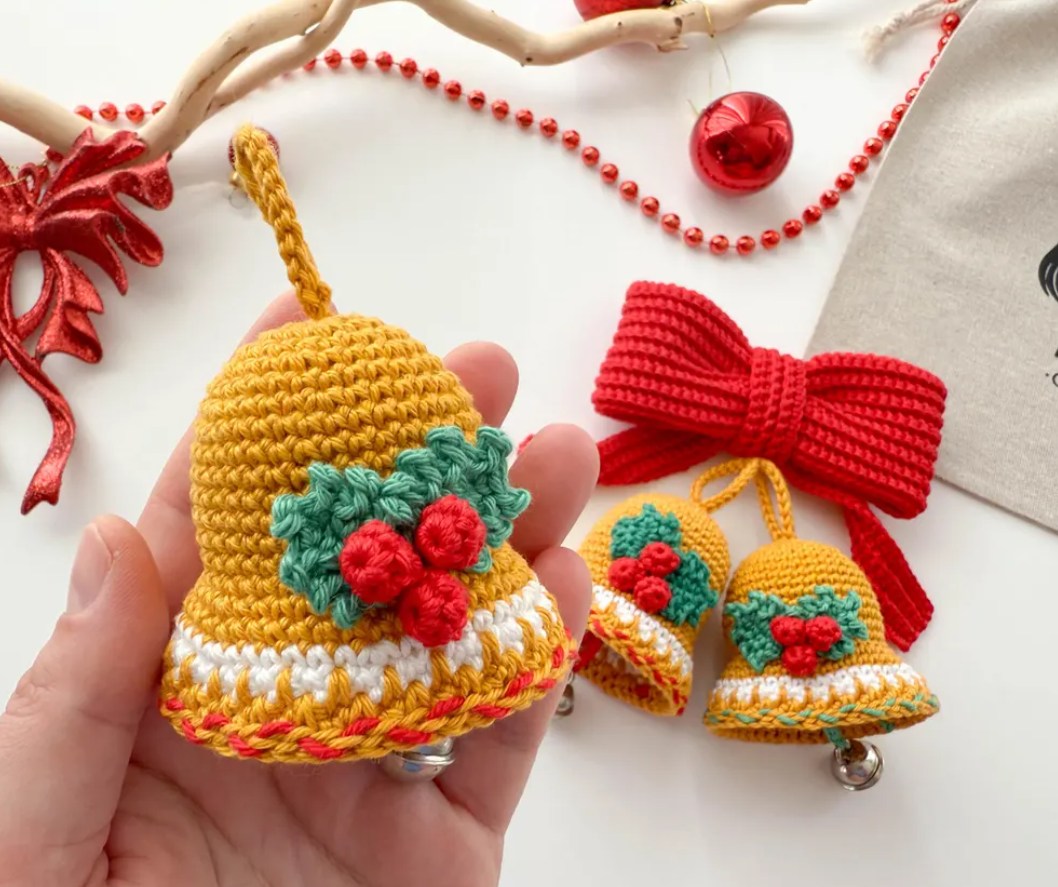
The holiday season brings with it a special warmth, and what better way to celebrate than with handmade decorations? The Crochet Christmas Bells Pattern with Bow is a delightful project that adds a touch of nostalgia and charm to your festive décor.
Whether you’re new to crochet or a seasoned crafter, these bells make for a perfect project to showcase your creativity while spreading Christmas joy. In this article, you’ll learn everything about making these beautiful bells, from choosing materials to adding the final elegant bow.
Creating your own Crochet Christmas Bells Pattern with Bow allows you to design decorations that perfectly match your personal holiday style. You can play with yarn colors—classic white and gold, or vibrant red and green—to create a look that complements your Christmas tree, garlands, or even gift wrapping.
Beyond being simple decorations, these bells symbolize joy and unity, bringing a handmade touch to your festive moments. The soft jingle and the texture of crochet threads together create a timeless ornament that can be cherished year after year.
These crochet bells are not only fun to make but also meaningful to gift. A handmade ornament always carries a personal touch, showing love and effort. By following a Crochet Christmas Bells Pattern with Bow, you can create sets of ornaments that can be gifted to family, friends, or even used as party favors.
They are small, quick projects that can easily be made in batches, and their versatility makes them suitable for every style—from minimalist designs to intricate, lacy creations.
Before you begin, having the right materials is essential for creating a beautiful Crochet Christmas Bells Pattern with Bow. The type of yarn, hook size, and embellishments you use will determine how your final project looks and feels. Gathering your supplies in advance will make your crafting experience smooth and enjoyable.
Start by selecting your yarn. For a classic look, choose cotton yarn in white, red, or metallic gold. Cotton works best because it holds its shape well and provides a crisp texture, making your bells look neat and elegant. You can also use fine acrylic yarn if you prefer a softer, shinier finish.
Next, select a crochet hook that matches the yarn weight. A smaller hook, such as 2.5mm or 3mm, will help create tighter stitches that give structure to your bell. If your stitches are too loose, the bell may not hold its shape well.
You’ll also need a small piece of ribbon or lace for the bow, and perhaps some small jingle bells or beads to add to the inside for a traditional sound effect. A tapestry needle will be useful for weaving in ends and attaching decorations.
Consider using fabric stiffener or a homemade starch solution if you want your bells to keep their form perfectly. This step helps them hang beautifully when used as ornaments on a Christmas tree or garland.
Lastly, prepare your workspace. A comfortable, well-lit area makes crocheting more relaxing and helps you see each stitch clearly. Having all your materials organized nearby ensures you can focus entirely on enjoying your Crochet Christmas Bells Pattern with Bow.
Now that you have all your supplies ready, it’s time to begin your Crochet Christmas Bells Pattern with Bow. Each step brings you closer to creating a charming ornament that captures the spirit of Christmas.
Start by making a magic ring and crochet a small circle of single crochets. This forms the top of your bell. Once you’ve joined the round, continue to expand it by adding double crochet stitches evenly in each row. As you go, your piece will naturally begin to form the curved bell shape.
To create the open bottom edge, continue increasing gradually while maintaining even tension. If you want a more flared bell, you can add a few extra stitches per round near the bottom. For a lacy or decorative edge, try adding picots or shell stitches as a border.
When your bell shape is complete, fasten off and weave in the ends neatly. At this point, you can stiffen the bell by soaking it in starch or using a spray stiffener. Shape it gently over a small mold (like the bottom of a cup) and let it dry completely.
After your bell is dry, thread a small ribbon through the top loop, tie a bow, and attach a small bead or jingle bell inside for added charm. You can also crochet a tiny loop at the top if you want to hang it on your Christmas tree.
Repeat the process for as many bells as you like! Making several of them creates a beautiful set of ornaments that can be hung together or given as thoughtful handmade gifts.
The Crochet Christmas Bells Pattern with Bow offers endless creative possibilities. These bells can be used in a variety of ways to enhance your home and gifts during the festive season.
One of the most common uses is to hang them on your Christmas tree. Their delicate structure and soft shine make them stand out beautifully among the lights and tinsel. You can make them in multiple colors to create a vibrant and joyful look.
You can also use them as embellishments for your holiday wreaths. Attaching a few crochet bells with bows to a green wreath adds a handmade and elegant touch. Pair them with pinecones, ribbons, and holly leaves for a stunning door decoration.
These bells also make wonderful gift toppers. Adding a small handmade bell to your wrapped presents makes each gift feel more personal and memorable. You can even include one as part of your holiday cards, turning them into keepsakes.
Another lovely idea is to create a garland using several crochet bells. Simply attach them to a long string or twine, spacing them evenly. This garland can be hung on the mantel, along staircases, or across windows for a festive touch.
Lastly, if you enjoy hosting holiday dinners, crochet bells can serve as napkin holders or table centerpieces. Their timeless beauty brings warmth and charm to any Christmas table setting.
Even a simple project like the Crochet Christmas Bells Pattern with Bow can benefit from a few expert tips. These insights help you make your bells look professional and last for many holiday seasons.
First, maintain even tension throughout your work. Uneven tension can cause your bell to warp or look lopsided. Practice with a few test stitches before starting your main piece.
Second, block your bells properly after crocheting. Using a light starch spray or homemade mixture will help them hold their shape. Just remember to reshape them while damp and let them dry naturally.
When adding bows, use satin or organza ribbons for a festive, polished look. You can also experiment with different sizes and colors to match your home décor. A small gold or silver bead in the center of the bow adds a refined touch.
If you plan to gift your bells, consider placing them in small transparent bags or decorative boxes. Handmade gifts presented beautifully always make a stronger impression.
Another important tip is to store your crochet bells carefully after the holiday season. Keep them in a dry, cool place, and avoid crushing them to preserve their shape for the next year.
Lastly, enjoy the process! Crocheting holiday decorations is about embracing creativity and spreading joy. Each stitch holds a little bit of Christmas spirit, and every bell you make adds to the warmth of the season.
1. What type of yarn works best for crochet Christmas bells?
Cotton yarn is ideal because it provides a crisp structure and holds its shape well. You can also use fine acrylic yarn for a shinier look.
2. Do I need to use fabric stiffener?
While optional, stiffener helps your bells maintain their form and hang beautifully on trees or garlands.
3. How long does it take to make one crochet bell?
A single bell usually takes between 30 to 45 minutes, depending on your skill level and the complexity of the design.
4. Can I customize the size of the bells?
Yes! Simply adjust the number of rounds or change your hook size to make smaller or larger bells.
5. Are these bells suitable for beginners?
Absolutely. The Crochet Christmas Bells Pattern with Bow is beginner-friendly and a great way to practice basic stitches like single and double crochet.
6. What’s the best way to attach the bow?
You can sew it on using a tapestry needle or simply tie it around the top loop of your bell.
7. How should I store my crochet Christmas bells after the holidays?
Store them in a dry box or bag to prevent them from losing shape or getting dusty. Avoid heavy stacking.
8. Can I sell the bells I make from this pattern?
Yes, handmade ornaments are popular at craft fairs and markets—just ensure you make each one with care and quality.
The Crochet Christmas Bells Pattern with Bow is a charming and meaningful project that captures the heart of the holiday season. With simple stitches, thoughtful details, and creative variations, you can craft ornaments that brighten any Christmas décor. Whether hung on the tree, used in garlands, or gifted to loved ones, these crochet bells carry a touch of handmade love that’s truly special.
I hope this tutorial inspired you to pick up your hook and start creating! Have you tried making crochet Christmas bells before? Share your experience and ideas in the comments—I’d love to hear your thoughts and suggestions!


