
Pie Carrier Sewing Pattern

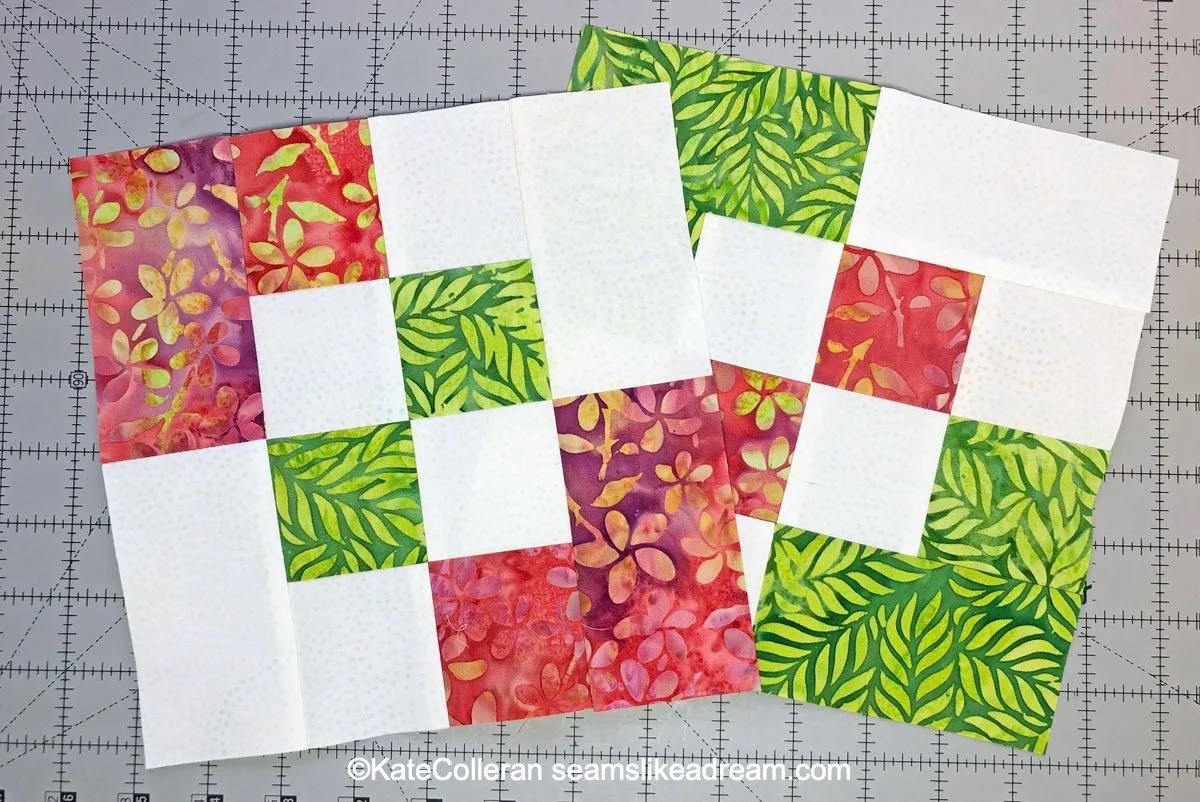
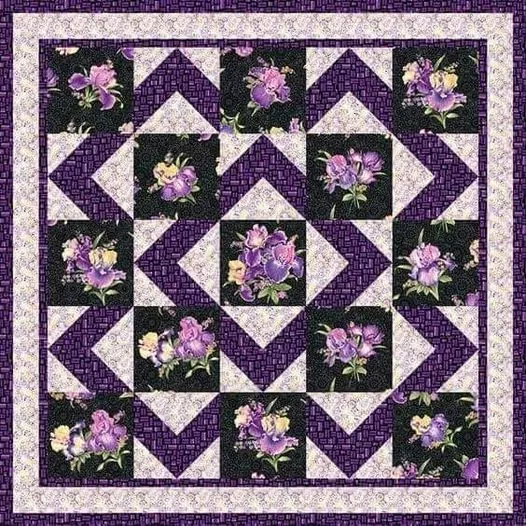
Creating a Disappearing 4 Patch Quilt Block is an exciting and creative way to bring unique designs to your quilting projects. This technique takes a simple 4-patch block and transforms it into something intricate with just a few cuts and rearrangements.
Whether you are a beginner or an experienced quilter, mastering this block will open up a world of possibilities for your quilting designs.
The Disappearing 4 Patch Quilt Block technique is popular due to its ease and the stunning results it produces. By simply slicing and rearranging, you can create a quilt that looks far more complex than the effort required.
This makes it a fantastic project for those looking to elevate their quilting skills while keeping the process manageable.
In this tutorial, we will walk through the steps to create a Disappearing 4 Patch Quilt Block, including fabric selection, cutting techniques, and assembly tips.
By following these steps, you will be able to craft a beautiful quilt block that can be used in a variety of quilting projects.
Selecting the right materials and fabric is the foundation of a successful quilt block. Here’s what you need to consider:
The best fabric choices include solid colors or simple prints that highlight the disappearing effect. Avoid overly busy patterns, as they may obscure the transformation of the block.
Once your fabric is selected, follow these cutting steps to create the Disappearing 4 Patch Quilt Block:
Following these steps will result in a visually dynamic quilt block that appears far more intricate than the original 4-patch.
To ensure your Disappearing 4 Patch Quilt Block comes together seamlessly, follow these tips:
By applying these techniques, your finished quilt block will be both professional-looking and structurally sound.
The Disappearing 4 Patch Quilt Block can be used in a variety of quilting projects. Here are some creative ideas:
With these creative possibilities, the Disappearing 4 Patch Quilt Block can be adapted to suit a variety of quilting projects.
Q: What size should I cut my fabric squares? A: The standard size is 5-inch squares, but you can adjust based on your desired quilt size.
Q: Can I use scraps for this pattern? A: Yes! This is a great pattern for using fabric scraps, as long as they are large enough for the cuts.
Q: How do I ensure my seams align correctly? A: Using pins and pressing seams properly will help maintain alignment.
Q: Can this block be used in a larger quilt project? A: Absolutely! It works beautifully in full-size quilts or as accents in quilted projects.
Q: What thread should I use for sewing? A: A high-quality cotton thread is best for durability and smooth stitching.
Q: Is this pattern beginner-friendly? A: Yes! It’s a simple yet effective way for beginners to practice precise cutting and sewing.
Join our VIP broadcast list and gain access to exclusive patterns, all for free. As a VIP member, you’ll receive the best patterns daily, delivered directly to your device. ✨📱 It’s a unique opportunity to stay up-to-date with the latest trends and designs, curated just for you. Don’t miss out on enhancing your projects and discovering new inspirations with the best patterns every day! 🎨🔝
The Disappearing 4 Patch Quilt Block is a fun and creative way to elevate your quilting skills. By following this tutorial, you can create a dynamic quilt block that adds visual interest to any project. Whether you use it for table runners, quilts, or pillows, this versatile pattern is sure to impress.
If you found this tutorial helpful, we’d love to hear your thoughts! Leave a comment below with your experience and suggestions. Happy quilting!


