
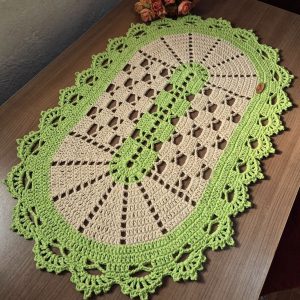
Crochet Multi-Purpose Blouse, Shawl, Runner Model

If you’re looking for an adorable and fun crochet project, Bunny Crochet Cups – Free Pattern is just what you need.
These charming cups are perfect for adding a touch of whimsy to your home décor or gifting them to friends and family. Whether you’re an experienced crocheter or a beginner, this free pattern is easy to follow and will help you create cute, functional bunny-themed cups.
Crocheting is a relaxing and creative hobby that allows you to make personalized items for yourself and loved ones.

Image from google.
The Bunny Crochet Cups combine practicality with cuteness, making them a perfect project for the spring season, Easter, or just for adding a smile to your everyday routine.
In this tutorial, we’ll walk you through the steps to crochet these delightful bunny cups, including materials, instructions, and tips for customization. Whether you’re making them as decorative pieces or to hold small items, you’ll love the end result of your efforts.
Before starting your Bunny Crochet Cups, you’ll need to gather the necessary materials. This step is essential for ensuring your project goes smoothly.
First, choose the right yarn for your cups. For a sturdy and smooth texture, we recommend using cotton yarn as it is both soft and durable. Cotton yarn is also easy to work with and provides a crisp finish for your bunny cups. You can choose any color that matches your style—pastels for a soft, Easter-inspired look or bright, bold hues for a more playful feel.
You’ll also need a crochet hook that corresponds to your chosen yarn. A 3.5mm to 4mm crochet hook is typically ideal for medium-weight yarn, but always check the yarn label for the recommended hook size.
Other materials required include:
Having all of your materials organized will ensure a smoother crocheting experience and will help you stay on track throughout the process.
Now that you have your materials ready, it’s time to start crocheting your Bunny Crochet Cups! The following instructions will guide you through the basic steps.
Start by creating a magic ring to form the base of the cup. This method helps close up the circle and gives your cup a neat, round foundation. Once the magic ring is created, continue crocheting in a spiral to build up the walls of the cup. Work in single crochet stitches (sc) for a tight, durable texture.
As you build the body of the cup, it’s important to increase your stitches periodically to maintain a consistent shape. For this, use the increase stitch (two single crochets in the same stitch) to widen the base as you go.
For the bunny’s ears, work two separate pieces starting with a small chain and crochet rows back and forth. The ears should be tapered and slightly pointed to give them an authentic bunny look. After completing the ears, attach them to the top of the cup with a yarn needle, sewing them securely.
You can customize the cup to your liking by adding more colors, patterns, or even a bow around the bunny’s neck. Once the basic structure is complete, you can proceed to the next step of adding facial features.
To make your Bunny Crochet Cup extra special, add some adorable facial details. The best way to do this is by using safety eyes, which give your bunny a cute, professional finish. Choose eyes that are appropriate for the size of your cup, making sure they’re securely fastened.
Next, use embroidery yarn or a contrasting yarn color to stitch on the bunny’s nose and mouth. You can create a simple V-shaped nose in the center of the face and add a small smile or whiskers to give it more personality.
For an extra cute touch, you can create small inner ears by crocheting smaller pieces in a different color and stitching them inside the ear. This adds a layered look to the bunny’s face, making it more eye-catching and vibrant.
Remember to position the facial features carefully to give your bunny a friendly expression. If you’re unsure about the placement, try placing the features loosely before sewing them in place. This will allow you to make adjustments for the best result.
Once the basic Bunny Crochet Cups are complete, it’s time to add some finishing touches and personalize your project. These customizations can give your cups a unique flair and make them even more special.
To enhance the appearance, you might want to add a bow to the bunny’s neck or ears. A simple ribbon tied in a bow or crocheted directly onto the cup will add charm and a touch of elegance. You can also experiment with creating a different facial expression or adding more intricate designs like little flowers or hearts around the cup.
If you’re creating these cups as gifts, consider pairing them with Easter-themed items like chocolate eggs or small toys to make them even more delightful. You can also create a set of Bunny Cups in different pastel colors or even a family of bunny cups in varying sizes.
For an additional whimsical touch, why not crochet a matching coaster? A small round or square coaster with a bunny motif would be the perfect complement to your cup.
Once all the details are added, take a step back and admire your handiwork! These personalized Bunny Crochet Cups will surely brighten up any room and make a fun conversation piece.
1. What type of yarn is best for Bunny Crochet Cups?
For Bunny Crochet Cups, cotton yarn is highly recommended because of its firmness and smooth texture. It holds its shape well and gives the cups a neat finish. However, you can also use acrylic yarn for a softer texture, especially if you want to create a plush version.
2. Can I make the cups larger or smaller?
Yes, you can easily adjust the size of your Bunny Crochet Cups by modifying the number of stitches in the starting magic ring and the number of rows in the cup body. Simply increase or decrease the stitch count to fit your desired size.
3. How do I secure the safety eyes?
To securely attach the safety eyes, push the post through the fabric where you want them to be placed. On the back side of the cup, place the provided washer or backing piece and press down tightly. This ensures that the eyes won’t come loose.
4. Can I wash my Bunny Crochet Cups?
Yes, you can wash your Bunny Crochet Cups. However, it’s best to hand wash them in cold water to preserve the integrity of the crochet work and prevent any potential shrinking or stretching. Lay the cups flat to dry.
5. Can I use these Bunny Cups for drinking?
While the Bunny Crochet Cups are functional, they are better suited for decorative purposes or holding small items, such as pens, flowers, or even candy. They are not intended for use as traditional drinking cups, as they are not waterproof or sealed.
6. How do I prevent the cup from losing its shape?
To keep the cup in good shape, consider inserting a small piece of stiff felt or another type of stiffening material inside the base of the cup before finishing the crochet work. This will help maintain its structure over time.
Join our VIP broadcast list and gain access to exclusive patterns, all for free. As a VIP member, you’ll receive the best patterns daily, delivered directly to your device. ✨📱 It’s a unique opportunity to stay up-to-date with the latest trends and designs, curated just for you. Don’t miss out on enhancing your projects and discovering new inspirations with the best patterns every day! 🎨🔝
In this tutorial, we’ve walked through the entire process of creating adorable Bunny Crochet Cups, from selecting materials to adding final touches. These cups make a wonderful project for crocheters of all levels, offering the perfect combination of fun, practicality, and customization.
Whether you’re making them for a special occasion or as a creative gift, these Bunny Cups will surely brighten anyone’s day. Take your time with the details and experiment with colors and embellishments to make them truly unique.
We hope this pattern has inspired you to try creating your own Bunny Crochet Cups. We’d love to hear your thoughts, suggestions, and any additional ideas you have for customizing these cute cups. Share your experience in the comments below!


