This type of crochet pattern combines the elegance of flowers with the practicality of square shapes, making it an ideal choice for anyone who wants to make a statement with their crochet work.
Whether you are a beginner or an experienced crocheter, this free pattern will guide you step-by-step in creating gorgeous flower squares that you can proudly incorporate into your crochet projects.
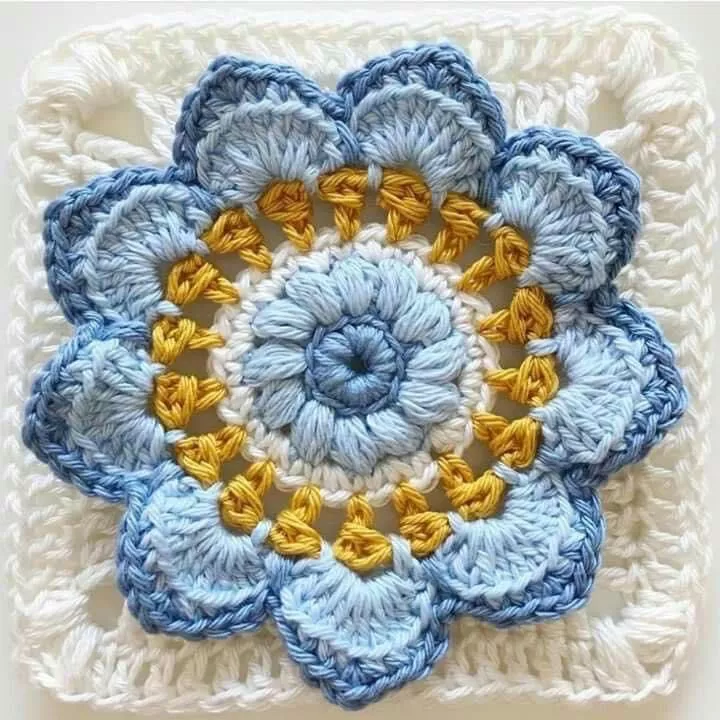
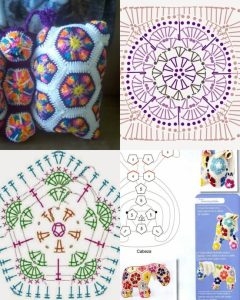
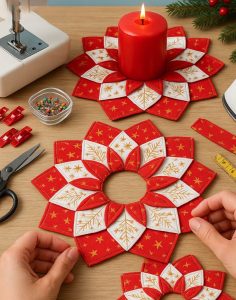
Image from google.
The beauty of the Crochet Flower Square – Free Pattern is that it offers endless possibilities for customization. By changing colors, stitch patterns, or flower designs, you can create unique and vibrant squares that reflect your personal style.
SEE MORE PATTERNS
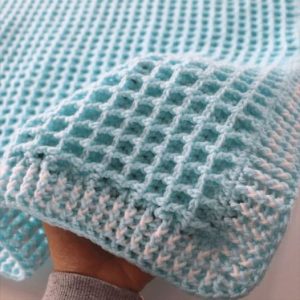
These flower squares can be joined together to form larger projects, such as a stunning crochet blanket or a decorative cushion cover. Whether you’re making a gift or simply indulging in a creative hobby, the possibilities are endless with this pattern.
In this article, we’ll explore the materials you’ll need, how to crochet the flower square itself, different ways to join the squares, and how you can personalize your project to suit your tastes. Follow along to create a charming and colorful Crochet Flower Square – Free Pattern that you can be proud to showcase.
1. Materials Needed for the Crochet Flower Square
Before you start crocheting your Crochet Flower Square – Free Pattern, it’s essential to gather the right materials. Having the correct yarn, crochet hook, and accessories will make your project easier and more enjoyable. The first thing you’ll need is yarn. For this pattern, a medium-weight yarn (also called worsted weight) is ideal. This type of yarn gives your flower squares structure and a beautiful texture.
The choice of yarn color is another important factor. You can use a solid color for the square base and a contrasting color for the flower to make it stand out. Alternatively, you can experiment with multiple colors to create a vibrant, multi-colored flower square. Acrylic yarn is a popular choice because it is affordable, easy to work with, and machine washable. However, cotton yarn can also be used for a more delicate and lightweight finish.
Next, you will need a crochet hook. For worsted weight yarn, a size H (5.0 mm) or I (5.5 mm) hook is recommended to achieve the correct tension and size for your square. If you choose a different yarn weight, adjust the hook size accordingly. You will also need a yarn needle to weave in any loose ends when your square is finished, and a pair of scissors to trim any excess yarn.
Lastly, don’t forget to have a measuring tape on hand to check the size of your square and ensure it meets the desired measurements. These basic tools will help ensure your Crochet Flower Square – Free Pattern is created with the utmost care and attention to detail.
2. Step-by-Step Instructions for the Crochet Flower Square
Now that you have gathered your materials, it’s time to dive into the fun part—crocheting your Crochet Flower Square – Free Pattern. The following instructions outline the process of making the square base and adding the flower motif. For this project, we’ll be using basic crochet stitches like the chain stitch, slip stitch, and double crochet, making it easy to follow even for beginners.
To start, make a foundation chain of 4 stitches and join it into a ring with a slip stitch. This creates the center of your square. For the first round, chain 3 (this counts as your first double crochet) and crochet 15 more double crochets into the ring, making a total of 16 double crochets. Join the round with a slip stitch into the top of the first chain-3.
In the second round, chain 3 again, and then make 1 double crochet into the same stitch. This will create a corner for your square. Continue by working 2 double crochets into each stitch from the previous round, creating 4 corners. Finish the round by joining with a slip stitch into the top of the first chain-3.
For the third round, begin by chaining 3, then work 2 double crochets into the next stitch. Repeat this process, working 2 double crochets in each stitch along the sides and 3 double crochets into the corner stitches. Once you reach the end, join the round with a slip stitch into the top of the first chain-3. You should now have a perfectly square base with a beautiful, smooth texture.
Next, you’ll create the flower motif. Start by making a small ring with a foundation chain of 4 stitches, and join with a slip stitch. For the flower petals, chain 3 and make 2 double crochets into the ring. Repeat this process 4 more times to create 5 petals. After completing the petals, join the last petal with a slip stitch.
Attach the flower to the center of your square using a slip stitch to secure it in place. Once you’ve finished the flower, your square will be complete! Repeat this process as many times as necessary to make the desired number of squares for your project.
3. Joining the Squares Together
Once you’ve crocheted several Crochet Flower Squares – Free Pattern, it’s time to join them together to form your blanket or other crochet project. There are several methods to join your squares, and the one you choose depends on the look you want to achieve. Two popular methods for joining crochet squares are the whip stitch and slip stitch join.
The whip stitch is the simplest method, requiring you to align the squares with their right sides facing each other. Using a yarn needle and the same yarn you’ve been using for the squares, sew through both loops of the edge of each square. Make sure the stitches are even for a neat finish. This method creates a slightly raised seam between squares that adds texture and dimension to your project.
For a smoother, more seamless finish, consider using the slip stitch join. Place two squares with the right sides facing each other, and use a slip stitch to crochet along the edges, joining them as you go. This method is faster than whip stitching and results in a nearly invisible join, which is perfect for a more polished look.
Another option is the join-as-you-go method. With this technique, you crochet the squares together as you make them, so there’s no need for additional sewing later. This method saves time and creates a uniform, smooth finish for your project. Experiment with different joining techniques to find the one that suits your style and desired look.
4. Customizing Your Crochet Flower Square
The Crochet Flower Square – Free Pattern offers numerous opportunities for customization. You can adjust the colors, stitch patterns, and flower designs to create a unique project that suits your personal taste. Here are a few ways to make your squares stand out:
First, experiment with color combinations. You can use a solid color for the square background and a contrasting color for the flower, or mix and match different colors for both the square and the flower to create a vibrant, eye-catching design. Ombre or gradient colors are also popular for creating a modern look.
Another option is to change the flower design itself. While the basic flower motif in this pattern is simple and classic, you can use different types of flowers, such as daisies, roses, or sunflowers, to give your square a different feel. You can also add more petals or use different stitches to make the flower texture more intricate.
Additionally, try adding decorative borders to each square for an extra touch of flair. A simple single crochet border can make your squares look more polished, or you can get creative with scalloped or picot edges for a more whimsical effect.
FAQ: Frequently Asked Questions
1. How do I make sure my squares are all the same size?
To ensure your squares are uniform, maintain the same tension throughout your work. If you notice a square is slightly larger or smaller than the others, adjust your tension or stitch count to match the desired size.
2. Can I use different types of yarn for my squares?
Yes! You can use different yarns for the background and the flower. Just make sure to choose yarns of a similar thickness to maintain the size and structure of the square.
3. How many squares do I need to make for a blanket?
The number of squares needed depends on the size of the blanket you want to create. For a small lap blanket, 30-40 squares may be enough, while a larger blanket may require 100 or more squares.
4. How do I join my squares without sewing them?
You can use the join-as-you-go method, which allows you to crochet your squares together as you make them. This method saves time and eliminates the need for sewing.
5. Can I add embellishments to my flower square?
Absolutely! You can add buttons, beads, or small appliques to enhance the flower motif and personalize your design.
6. What should I do if my flower petals are uneven?
If your flower petals are uneven, try adjusting your tension or adding more stitches to balance them out. You can also block your squares after finishing to help even out any inconsistencies.
Join our VIP broadcast list and gain access to exclusive patterns, all for free. As a VIP member, you’ll receive the best patterns daily, delivered directly to your device. ✨📱 It’s a unique opportunity to stay up-to-date with the latest trends and designs, curated just for you. Don’t miss out on enhancing your projects and discovering new inspirations with the best patterns every day! 🎨🔝
JOIN NOW
Conclusion
In this article, we’ve walked you through the steps of creating a beautiful Crochet Flower Square – Free Pattern, from gathering the necessary materials to crocheting the square and adding a flower motif.
We also covered different methods for joining the squares together and provided tips for customizing your project to make it truly unique.
We hope this guide has inspired you to create your own crochet flower squares and incorporate them into a larger project.
PATTERN HERE
Please share your thoughts and suggestions in the comments section below. We’d love to hear about your experiences and any future crochet projects you’d like to see! Happy crocheting!


