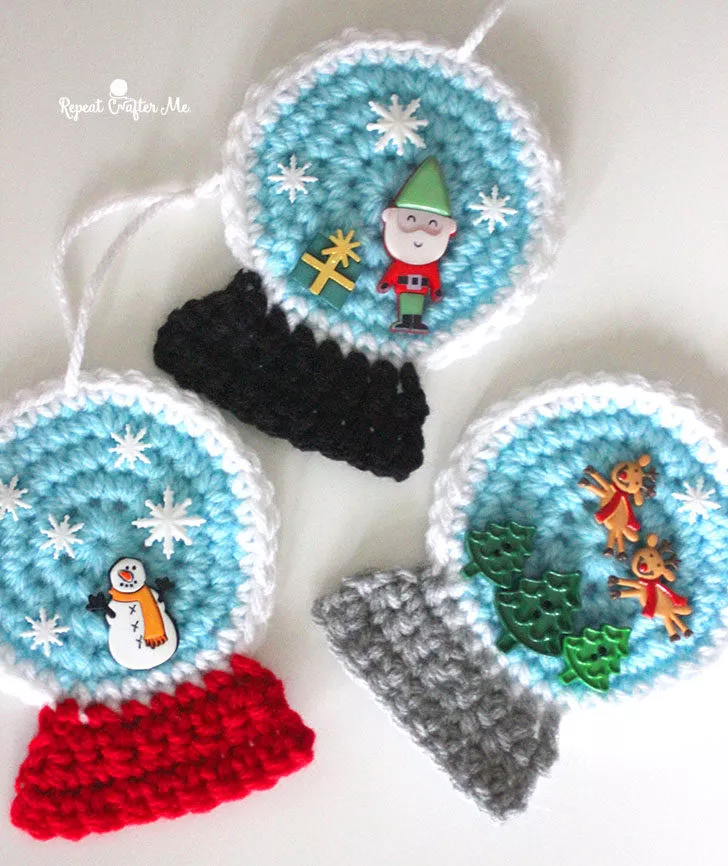
If you’re looking for a fun and festive way to add charm to your holiday décor, Crochet SnowGlobe Ornaments – FREE PATTERNS are the perfect solution.
These adorable ornaments can be customized with your favorite colors and decorations, and they make for a delightful gift for friends and family.
Advertising
Whether you’re an experienced crocheter or a beginner, this tutorial will guide you step-by-step through creating your own Crochet SnowGlobe Ornaments.
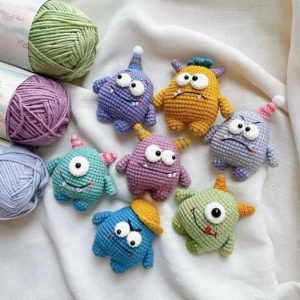
Image from google.
Crocheting your own snowglobe ornaments is a fun project that combines creativity with the cozy warmth of handmade crafts.
These ornaments are not only a great way to add a personal touch to your tree but can also be used to decorate your home or given as gifts. The best part is that Crochet SnowGlobe Ornaments are easy to make, and with the free patterns provided, you can get started right away.
In this tutorial, we’ll explore how to crochet these whimsical snowglobe ornaments and offer tips for customizing them to suit your style.
Advertising
Whether you’re making just one ornament or a whole set, this craft is bound to bring holiday cheer into your home. Let’s get started with the basics of crocheting SnowGlobe Ornaments.
1. Materials Needed for Crochet SnowGlobe Ornaments
Before you start crocheting your Crochet SnowGlobe Ornaments, it’s important to gather all the necessary materials. Having everything on hand ensures that the process will go smoothly and that your ornaments will turn out beautifully. Here’s a list of the essential supplies you’ll need:
Yarn: For the main body of the snowglobe, choose a soft yarn in your preferred color. White or light blue are great options for the “snow” effect, while you can also use festive colors like red or green for the base and accents. Make sure to select yarn that is medium weight (like worsted weight) for the right texture.
Crochet Hook: The size of the crochet hook will depend on the yarn you choose. A 4mm or 5mm crochet hook is generally a good size for worsted-weight yarn.
Scissors: A pair of sharp scissors will be needed to cut the yarn once your crochet work is finished.
Tapestry Needle: After you’ve finished crocheting, a tapestry needle will help you weave in any loose yarn ends, ensuring that your project looks polished.
Stuffing: For the snowglobe effect, you’ll need some fiberfill stuffing to give your ornament its round shape and fill it with “snow.”
Decorative Elements: This is where your creativity shines! You can add miniature trees, figurines, or even tiny snowflakes inside the snowglobe. These small elements will give your ornament personality and make it truly unique.
Once you have all your materials ready, you’re good to go. Let’s move on to the step-by-step instructions for creating your own Crochet SnowGlobe Ornaments.
2. Basic Crochet SnowGlobe Ornament Pattern
Now that you have everything you need, let’s dive into the basic steps for creating your Crochet SnowGlobe Ornaments. This easy-to-follow pattern is great for both beginners and experienced crocheters. Here’s how to get started:
Create the Base: Start by crocheting a small circle for the base of the snowglobe. Use your crochet hook and yarn to work in a spiral, increasing in each round until the base is the size you want. This will form the foundation of the ornament, so make sure it’s the right size for the globe portion to sit on.
Make the Globe: The next part of the project is creating the globe, which will house the “snow.” Work in a continuous round to make a small sphere shape. For a smooth round shape, be sure to increase your stitches gradually, and stop when the globe is large enough to hold the decorations inside. Leave a small opening at the top for stuffing.
Stuff the Globe: Before closing the globe, stuff it with fiberfill to give it volume and shape. You can add as much stuffing as you like, depending on how firm you want the ornament to be. If you’d like to create a “snow” effect inside, you can even add a bit of white glitter or fake snow inside the globe.
Close the Globe: Once your globe is stuffed, use your crochet hook to decrease the stitches, closing the opening securely. Make sure to weave in the yarn ends to finish the project neatly.
Attach the Base: Now, sew the globe securely to the base you crocheted in step one. You can use a whip stitch or slip stitch to attach the two pieces together.
Add Embellishments: The fun part of this project is customizing your snowglobe! You can add small decorative items inside the globe, such as miniature Christmas trees, reindeer, or snowflakes. Additionally, you can crochet small accessories like scarves or hats for the figures inside.
By following these steps, you’ll have a charming Crochet SnowGlobe Ornament ready to hang on your tree or gift to a loved one.
3. Customizing Your Crochet SnowGlobe Ornaments
Once you’ve mastered the basic Crochet SnowGlobe Ornament pattern, it’s time to get creative! Customizing your ornaments is a great way to make them reflect your unique style. Here are some ideas for personalizing your snowglobes:
Different Color Schemes: You don’t have to stick with traditional colors like white or blue for your snowglobe. Experiment with different shades like pink, gold, or silver to match your holiday décor.
Miniature Decorations: To give your snowglobe more character, consider adding tiny holiday figurines or accessories inside. You could crochet small snowmen, Santa figures, or even tiny gifts for an extra touch of festivity.
Use Different Yarn Textures: For the base of the snowglobe, you can use yarn with a different texture, such as fluffy yarn for a soft, fuzzy look. This will create a nice contrast with the smooth globe and add visual interest to your ornament.
Add Sparkle: To make your Crochet SnowGlobe Ornaments shine, incorporate metallic or glitter yarn into your design. This will give the globe a festive, sparkling effect that’s perfect for holiday decorations.
Personalized Messages: You can make your snowglobes even more special by adding a small embroidered message on the base, such as “Merry Christmas” or the recipient’s name. This makes the ornament feel like a thoughtful, personalized gift.
Mix and Match Styles: Don’t be afraid to experiment with different styles and techniques. You can combine the snowglobe pattern with other crochet techniques, like amigurumi, to create more intricate designs inside the globe.
With these customization ideas, your Crochet SnowGlobe Ornaments will be as unique as your holiday spirit.
4. Tips for Perfect Crochet SnowGlobe Ornaments
To ensure that your Crochet SnowGlobe Ornaments turn out beautifully, here are some helpful tips to keep in mind:
Choose the Right Yarn: The yarn you use will impact the final look of your ornament. Opt for yarn that has some structure to it, so your globe holds its shape well. Acrylic or cotton yarn works well, but for a more luxurious feel, try using wool yarn.
Use a Tight Tension: Crocheting tightly will help your snowglobe hold its shape and prevent stuffing from peeking out through any holes. If you’re working with thinner yarn, consider using a smaller crochet hook to ensure a tight fabric.
Be Patient with the Stuffing: Don’t rush the stuffing process. Adding too much stuffing can distort the shape of your ornament, so work slowly and make sure it’s evenly distributed inside the globe.
Secure the Decorations: When adding miniature decorations inside the globe, make sure they are securely fastened so they don’t shift around. Use a bit of hot glue if necessary to keep items in place.
Take Your Time with the Base: The base of the snowglobe is just as important as the globe itself. Make sure it’s crocheted tightly and securely attached to the globe to prevent any wobbling.
Test the Hanging Thread: Before hanging your ornament, test the strength of the thread or ribbon you plan to use. Make sure it can hold the weight of the snowglobe without tearing.
By following these tips, your Crochet SnowGlobe Ornaments will look flawless and be the perfect addition to your holiday décor.
FAQ: Frequently Asked Questions
1. Can I use other crochet techniques to decorate the snowglobe?
Yes, you can incorporate techniques like amigurumi or surface crochet to create more detailed decorations inside the globe, such as mini trees, snowmen, or even tiny animals.
2. What type of yarn is best for making snowglobes?
A medium-weight yarn (like worsted weight) works best for these ornaments. Cotton yarn is a good choice because it holds its shape well, but you can also use acrylic or wool yarn for a softer feel.
3. How do I ensure my crochet snowglobe stays round?
Use a tight tension and add just the right amount of stuffing to maintain the shape of the globe. If necessary, block the globe after finishing to help it retain its round shape.
4. Can I make these ornaments larger or smaller?
Absolutely! You can adjust the size of the globe by increasing or decreasing the number of rounds in the pattern. Just make sure to adjust the amount of stuffing accordingly.
5. Can I use glitter or fake snow inside the globe?
Yes, adding glitter or fake snow inside the globe can enhance the snowglobe effect. Just make sure the decorations inside are securely fastened so they don’t move around.
Join our VIP broadcast list and gain access to exclusive patterns, all for free. As a VIP member, you’ll receive the best patterns daily, delivered directly to your device. ✨📱 It’s a unique opportunity to stay up-to-date with the latest trends and designs, curated just for you. Don’t miss out on enhancing your projects and discovering new inspirations with the best patterns every day! 🎨🔝
In this tutorial, we’ve covered how to create your own Crochet SnowGlobe Ornaments, from the materials you need to the basic pattern and helpful tips for customization.
With your newly learned skills, you can create adorable and personalized ornaments that will brighten up your holiday season.
Whether you keep them for yourself or give them as gifts, these crocheted snowglobes are sure to add a touch of warmth and charm to any home.
VIDEO TUTORIAL
Please leave a comment with your thoughts on this tutorial, and feel free to share any suggestions for future posts. Happy crocheting!


