
Pie Carrier Sewing Pattern

The Spiral Quilt Block is a stunning design that adds movement and visual interest to any quilt. Whether you’re a beginner or an experienced quilter, this block is an excellent choice for exploring your creativity and sharpening your quilting skills.
In this comprehensive guide, we will walk you through a Spiral Quilt Block – tutorial, providing all the steps you need to create this captivating pattern.
Quilting with a spiral design creates an illusion of rotation, giving your project a dynamic and modern feel.
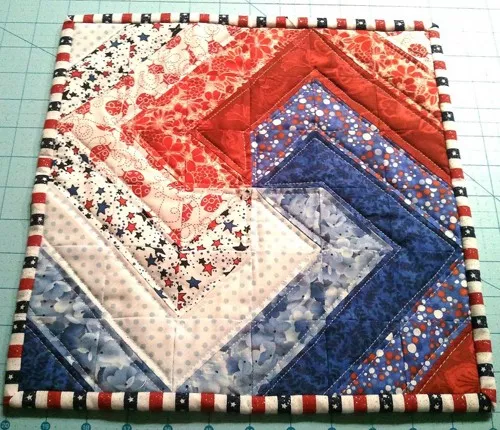
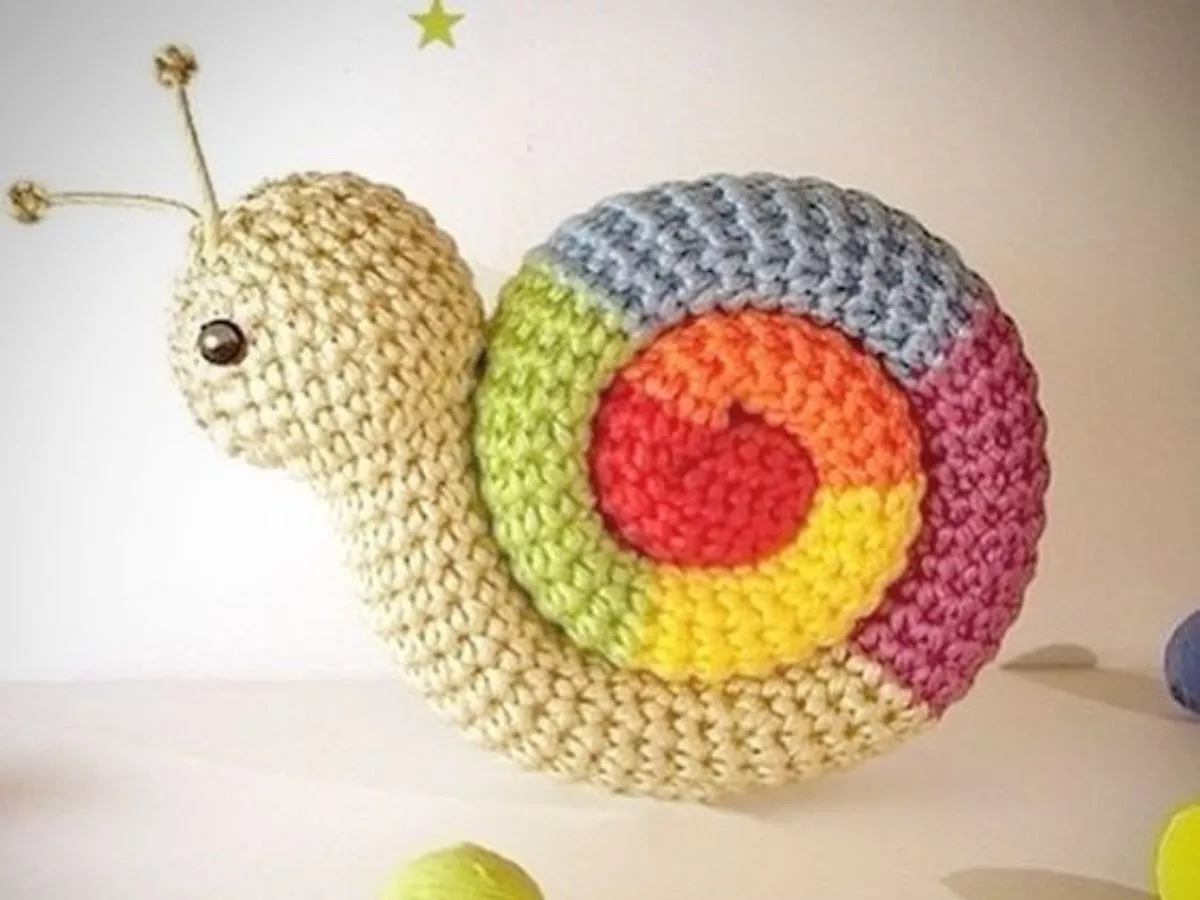
Image from google.
It’s versatile enough to be used in various quilt sizes and works beautifully with a wide range of fabric patterns and colors. Whether you want a bold, dramatic look or something more subtle and elegant, the Spiral Quilt Block can be customized to suit your style.
This tutorial focuses on a beginner-friendly approach, ensuring that anyone can follow along and create a professional-looking quilt block. By the end of this guide, you’ll not only understand the process but also feel confident experimenting with your own variations of the Spiral Quilt Block.
Before you begin creating your Spiral Quilt Block, it’s important to gather all the materials and tools required. Proper preparation ensures a smooth and enjoyable quilting process.
Start with selecting the fabric. Choose at least two contrasting fabrics to highlight the spiral design. You can opt for solids, prints, or a mix of both, depending on the effect you’re aiming for. High-contrast colors work best to make the spiral pattern stand out.
You’ll also need a rotary cutter, cutting mat, and quilting ruler for precise cutting. Accuracy is key when piecing together a spiral block, so having these tools on hand is essential. For sewing, ensure you have a reliable sewing machine with a quarter-inch seam foot, as this will help you achieve consistent seam allowances.
Other important items include thread that matches or complements your fabric, pins or clips for holding pieces together, and fabric marking tools for drawing guide lines. Don’t forget to have an iron and ironing board nearby for pressing seams as you work. Pressing helps keep your block flat and ensures a professional finish.
Lastly, consider using a template for the spiral shape. While you can create a spiral block without one, a template simplifies the process and helps maintain accuracy.
Once you’ve gathered your materials, the next step in this Spiral Quilt Block – tutorial is cutting and preparing the fabric. Accurate cutting is crucial to achieving a clean and balanced spiral design.
Begin by cutting your chosen fabrics into strips of equal width. The width of the strips will determine the size of your spiral segments, so choose a measurement that aligns with your desired block size. For example, if you want a bold spiral, opt for wider strips; for a more intricate design, go with narrower strips.
After cutting the strips, arrange them in the order you plan to sew them. Alternating the fabrics ensures the spiral effect is visually striking. Take time to experiment with different arrangements before committing to a layout. This step allows you to preview the final look and make adjustments as needed.
Mark the center of your block on a base square or foundation fabric. This will act as a guide as you piece together the spiral. Using a fabric marker, draw light lines from the center outward to help with alignment during sewing.
If you’re using a template, trace the spiral shape onto the foundation fabric. Be sure to follow the instructions provided with the template to achieve accurate results. Templates are especially helpful for beginners or anyone looking for a consistent spiral pattern.
Before moving on to sewing, press all your fabric strips to remove any wrinkles. Pressing ensures the strips lie flat and makes them easier to handle during the sewing process.
Now it’s time to sew your Spiral Quilt Block together. This step requires patience and precision to ensure the spiral design comes together seamlessly.
Start by sewing the first strip of fabric to the center of the foundation square. Align the edge of the strip with the marked center line and sew a straight seam. Press the strip open with an iron before adding the next piece.
Continue adding strips in a spiral pattern, sewing one piece at a time. Align each strip carefully with the edges of the previous one to maintain the spiral effect. Use pins or clips to hold the strips in place as you sew, especially if the fabric is slippery or difficult to manage.
As you work outward, check the alignment of the strips regularly. Minor adjustments may be needed to keep the spiral even. Trim excess fabric from the edges as you go to prevent bulk and ensure a clean finish.
If you encounter any challenges, take a moment to review your work and correct any mistakes. The beauty of quilting lies in the process, and it’s okay to take your time to get it right.
Once all the strips are sewn, give the block a final press. This step helps set the seams and ensures the block lies flat. A well-pressed block is easier to work with when assembling your quilt top.
The final step in this Spiral Quilt Block – tutorial is finishing and preparing the block for use in a quilt. A polished finish enhances the overall appearance and ensures the block is ready for assembly.
First, square up the block to the desired size. Use a quilting ruler and rotary cutter to trim the edges, ensuring the block is perfectly square. Squaring up is an important step that ensures your blocks fit together neatly when constructing the quilt.
Next, check the seams for any loose threads or areas that need reinforcement. Sew over any weak points to secure the block and prevent unraveling during washing or handling.
If you’re making multiple spiral blocks for a quilt, take a moment to compare them. Consistency is key in quilting, so check that all your blocks are the same size and shape. Adjust as needed to ensure uniformity.
Consider adding borders to your spiral block for added visual interest. Borders can frame the spiral design and make the block stand out in the final quilt. Choose fabrics that complement the colors and patterns used in the spiral.
Finally, label your block with its position in the quilt layout if you’re working on a large project. This helps keep your quilt top organized and ensures the blocks are assembled in the correct order.
1. What fabrics work best for a Spiral Quilt Block?
High-contrast fabrics, such as a mix of solids and prints, are ideal for highlighting the spiral design. Choose fabrics with complementary colors for a harmonious look.
2. How do I ensure my Spiral Quilt Block is accurate?
Use a template or draw guide lines on your foundation fabric to maintain alignment. Accurate cutting and consistent seam allowances are also essential.
3. Can I make a Spiral Quilt Block without a foundation fabric?
Yes, but using a foundation fabric provides stability and helps maintain the shape of the spiral, especially for beginners.
4. How do I customize the size of the Spiral Quilt Block?
Adjust the width of your fabric strips and the number of rounds in the spiral to create a block that fits your desired dimensions.
5. What tools are essential for making a Spiral Quilt Block?
A rotary cutter, cutting mat, quilting ruler, sewing machine, and iron are must-haves for achieving precise results.
6. Can I use scraps to make a Spiral Quilt Block?
Absolutely! Scraps are perfect for creating a colorful and unique spiral design, making this a great project for using leftover fabric.
Join our VIP broadcast list and gain access to exclusive patterns, all for free. As a VIP member, you’ll receive the best patterns daily, delivered directly to your device. ✨📱 It’s a unique opportunity to stay up-to-date with the latest trends and designs, curated just for you. Don’t miss out on enhancing your projects and discovering new inspirations with the best patterns every day! 🎨🔝
In this Spiral Quilt Block – tutorial, we’ve covered everything from selecting materials to finishing your block. This pattern is a creative and rewarding way to add movement and interest to your quilts. By following these steps, you’ll master the art of creating a beautiful spiral block that’s both functional and visually appealing.
We hope you enjoyed this tutorial and found it helpful. Let us know your thoughts in the comments and share any suggestions for future quilting guides. Happy quilting!


