
Pie Carrier Sewing Pattern

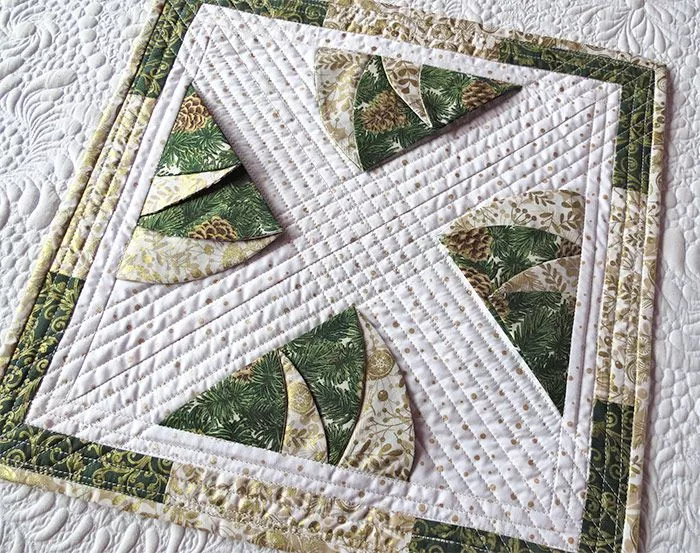
Fabric Star Ornaments are a beautiful and creative way to decorate your home for the holiday season. These charming handmade ornaments are simple to make, require minimal materials, and can add a personal touch to your Christmas tree or gift wrapping.
Whether you’re an experienced crafter or a beginner, this Fabric Star Ornaments tutorial will guide you step by step to create these delightful decorations.
Making Fabric Star Ornaments allows you to express your creativity and customize your decorations to fit any color scheme or theme. You can choose fabrics in vibrant patterns or soft, neutral tones—whatever suits your style.
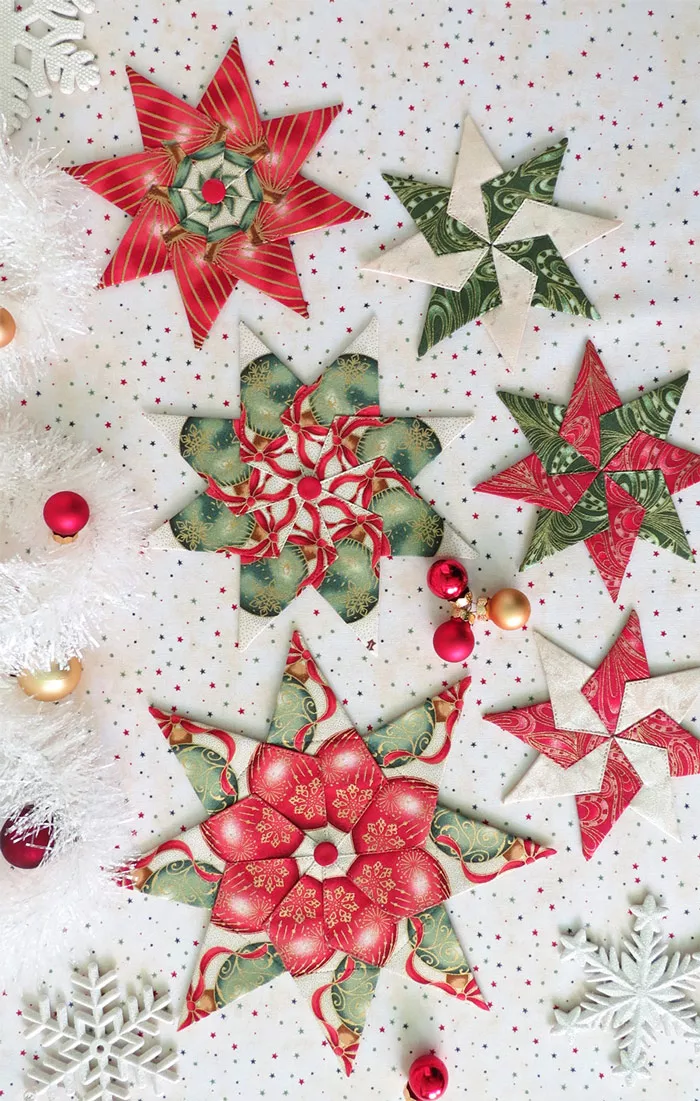
Image from google.
These ornaments are not only great for personal use, but they also make wonderful handmade gifts or thoughtful additions to holiday crafts fairs.
In this article, you’ll find a detailed Fabric Star Ornaments tutorial that walks you through the process from start to finish. You’ll learn how to cut, stitch, and decorate your stars, and we’ll offer tips for adding extra charm.
Whether you’re making a few stars or a whole set, these Fabric Star Ornaments will bring warmth and cheer to your seasonal decor.
Before you begin, it’s important to gather all the materials needed for this Fabric Star Ornaments tutorial. The list of supplies is minimal, but the results are impressive.
The first step in making your Fabric Star Ornaments is choosing the fabric. You can use cotton, felt, or even old clothing items to create your stars. Cotton fabric is particularly popular for this craft because it’s easy to work with and offers a wide range of patterns and colors. If you want to create a rustic or vintage look, choose fabrics with plaid, gingham, or floral prints. For a more modern look, select geometric or metallic fabrics.
You will need a good pair of scissors or a rotary cutter to cut your fabric into the desired shapes. A rotary cutter offers more precision for cutting straight lines and corners, but scissors will work just fine if that’s what you have on hand. Be sure to measure your fabric carefully before cutting.
For stitching the stars together, you’ll need a needle and thread. A basic hand-sewing needle is all you need. You can choose matching or contrasting thread depending on whether you want the stitches to stand out or blend in. If you’re planning to add decorative stitching, such as a simple running stitch or whip stitch, use a contrasting color.
While sewing is the most secure method of attaching the fabric pieces, you can use fabric glue for quick fixes or as an alternative to stitching. Fabric glue is also great for adding extra embellishments like buttons or beads. Just make sure the glue is designed specifically for fabric to ensure it holds well.
You can add extra embellishments to your Fabric Star Ornaments to make them even more special. Consider using buttons, beads, sequins, lace, or ribbon for decorative touches. These little additions will elevate the overall look and add a festive charm to your ornaments.
If you prefer a plush star ornament, you may want to add a little stuffing to make it more three-dimensional. Polyester fiberfill or cotton batting works best for this, as it is lightweight and easily shapes into your star design.
Now that you have all your materials ready, let’s dive into the step-by-step Fabric Star Ornaments tutorial. This guide will walk you through each stage of the process, making it easy to follow along.
Start by cutting out two star shapes from your fabric. You can either trace a star pattern onto your fabric with a fabric pencil or use a pre-made template. The size of the stars is up to you—small stars make great additions to wreaths, while larger ones can stand out as main ornaments on your tree.
Once you’ve cut out your star shapes, you may want to add a decorative edge to your fabric. You can use pinking shears to create a zigzag edge that prevents fraying, or you can fold the edges under and sew a simple hem around the perimeter of each star.
Next, place the two star pieces right sides together. Thread your needle and begin sewing around the edges, leaving a small gap at one point for turning the star inside out. You can use a whip stitch or running stitch, depending on your preference. Make sure your stitches are tight enough to hold the fabric securely, but leave enough space between them for a neat finish.
Once the stars are sewn together, carefully turn them inside out through the small gap you left. Use a pencil or small tool to gently push the points of the star so they are sharp and well-defined. This step will help give your stars a crisp, professional appearance.
If you want your Fabric Star Ornaments to have a bit of dimension, now is the time to add some stuffing. Use small amounts of polyester fiberfill or cotton batting, stuffing the star until it reaches your desired puffiness. Be sure not to overstuff, as this could cause the fabric to stretch or tear.
Once you’ve stuffed your star, sew up the small gap you left earlier. You can use a hidden stitch to make the closing nearly invisible. To hang your star, cut a small piece of ribbon or twine and sew it onto the top of your ornament. This will allow you to hang your star on the tree or wherever you’d like.
Adding embellishments is one of the most fun parts of making Fabric Star Ornaments. This is where you can let your creativity shine and make each ornament unique. Here are some ways to decorate your fabric stars:
Consider adding embroidery to your stars for an extra touch of artistry. Simple stitches like French knots, cross-stitches, or chain stitches can create beautiful designs on the fabric. You can stitch patterns such as snowflakes, stars, or even words like “Joy” or “Peace.”
Buttons and beads are a wonderful way to add texture and sparkle to your Fabric Star Ornaments. Sew buttons at the center of the star or scatter beads along the edges. You can also attach sequins for a bit of festive glamour.
Lace and ribbon are perfect for giving your stars a delicate, vintage-inspired look. Sew lace trim along the edges or tie a small ribbon bow at the top of the star for a sweet finishing touch. You can also use ribbon as a decorative band around the star.
If you’re feeling artistic, use fabric paint or fabric markers to draw intricate designs on your stars. You can paint designs like holly leaves, stars, or any other festive motifs. This is a great option if you want a more personalized ornament.
Add some holiday sparkle to your stars by sprinkling them with glitter. You can either use fabric glue to hold the glitter in place or lightly dust them with a glue stick and then sprinkle the glitter for a delicate shimmer. Glittered stars look especially beautiful when hung on the Christmas tree.
Using stamps or stencils to create patterns on the fabric is a fun and easy way to decorate your stars. Simply apply fabric paint to the stamp or stencil and press it onto the star. You can create detailed designs without needing advanced sewing or painting skills.
To make your Fabric Star Ornaments look polished and professional, here are some additional tips and tricks.
For a more durable and attractive ornament, choose high-quality fabric that holds its shape well. Fabrics like cotton, felt, and linen work best for this project.
Don’t feel restricted to just a traditional five-pointed star. You can experiment with other shapes, such as hearts, trees, or even snowflakes, to create a variety of ornaments.
For a holiday-themed twist, you can add a little dried lavender or cinnamon sticks inside your stars to make them smell festive. This adds a sensory element to your Fabric Star Ornaments that guests will enjoy.
If you want to create a smaller, more delicate ornament, try making miniature Fabric Star Ornaments. These tiny stars are perfect for adorning gift packages or using in wreaths.
To make your Fabric Star Ornaments even more special, consider personalizing them with names, dates, or messages. This can be done with embroidery, fabric markers, or even iron-on transfers for a more professional look.
Handmade Fabric Star Ornaments make wonderful gifts for friends and family. You can add a personal message or include them as part of a larger gift, such as a handmade wreath or a bundle of holiday decorations.
Q: Can I use other fabrics for these ornaments?
A: Absolutely! While cotton and felt are the most commonly used fabrics for Fabric Star Ornaments, you can experiment with other materials like burlap, linen, or even old clothing to create a more personalized look.
Q: How do I make sure my star ornaments stay in shape?
A: Using high-quality fabric and a good stuffing will help your stars retain their shape. Additionally, be sure to stitch securely and avoid overstuffing, which can cause your stars to lose their structure.
Q: Can I use a sewing machine for this project?
A: Yes, if you prefer, you can use a sewing machine instead of hand-stitching the stars. However, hand stitching often gives the ornaments a more homemade and charming feel.
Q: How do I make my fabric stars last longer?
A: To ensure your Fabric Star Ornaments last for many holiday seasons, store them carefully in a cool, dry place after the holidays. Avoid packing them tightly, and consider using a storage box with padding to protect the ornaments.
Join our VIP broadcast list and gain access to exclusive patterns, all for free. As a VIP member, you’ll receive the best patterns daily, delivered directly to your device. ✨📱 It’s a unique opportunity to stay up-to-date with the latest trends and designs, curated just for you. Don’t miss out on enhancing your projects and discovering new inspirations with the best patterns every day! 🎨🔝
In this Fabric Star Ornaments tutorial, we’ve shown you how to make beautiful, personalized decorations that can brighten up your home for the holidays. From choosing the right fabrics to adding creative embellishments, these ornaments are easy to make and fun to customize. Whether you create them as gifts or to decorate your own tree, these Fabric Star Ornaments will surely bring holiday cheer for years to come.
We hope you enjoyed this tutorial! Please share your thoughts in the comments and feel free to ask any questions or provide suggestions for future projects. Happy crafting!


