Gorgeous Vintage Crochet Christmas Ornaments – Free Pattern are the perfect way to add a touch of timeless charm to your holiday decorations.
If you’re a crochet enthusiast or simply looking to add something unique to your Christmas tree, these vintage-inspired ornaments are a wonderful choice.
This article will walk you through everything you need to know about creating these beautiful crochet ornaments, from the materials needed to step-by-step instructions for a gorgeous result.
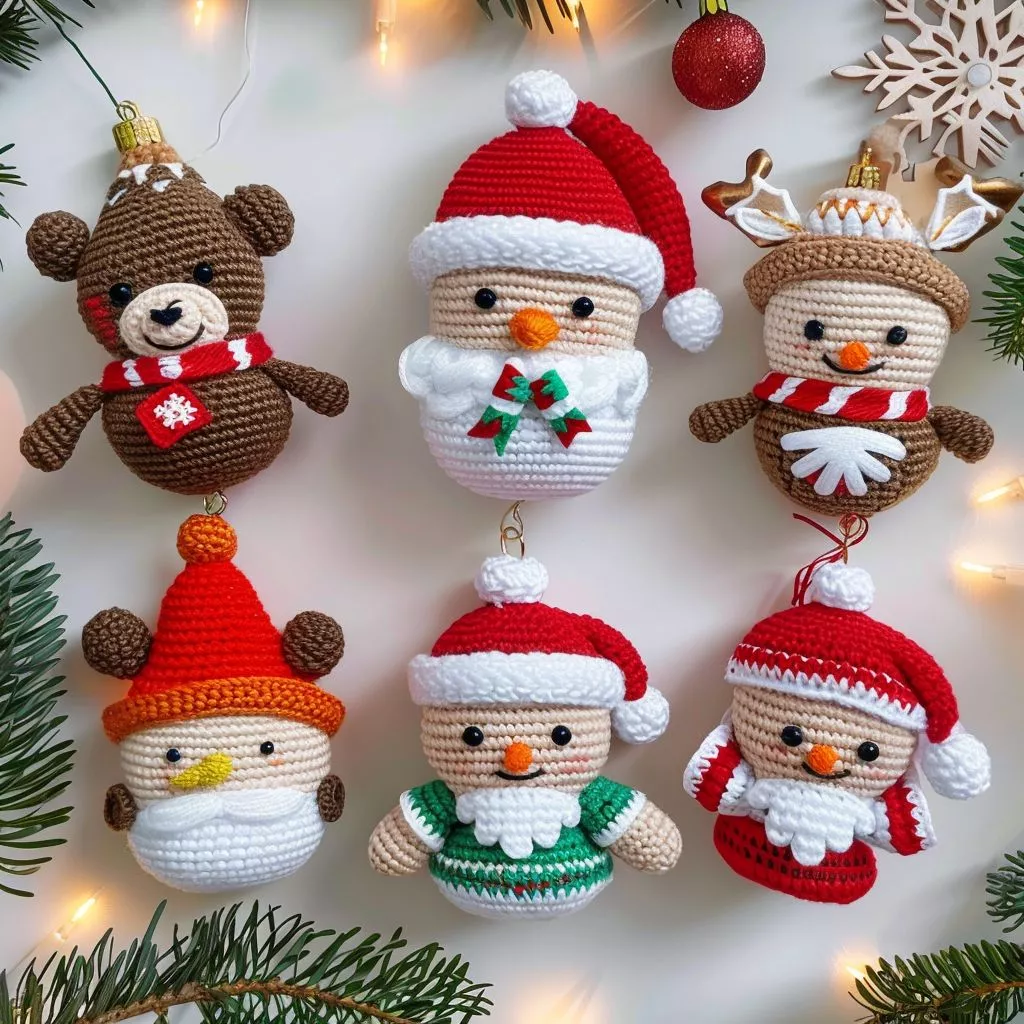
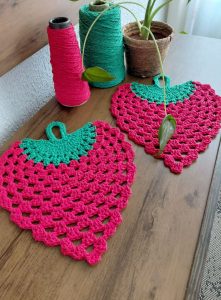
Image from google.
With a combination of vintage crochet techniques and a bit of creativity, your Christmas tree will shine brighter than ever before.
SEE MORE PATTERNS
These ornaments offer a special way to connect with the past, as they carry the nostalgia of old-fashioned Christmas traditions.
Crochet ornaments have been a staple of holiday décor for generations, and there’s something incredibly satisfying about making them yourself. They provide a personal touch, and once completed, they can become family heirlooms that are cherished for years to come.
In this guide, we will dive into the world of vintage crochet ornaments, provide a free pattern to help you create your own, and give tips on how to incorporate these charming pieces into your holiday celebrations. Let’s get started with the first section on gathering your materials!
1. Materials You’ll Need for Gorgeous Vintage Crochet Christmas Ornaments
Before you begin crocheting your vintage crochet Christmas ornaments, it’s essential to gather the right materials. Having everything ready will ensure that your crafting session is smooth and enjoyable. Here’s a list of the materials you’ll need for this project:
- Yarn
For vintage-style ornaments, you’ll want to use yarn that reflects the soft, delicate look of classic decorations. A fine cotton yarn in white, cream, or pastel colors works best for creating that vintage crochet effect. You can also use metallic threads if you want to add a touch of sparkle to your ornaments.
- Crochet Hook
For a clean and neat finish, use a crochet hook that matches the thickness of the yarn. A 2.5mm or 3mm hook is usually ideal for fine cotton yarn. Using the right size will help you achieve the detailed, intricate stitches typical of vintage crochet patterns.
- Scissors
Sharp scissors are essential for cutting your yarn after each piece is finished. Be sure to keep your scissors nearby as you work to avoid any interruptions in your crafting process.
- Needle for Weaving in Ends
Once you’ve completed your ornaments, you’ll need a yarn needle to weave in the loose ends. This step is important for finishing your ornaments with a professional touch, ensuring that the threads stay secure.
- Stitch Markers
If you’re working with intricate patterns, stitch markers can help you keep track of your stitches and prevent mistakes. They’re especially helpful when crocheting shapes like stars, flowers, or snowflakes.
- Optional Embellishments
To enhance the vintage feel of your ornaments, you might want to add some embellishments. Small beads, sequins, or tiny bells can add a festive, charming look to your crochet pieces, making them truly stand out on your Christmas tree.
With these materials in hand, you’re ready to begin your crochet journey. Let’s move on to the next step: learning the basics of the crochet stitches used for these vintage ornaments.
2. Essential Crochet Stitches for Vintage Ornaments
Crocheting beautiful vintage-style Christmas ornaments requires a good understanding of basic crochet stitches. Here are the essential stitches that you’ll use in your Gorgeous Vintage Crochet Christmas Ornaments:
- Chain Stitch (ch)
The chain stitch is the foundation of almost all crochet projects. To start, simply create a small loop with your yarn and pull the hook through to form a chain. It’s often the first stitch you’ll use to form the base of your ornament.
- Slip Stitch (sl st)
Slip stitches are used to join the ends of a round or to move the yarn to a new stitch position without adding height. They create smooth joins in your crochet work, essential for shaping your ornaments.
- Single Crochet (sc)
This stitch is key to creating dense, solid fabric. It’s often used in the body of the ornament to create the base layer or to close up holes in your crochet work. The single crochet stitch gives a sturdy finish to your projects.
- Half Double Crochet (hdc)
A step up from the single crochet, the half double crochet creates a slightly taller stitch and adds texture. It’s perfect for creating a bit of volume and depth in your vintage ornaments.
- Double Crochet (dc)
The double crochet is taller than the half double crochet, adding height and open space to your work. It’s commonly used for the outer edges of your ornaments to create a lacy effect.
- Treble Crochet (tr)
For a truly vintage look, use the treble crochet stitch. This stitch creates an open, airy effect and is perfect for creating delicate lace patterns on your ornaments. It adds elegance and charm to any piece.
These basic crochet stitches will help you create the intricate designs typically found in vintage crochet Christmas ornaments. With these techniques, you’ll be able to craft intricate patterns such as stars, snowflakes, and angels. Now that we know the necessary stitches, let’s move on to the pattern instructions.
3. Step-by-Step Guide to Crocheting Your Vintage Christmas Ornaments
Now that you have your materials and are familiar with the essential stitches, it’s time to start crocheting your ornaments. Below is a free pattern to create a beautiful vintage crochet snowflake ornament. Follow these steps carefully, and you’ll have a lovely piece to hang on your Christmas tree!
- Start with the Magic Ring
Begin by making a magic ring with your yarn. This will form the center of your snowflake.
- Round 1: Crochet into the Ring
Ch 3 (counts as the first dc), then crochet 11 dc into the ring. Join with a sl st to the top of the first ch 3. Pull the tail of the magic ring to close the center.
- Round 2: Forming the Points
Ch 3, dc into the next stitch, ch 3, sl st into the same stitch. Repeat this step around until you have 6 points. Join with a sl st.
- Round 3: Adding the Lace
Ch 4, (dc, ch 3, dc) into each chain space between points. This will create a lacy, frilled effect around the edges of your snowflake.
- Round 4: Final Detailing
Ch 1, sc in each dc space around. This will add a solid border to your ornament, making it look complete and polished.
- Finish and Weave in Ends
Once you’ve completed your ornament, weave in all loose ends with a yarn needle. You can add a small hanging loop to the top if you wish.
Congratulations! You’ve just completed a gorgeous vintage-inspired crochet ornament. Repeat this process to create multiple ornaments, each with its unique pattern and design.
4. Tips for Displaying Your Vintage Crochet Christmas Ornaments
Once you’ve completed your Gorgeous Vintage Crochet Christmas Ornaments, it’s time to display them. Here are some tips for showcasing your beautiful creations:
- Hang with Care
Use thin, sturdy threads or ribbon to hang your ornaments on the tree. For a vintage touch, use satin ribbon in a soft color, like cream or gold.
- Pair with Other Decorations
Your crochet ornaments can be combined with other classic holiday decorations, such as tinsel, baubles, or vintage glass ornaments. Mixing textures creates a beautiful, layered look on the tree.
- Create a Focal Point
Consider making a set of ornaments that feature different patterns and hanging them in a specific section of your tree. This will create a focal point that draws attention to your crochet creations.
- Place on Wreaths
These ornaments aren’t limited to your Christmas tree! Use them to decorate wreaths, garlands, or even as part of your holiday table centerpieces. Their delicate design will complement any décor.
- Gift Them
Handmade crochet ornaments make wonderful gifts for loved ones. Create a few and gift them as a token of holiday cheer, along with a small note explaining the vintage crochet pattern.
- Store Carefully
Since crochet ornaments are delicate, store them carefully after the holiday season. Place them in a tissue paper-lined box to protect them from damage and keep them looking gorgeous for years to come.
FAQ
1. Can I use any yarn for crochet ornaments?
While you can use any yarn, it’s best to use fine cotton yarn for a vintage look. This type of yarn holds the delicate stitch patterns well and gives a soft, classic finish.
2. How long does it take to make one ornament?
The time it takes to make one ornament depends on your skill level. On average, it should take about 30 minutes to 1 hour to complete a single ornament.
3. Can I customize the pattern?
Absolutely! Feel free to change the colors, add beads or sequins, or adjust the size of the stitches to create unique designs for your ornaments.
4. What are some other ornament designs I can crochet?
In addition to snowflakes, you can create stars, bells, angels, or even small trees. Vintage crochet ornaments are versatile, so feel free to experiment with different patterns.
Join our VIP broadcast list and gain access to exclusive patterns, all for free. As a VIP member, you’ll receive the best patterns daily, delivered directly to your device. ✨📱 It’s a unique opportunity to stay up-to-date with the latest trends and designs, curated just for you. Don’t miss out on enhancing your projects and discovering new inspirations with the best patterns every day! 🎨🔝
JOIN NOW
Conclusion
In this article, we’ve explored how to create Gorgeous Vintage Crochet Christmas Ornaments using a free pattern and essential crochet techniques. From selecting the right materials to following the step-by-step guide, you now have all the tools you need to make your holiday decorations shine. These ornaments are a beautiful way to add a personal, nostalgic touch to your Christmas tree.
PATTERN HERE
We hope you’ve enjoyed this crochet tutorial and that it inspires you to create your own vintage crochet Christmas ornaments. Let us know how your ornaments turned out and share any tips or suggestions you have in the comments below!


