
Pie Carrier Sewing Pattern

If you’re looking to enhance your quilting skills and add something special to your collection, a FREE Quilt Block Pattern – Tutorial is the perfect place to start.
Whether you’re new to quilting or a seasoned pro, having access to free patterns is a great way to experiment with new techniques and designs.
In this tutorial, we’ll guide you through the process of creating a stunning quilt block from scratch, all while giving you a valuable resource to inspire your next project.
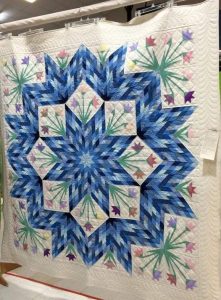
The beauty of quilting lies in its versatility, and with a FREE Quilt Block Pattern – Tutorial, you can create blocks that suit your personal style and preferences. From classic patterns to more modern twists, the options are endless.
Plus, by following a tutorial step-by-step, you’ll have the opportunity to refine your technique and gain confidence in your quilting skills.
As you dive into this tutorial, remember that quilting is as much about creativity as it is about precision.
This step-by-step guide is designed to help you master the art of quilt block creation, offering tips, tricks, and a free pattern to get you started. Let’s begin!
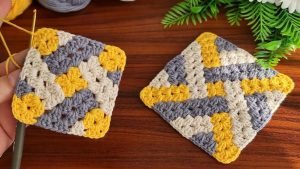
Before diving into your FREE Quilt Block Pattern – Tutorial, it’s important to understand the basics of quilt block patterns. Quilt blocks are the building blocks of a quilt, and each one is made up of several fabric pieces stitched together in a specific pattern.
The first step is to choose the right fabric. For beginners, it’s advisable to start with cotton fabric, as it’s easy to work with and comes in a wide variety of colors and patterns. Pre-cut fabric squares, such as charm packs or fat quarters, can also save you time in selecting fabric.
Once you have your fabric, you’ll need to decide on the size of your quilt block. A standard quilt block is usually 12.5 inches square, but this can vary depending on the design. Keep in mind that quilt blocks often include seam allowances, typically 1/4 inch, which should be factored into your measurements.
Next, familiarize yourself with basic quilting terminology. A “seam allowance” is the space between the edge of the fabric and the stitching line, while a “block” is the individual unit of the quilt. You’ll also hear terms like “half-square triangle,” “strip piecing,” and “foundation piecing,” which are techniques used to create different shapes within the blocks.
With a solid understanding of the basics, you’re ready to explore the FREE Quilt Block Pattern – Tutorial and start creating your quilt blocks with confidence.
Having the right tools can make a big difference in the quality of your quilt blocks. When you’re following a FREE Quilt Block Pattern – Tutorial, having the proper equipment will help you achieve clean, precise results.
One of the most important tools is your sewing machine. While hand sewing is an option, a sewing machine will make the process faster and more efficient. Be sure your sewing machine is set up with the right needle for quilting. A universal or quilting needle is recommended, as it will help prevent skipped stitches and damage to the fabric.
Another essential tool is the rotary cutter. A rotary cutter makes cutting fabric into precise shapes quick and easy. Pair this with a self-healing cutting mat and a ruler to ensure your cuts are straight and accurate. If you don’t have a rotary cutter, a sharp fabric scissors can also work, though it may take longer.
For measuring and marking fabric, a clear ruler and fabric markers or chalk are helpful. The ruler ensures your fabric pieces are the correct size and that your seams line up perfectly. Fabric markers or chalk allow you to make temporary marks on the fabric, helping with alignment without leaving permanent stains.
You’ll also want to have plenty of pins on hand to hold your fabric pieces in place as you sew. This is especially useful when working with small, intricate quilt blocks.
Finally, don’t forget about an iron. Pressing your seams as you go is crucial for keeping your quilt block neat and ensuring the pieces fit together properly. An iron with steam capabilities can help you achieve sharp, crisp seams.
Now that you understand the basics and have your tools ready, it’s time to start creating your FREE Quilt Block Pattern – Tutorial. Follow these steps to make your first quilt block with ease.
Start by cutting your fabric into the necessary shapes as dictated by your quilt block pattern. If the pattern calls for squares, triangles, or strips, use your rotary cutter and ruler to cut the fabric accurately. Be sure to account for seam allowances, which will be added later when you sew the pieces together.
Next, begin sewing the fabric pieces together. Start by piecing together smaller units, such as half-square triangles or strips, according to the instructions in the pattern. Be sure to press your seams open or to one side as you go. This will help keep your block flat and prevent it from becoming bulky.
As you sew, constantly check your work against the pattern. Ensure that the sizes of your pieces match the measurements given in the tutorial. If your block starts to become distorted, you can use a seam ripper to carefully remove the stitches and try again.
Once the smaller units are assembled, start joining them together to form the full quilt block. Work methodically, attaching each piece and pressing the seams as you go. The key is to take your time and ensure each seam is aligned properly.
After all the pieces are sewn together, give your quilt block a final press with the iron. This will help set the seams and give your block a polished, professional look.
Finally, check the size of your quilt block to ensure it matches the intended dimensions. If needed, trim the edges to achieve a perfect square. Your quilt block is now ready to be used in a larger quilt project!
While following a FREE Quilt Block Pattern – Tutorial, you may encounter challenges. Here are some tips to help you navigate the process and improve your quilting skills.
First, always measure twice and cut once. Accurate cutting is crucial for achieving well-aligned seams and a consistent quilt block. If you make a mistake, it’s best to correct it early on to avoid frustration later.
Second, practice chain piecing. This technique allows you to sew multiple pieces in a row without cutting the thread between each one, saving you time and reducing thread waste. It’s especially helpful when making quilts with many blocks.
Consider using a design wall to lay out your blocks before sewing them together. This allows you to see the overall design and make any necessary adjustments before permanently stitching the pieces.
Another helpful tip is to starch your fabric before cutting it. This will make the fabric easier to handle and help reduce the risk of stretching during the quilting process.
For more intricate patterns, try using paper piecing. This method involves sewing fabric pieces onto a paper template, ensuring precision and accuracy in complex designs.
Lastly, don’t be afraid to make adjustments to the pattern to fit your personal style. Quilting is a creative process, so feel free to experiment with different colors, fabric types, and layouts.
1. How do I download a free quilt block pattern?
You can find free quilt block patterns on quilting blogs, websites, and social media platforms. Many sites offer downloadable PDFs that you can print and use for your projects.
2. What is the best fabric for beginners?
Cotton fabric is ideal for beginners because it’s easy to work with, widely available, and affordable. Choose fabric with a simple design for your first few blocks.
3. How can I make my quilt blocks more precise?
Use a rotary cutter, ruler, and cutting mat for precise fabric cuts. Additionally, make sure to measure your fabric pieces carefully and press your seams flat as you go.
4. Can I make a quilt block by hand?
Yes, quilting by hand is possible, but it takes longer than using a sewing machine. Hand stitching can be a great option for smaller projects or when you want to add personal touches.
5. How do I join quilt blocks together?
You can join quilt blocks by sewing them together in rows, then stitching the rows together. Make sure to match up the seams for a neat and uniform result.
Join our VIP broadcast list and gain access to exclusive patterns, all for free. As a VIP member, you’ll receive the best patterns daily, delivered directly to your device. ✨📱 It’s a unique opportunity to stay up-to-date with the latest trends and designs, curated just for you. Don’t miss out on enhancing your projects and discovering new inspirations with the best patterns every day! 🎨🔝
The FREE Quilt Block Pattern – Tutorial is a fantastic way to dive into the world of quilting. By following the steps in this guide, you can create beautiful quilt blocks that form the foundation of your next project. Whether you’re creating a small wall hanging or a full-sized quilt, these tips and techniques will help you succeed.
We’d love to hear your thoughts! Feel free to leave a comment with your questions, suggestions, or feedback. Happy quilting!


