
Crochet Multi-Purpose Blouse, Shawl, Runner Model

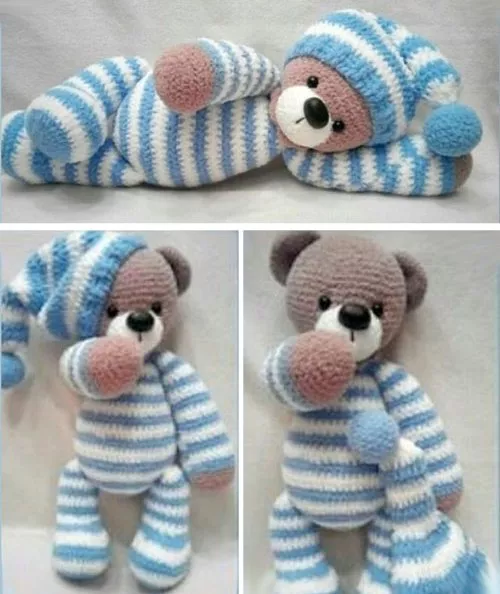
Creating an Amigurumi Bear in Pajamas – Free Pattern is a delightful way to bring your crochet skills to life.
This project is ideal for crafters who enjoy making unique, handmade toys that exude charm and warmth. Whether as a gift, a keepsake, or a decoration, this adorable bear in pajamas will surely captivate anyone who sees it.
The Amigurumi Bear in Pajamas – Free Pattern is designed to be accessible for beginners while offering room for creativity for more experienced crocheters.
With just a few materials and some patience, you can create a snug and cuddly bear that will melt hearts. The pajamas add an extra layer of personality, making this pattern truly special.
This guide will walk you through every step of creating your Amigurumi Bear in Pajamas – Free Pattern, from gathering materials to adding the finishing touches. By the end, you’ll have a charming bear that showcases your crochet talents.
Before starting your Amigurumi Bear in Pajamas – Free Pattern, gather all the essential materials. Having everything ready ensures a smooth crafting process.
Having the right tools is crucial for achieving the desired results in your Amigurumi Bear in Pajamas – Free Pattern. Good-quality materials will enhance both the appearance and durability of your finished bear.
Prepare extra supplies, such as different yarn colors, if you want to add creative accents like patterns or embellishments to the pajamas. Attention to detail starts with the right materials.
The bear’s body and head are the foundation of your Amigurumi Bear in Pajamas – Free Pattern. Follow these steps for a well-proportioned structure.
Consistency in tension and careful stuffing are key to crafting a perfect Amigurumi Bear in Pajamas – Free Pattern. Take your time to ensure each part is well-shaped.
The body and head form the heart of your bear. Investing effort in these steps sets a strong foundation for the rest of the project, ensuring a polished final product.
The pajamas are the highlight of your Amigurumi Bear in Pajamas – Free Pattern, adding personality and charm. Here’s how to make them:
Customizing the pajamas lets you put your own spin on the Amigurumi Bear in Pajamas – Free Pattern. Experiment with different colors and patterns to make it special.
The pajamas are a fun way to showcase your creativity. They transform the bear from a simple toy into a lovable character with its own personality.
Once all parts are complete, it’s time to assemble your Amigurumi Bear in Pajamas – Free Pattern and add the final details.
Completing the assembly is a satisfying step in bringing your Amigurumi Bear in Pajamas – Free Pattern to life. Take your time to ensure each detail is perfect.
The finishing touches give your bear its personality and charm. These small details make all the difference in transforming your project into a cherished creation.
Q: Is this pattern beginner-friendly?
A: Yes, the Amigurumi Bear in Pajamas – Free Pattern is suitable for beginners with basic crochet knowledge.
Q: What yarn works best for this project?
A: Soft cotton or acrylic yarn in medium weight is ideal for a durable and cuddly bear.
Q: Can I customize the pajamas?
A: Absolutely! You can experiment with colors, patterns, and embellishments to make the pajamas unique.
Q: How long does it take to complete the bear?
A: Depending on your skill level, it may take 8-12 hours to complete the project.
Q: Are safety eyes mandatory?
A: No, you can embroider the eyes for a child-safe option or a different aesthetic.
Q: Can I sell bears made from this pattern?
A: Always check the pattern’s licensing terms, but many free patterns allow small-scale sales.
Join our VIP broadcast list and gain access to exclusive patterns, all for free. As a VIP member, you’ll receive the best patterns daily, delivered directly to your device. ✨📱 It’s a unique opportunity to stay up-to-date with the latest trends and designs, curated just for you. Don’t miss out on enhancing your projects and discovering new inspirations with the best patterns every day! 🎨🔝
Creating an Amigurumi Bear in Pajamas – Free Pattern is a rewarding experience that combines creativity and craftsmanship. This guide has provided step-by-step instructions to help you craft a lovable and unique bear.
We hope this article has inspired you to start your project. Have you tried this pattern? Share your thoughts and suggestions in the comments—we’d love to hear from you!


