Creating a Beautiful Shells Blanket is a rewarding project for crochet enthusiasts of all skill levels. This pattern is not only visually stunning but also easy to follow, making it an ideal choice for beginners and experienced crafters alike.
With its elegant shell design, this blanket adds charm and sophistication to any space. Best of all, this tutorial includes a free pattern to guide you every step of the way.
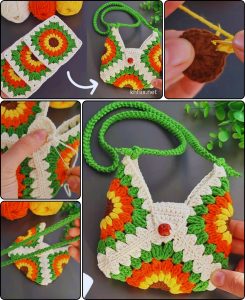
The shell stitch is a timeless crochet technique known for its wavy, textured appearance that mimics the natural beauty of seashells.
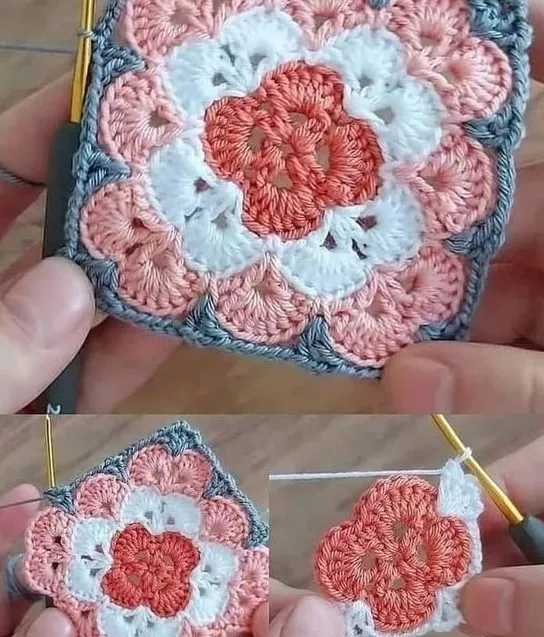
Image from google.
Whether you’re looking to craft a cozy throw for your living room or a heartfelt gift for a loved one, the Beautiful Shells Blanket is an excellent choice. It’s versatile, customizable, and guaranteed to impress.
SEE MORE PATTERNS
In this article, we’ll explore the materials, techniques, and creative possibilities that come with crocheting this blanket. Follow along for detailed instructions and tips that will make your crochet experience enjoyable and fulfilling.
1. Materials You Need to Crochet the Beautiful Shells Blanket
Before diving into the process, it’s important to gather all the necessary materials for your Beautiful Shells Blanket – FREE PATTERN. Having the right tools will ensure a smooth and enjoyable crochet journey.
- Yarn Selection: Choose a soft, durable yarn that complements the shell design. Worsted weight yarns work particularly well for this pattern.
- Crochet Hook: The recommended hook size for your chosen yarn is essential. Most patterns suggest a 5.0mm or 5.5mm hook.
- Scissors: A sharp pair of scissors is crucial for clean and precise cuts.
- Stitch Markers: These will help you keep track of your stitches, especially in larger blankets.
- Tapestry Needle: Use this to weave in ends and tidy up your finished project.
- Pattern Printout or Digital Copy: Having the free pattern on hand ensures you stay on track throughout the process.
With these materials ready, you’re well-prepared to start crocheting your stunning shell blanket.
2. Step-by-Step Instructions for the Shell Stitch
The shell stitch is the foundation of the Beautiful Shells Blanket – FREE PATTERN. Mastering this stitch is easy with practice, and the results are breathtaking.
- Step 1: Begin with a Chain Foundation
Start by chaining a multiple of 6 stitches plus 2. This ensures your pattern aligns perfectly as you work across the rows.
- Step 2: Create Your First Shell
Skip two chains, then work five double crochets into the next chain. This forms the first shell of your row.
- Step 3: Establish the Pattern
Skip two chains, then single crochet into the next chain. Skip another two chains and work another shell. Repeat this sequence to the end of the row.
- Step 4: Turn and Continue
At the end of the row, chain two and turn your work. Begin the next row by working shells into the center of the shells from the previous row.
- Step 5: Maintain Consistency
Ensure your stitches are even and maintain the same tension throughout. This will give your blanket a professional finish.
- Step 6: Finishing Touches
Once your blanket reaches the desired size, finish off with a simple border for a polished look. Popular border options include single crochet rows or picot edging.
3. Customizing Your Beautiful Shells Blanket
One of the joys of working on the Beautiful Shells Blanket is its adaptability. You can personalize it to suit your style and needs in various ways.
- Choosing Colors
Experiment with different color palettes to create a unique look. Gradient yarns or alternating solid colors can add depth and dimension to your blanket.
- Adjusting Size
Modify the chain foundation to make a baby blanket, lap throw, or even a king-sized cover. The shell stitch works seamlessly across all dimensions.
- Adding Texture
Use thicker yarn or incorporate different stitches to add a textured effect to your blanket.
- Incorporating Patterns
Combine the shell stitch with other crochet techniques, like stripes or granny squares, for an eclectic design.
- Creating Borders
A decorative border can elevate your blanket’s overall look. Options include scalloped edges, fringe, or tassels.
- Mixing Materials
Blend yarns of different textures, such as acrylic and wool, for a cozy and stylish result.
4. Tips for a Flawless Crochet Experience
Crocheting a Beautiful Shells Blanket is a rewarding experience, and these tips will help you achieve flawless results.
- Practice the Shell Stitch First
Familiarize yourself with the shell stitch by practicing on a small swatch before starting the full blanket.
- Keep an Even Tension
Consistent tension is key to ensuring your blanket looks neat and professional.
- Take Breaks
Crocheting for long periods can strain your hands. Take regular breaks to rest and avoid fatigue.
- Count Your Stitches
Regularly count your stitches to ensure your rows remain even and symmetrical.
- Follow the Pattern Closely
Refer to the free pattern frequently, especially if you’re a beginner.
- Block Your Finished Blanket
Blocking your blanket after completing it will help smooth out stitches and enhance its shape.
FAQ
Q: What yarn works best for the Beautiful Shells Blanket?
A: Worsted weight yarn is ideal, but you can also experiment with lighter or chunkier yarns depending on your preference.
Q: Is the shell stitch beginner-friendly?
A: Yes, the shell stitch is simple and repetitive, making it an excellent choice for beginners.
Q: How long does it take to complete this blanket?
A: The time required depends on the size of the blanket and your crochet speed. On average, a small throw might take a week of dedicated work.
Q: Can I use this pattern for other projects?
A: Absolutely! The shell stitch is versatile and can be used for scarves, table runners, and more.
Q: Do I need special tools for blocking?
A: Blocking mats and pins are helpful but not essential. A clean towel and flat surface work well too.
Q: How do I maintain the blanket?
A: Handwash or machine wash on a gentle cycle with mild detergent. Lay flat to dry to preserve the blanket’s shape and texture.
Join our VIP broadcast list and gain access to exclusive patterns, all for free. As a VIP member, you’ll receive the best patterns daily, delivered directly to your device. ✨📱 It’s a unique opportunity to stay up-to-date with the latest trends and designs, curated just for you. Don’t miss out on enhancing your projects and discovering new inspirations with the best patterns every day! 🎨🔝
JOIN NOW
Conclusion
The Beautiful Shells Blanket – FREE PATTERN is a perfect project for crocheters looking to create something elegant and functional.
From mastering the shell stitch to customizing your design, this pattern offers endless possibilities. Whether you’re crafting for yourself or gifting to someone special, the finished blanket will be a treasured item.
PATTERN HERE
We hope this tutorial inspires you to pick up your crochet hook and get started. Let us know your thoughts, share your experiences, and feel free to suggest future topics. Happy crocheting!


