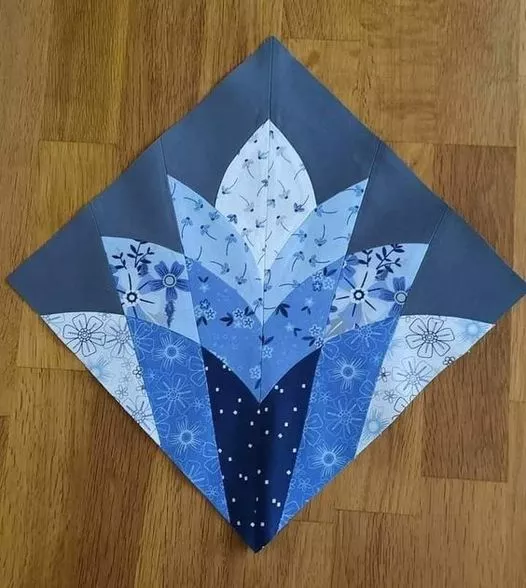
Flea Market Flowers - Quilt Pattern

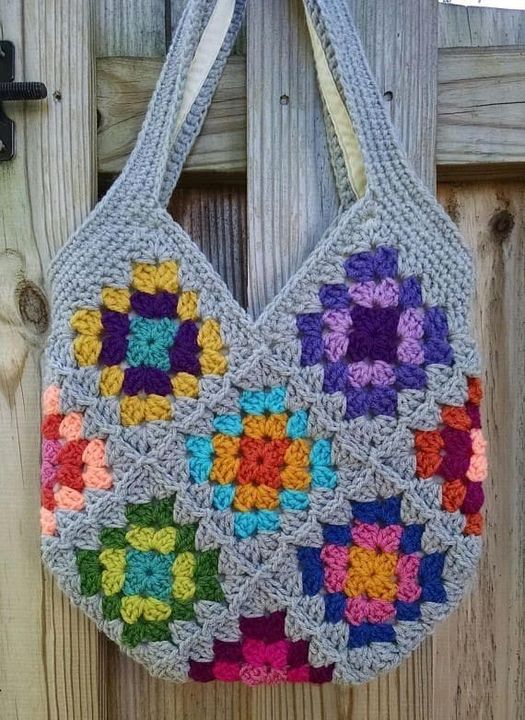
The Granny Square Purse Pattern is a timeless and stylish crochet project that blends vintage charm with modern functionality. Whether you are a beginner or an experienced crocheter,
this project is an excellent way to practice your skills while creating a beautiful and practical accessory. The classic granny square design offers endless possibilities for color combinations, making it easy to personalize your purse to match your style.
One of the best things about the Granny Square Purse Pattern is its versatility. You can create small coin purses, medium-sized handbags, or even large tote bags using the same basic technique.
By simply adjusting the number of squares or the type of yarn, you can make a purse that suits any occasion. Additionally, this project is an excellent way to use up leftover yarn scraps, making it both economical and eco-friendly.
If you have never made a Granny Square Purse Pattern before, don’t worry! This tutorial will guide you step by step, from choosing the right materials to assembling your finished purse. Let’s get started!
Before diving into the Granny Square Purse Pattern, it’s essential to gather all the necessary materials and tools. Having everything ready will make the process smoother and more enjoyable.
Selecting the right yarn is crucial for the durability and appearance of your purse. Cotton yarn is a popular choice as it provides a sturdy and structured finish. Acrylic yarn is also an option if you prefer a softer feel.
The recommended crochet hook size will depend on the yarn you choose. Generally, a 4mm to 5mm hook works well for most granny square patterns.
To complete your purse, you will need a yarn needle for sewing the squares together, a pair of scissors, and a lining fabric if you want to add extra durability.
Granny squares offer an excellent opportunity to play with colors. You can opt for a monochrome look, a vibrant multi-color combination, or even an ombre effect.
If you want to add a unique touch, consider adding beads, buttons, or appliqués to your purse. These embellishments can enhance the overall design.
You can crochet your own handles or use ready-made ones. Magnetic clasps, zippers, or buttons can be used as closures, depending on your preference.
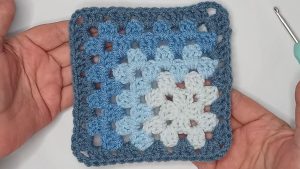
The foundation of the Granny Square Purse Pattern is the classic granny square. If you’re new to crocheting, learning this simple yet versatile technique will open the door to countless projects.
Start by making a slip knot and chaining four stitches. Join the last chain to the first with a slip stitch to form a small loop.
Chain three (this counts as your first double crochet), then crochet two more double crochets into the loop. Chain two, then make three more double crochets. Repeat this pattern until you have four sets of three double crochets, separated by chain spaces.
In each new round, work three double crochets into each chain space, followed by two chain stitches to form the corners. Continue expanding the square until it reaches your desired size.
Once you have finished your granny squares, fasten off the yarn and use a needle to weave in the loose ends to give your squares a clean look.
Depending on the size of your purse, you will need multiple granny squares. A small purse may require only four squares, while a tote bag could need up to twelve or more.
Once you have completed your granny squares, it’s time to assemble your Granny Square Purse Pattern into a functional bag.
Lay out your squares in the desired pattern. Consider color placement to ensure a balanced and aesthetically pleasing look.
Use a whip stitch or single crochet stitch to join the squares together. Be sure to align the edges evenly for a neat finish.
For extra durability, you can sew a fabric lining inside your purse. Cut a piece of fabric slightly larger than the assembled squares, sew the edges, and attach it inside using a yarn needle.
If you are using pre-made handles, sew them securely onto the purse. If you prefer crocheted handles, make two long chains and reinforce them with single crochet stitches for added strength.
To keep your belongings secure, consider adding a button, zipper, or magnetic clasp closure.
Trim any loose threads and make sure all stitches are tight and secure. Your Granny Square Purse Pattern is now complete!
Now that your purse is finished, let’s explore some ways to make it uniquely yours.
For a bohemian look, use earthy tones and add fringe to the bottom of the purse.
Opt for neutral colors like beige, white, or gray for a modern and minimalist aesthetic.
Bright colors can make your purse stand out and add a fun element to your outfit.
Try pastel shades for spring, warm hues for autumn, or festive colors for holiday-inspired designs.
Personalize your purse by adding embroidered details or sewn-on appliqué.
Create a matching granny square wallet or coin pouch to go with your purse.
1. How long does it take to make a Granny Square Purse?
It depends on your skill level and the purse size, but most people complete a small purse in a few days.
2. Can I make this purse using only one color?
Yes! A single-color granny square purse has a sleek and modern look.
3. What type of yarn is best for durability?
Cotton yarn is best for a sturdy and long-lasting purse.
4. Can I wash my crochet purse?
Yes, but hand washing in cold water is recommended to prevent stretching.
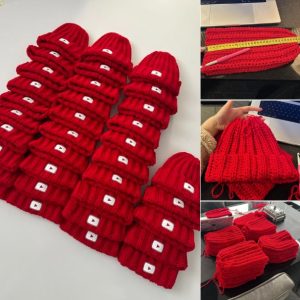
5. Can I sell Granny Square Purses I make?
Absolutely! Handmade purses are popular in craft fairs and online marketplaces.
6. How do I add a lining to my purse?
Simply cut a fabric piece to size, sew the edges, and attach it inside with a yarn needle.
Join our VIP broadcast list and gain access to exclusive patterns, all for free. As a VIP member, you’ll receive the best patterns daily, delivered directly to your device. ✨📱 It’s a unique opportunity to stay up-to-date with the latest trends and designs, curated just for you. Don’t miss out on enhancing your projects and discovering new inspirations with the best patterns every day! 🎨🔝
Creating a Granny Square Purse Pattern is a fun and rewarding project that allows you to combine creativity with functionality. Whether you’re making it for yourself or as a thoughtful gift, the endless customization options make this purse a must-try crochet project.
We hope this guide has helped you on your crochet journey! Let us know your thoughts, and feel free to share your own granny square purse creations in the comments. Happy crocheting!

