
Crochet Multi-Purpose Blouse, Shawl, Runner Model

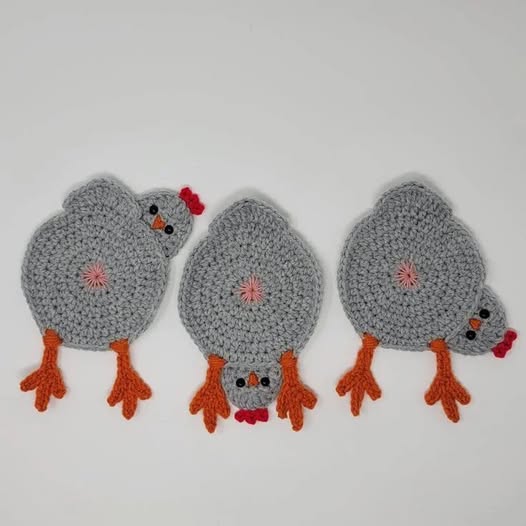
Crochet Chicken Coasters are a fun and functional way to add charm to your home decor. These adorable coasters are perfect for protecting your furniture while bringing a rustic farmhouse touch to your kitchen or dining area.
Whether you are a beginner or an experienced crocheter, making these coasters is an enjoyable and rewarding project.
Creating Crochet Chicken Coasters – Pattern allows you to customize colors, textures, and sizes to match your style. They also make excellent gifts for friends and family who appreciate handmade crafts.
This tutorial will guide you step by step through the process of crocheting these cute and practical coasters.
Using the right yarn, hook size, and stitch techniques will ensure that your coasters are sturdy and long-lasting. You will also learn how to add intricate details, such as a beak, comb, and eyes, to make your crochet chickens truly unique.
Before you start working on your Crochet Chicken Coasters – Pattern, gather all the necessary materials. Having the right tools will make the process smoother and more enjoyable.
Once you have all the materials ready, you can begin by making the base of your crochet chicken.
Now that you have your materials, let’s start crocheting your adorable Crochet Chicken Coasters – Pattern. Follow these steps carefully:
With these steps completed, your crochet chicken coaster will start taking shape beautifully.
One of the best aspects of making Crochet Chicken Coasters – Pattern is the ability to personalize them. Here are some ways to customize your project:
By adding your personal touch, your crochet chicken coasters will be truly one-of-a-kind.
To ensure your Crochet Chicken Coasters – Pattern remain in excellent condition, follow these care tips:
With proper care, your crochet chicken coasters will last for years and continue to add charm to your space.
1. Are crochet chicken coasters beginner-friendly?
Yes! This pattern is great for beginners as it uses basic stitches and simple shaping techniques.
2. Can I use acrylic yarn for this pattern?
While you can use acrylic yarn, cotton yarn is recommended for better durability and absorbency.
3. How long does it take to complete one coaster?
Depending on your skill level, one coaster can take between 30 minutes to an hour.
4. Can I sell the coasters made from this pattern?
Absolutely! Handmade coasters make excellent items for craft fairs or online shops.
5. What other shapes can I make using this pattern?
With some creativity, you can modify this pattern to create duck, owl, or even turkey coasters.
6. Do I need to block the finished coasters?
Blocking is optional but helps to keep the coasters flat and well-shaped.
Join our VIP broadcast list and gain access to exclusive patterns, all for free. As a VIP member, you’ll receive the best patterns daily, delivered directly to your device. ✨📱 It’s a unique opportunity to stay up-to-date with the latest trends and designs, curated just for you. Don’t miss out on enhancing your projects and discovering new inspirations with the best patterns every day! 🎨🔝
Creating Crochet Chicken Coasters – Pattern is a fun and rewarding experience that combines creativity with practicality. These charming coasters add warmth to any home and make wonderful gifts. With the right materials, a bit of patience, and some customization, you can create coasters that reflect your personal style.
We hope this tutorial has been helpful! Let us know your thoughts in the comments and feel free to share your creations. Happy crocheting!


