
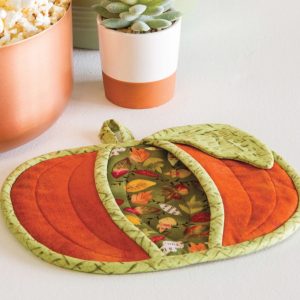
Pie Carrier Sewing Pattern

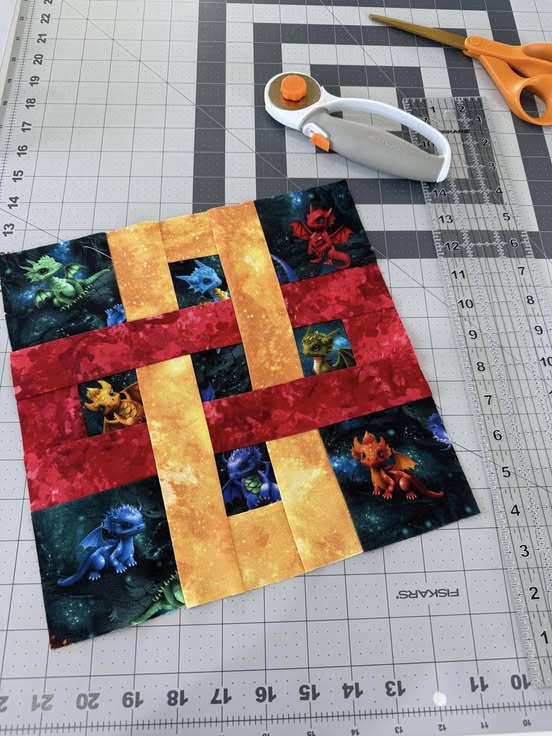
The Puzzle Box Quilt is a visually striking and modern quilt pattern that combines geometric shapes to create a mesmerizing design. This pattern is perfect for quilters of all skill levels, offering a structured yet playful arrangement that resembles an interlocking puzzle.
Whether you’re looking to create a bold statement piece or a subtle, harmonious quilt, the Puzzle Box Quilt provides endless possibilities for creativity.
In this tutorial, we will guide you through the steps to create your own Puzzle Box Quilt, from selecting fabrics to assembling the final piece.
You will learn essential quilting techniques, fabric cutting tips, and layout strategies to achieve a polished and professional look. By following these instructions, you will gain confidence in your quilting skills and produce a beautiful quilt that showcases your craftsmanship.
The Puzzle Box Quilt pattern is known for its versatility. It can be made using a variety of color schemes, from monochromatic tones to vibrant contrasts.
Additionally, the quilt size can be easily adjusted by increasing or decreasing the number of blocks. Let’s dive into the process of making this stunning quilt!
Before you start your Puzzle Box Quilt, it’s essential to gather the right materials. Having high-quality supplies ensures that your quilt turns out beautifully and lasts for years to come.
First, choose your fabrics. This quilt works best with a combination of light, medium, and dark tones to create a sense of depth. Cotton quilting fabric is ideal due to its durability and ease of handling. You can also opt for pre-cut fabric bundles like fat quarters or layer cakes to save time.
Next, select a rotary cutter, quilting ruler, and cutting mat. These tools will help you cut precise fabric pieces, ensuring that your quilt blocks fit together seamlessly. Sharp fabric scissors are also useful for trimming and final adjustments.
For sewing, use a sewing machine with a 1/4-inch foot to maintain consistent seam allowances. A neutral-colored thread is recommended for stitching to blend well with various fabric choices. Don’t forget quilting pins or clips to keep fabric pieces in place while sewing.
Lastly, gather batting and backing fabric. Batting provides warmth and structure to your quilt, while the backing fabric covers the underside. Choose a soft, high-quality batting that suits your climate and comfort preference.
Once your materials are ready, the next step in making your Puzzle Box Quilt is cutting and preparing the quilt blocks. Precision is key to ensuring that the final quilt has clean lines and balanced proportions.
Start by cutting your fabric into squares and rectangles. The exact dimensions depend on your quilt size, but a standard block size is 10×10 inches. Using a rotary cutter and quilting ruler, measure and cut carefully to maintain accuracy.
Arrange your fabric pieces into groups based on color and pattern. This step helps in visualizing the final design and prevents repetitive placements that might disrupt the puzzle-like effect of the quilt.
After organizing the fabric, press each piece with an iron to remove wrinkles. This will make sewing easier and more precise. If needed, use spray starch to stiffen delicate fabrics and prevent fraying.
Once the fabric pieces are pressed and sorted, label them according to their placement in the quilt layout. This will keep you organized as you begin the sewing process.
Now that your quilt blocks are ready, it’s time to start sewing them together. The assembly process is where the Puzzle Box Quilt truly takes shape.
Begin by sewing small units together to form larger blocks. Use a 1/4-inch seam allowance and press seams open or to one side, depending on your preference. This technique helps reduce bulk and creates a smoother quilt top.
As you sew, double-check the alignment of your fabric pieces. Precision is crucial to achieving a polished look, so take your time to match seams and corners accurately.
Continue sewing the blocks together in rows, pressing each row as you go. Once all the rows are assembled, join them together to form the complete quilt top. Pin the rows before sewing to ensure they align correctly.
After sewing the entire quilt top, press it one final time to smooth out any wrinkles. At this stage, inspect your work and make any necessary adjustments before moving on to the quilting process.
With the quilt top complete, the final step is quilting and finishing. This process involves stitching the layers together and adding binding to secure the edges.
Layer your quilt by placing the backing fabric right-side down, followed by the batting, and then the quilt top right-side up. Smooth out any wrinkles and use quilting pins or basting spray to hold the layers in place.
Choose a quilting design that complements your Puzzle Box Quilt pattern. Straight-line quilting is a great choice for beginners, while free-motion quilting can add intricate details for a more artistic touch.
Using a walking foot, sew along the quilt design, starting from the center and working outward. This prevents fabric shifting and ensures an even quilted texture. Take your time and adjust the tension settings on your machine as needed.
Once the quilting is complete, trim any excess batting and backing fabric. Attach the binding by sewing it around the edges, either by hand or machine. The binding provides a clean finish and secures the quilt layers together.
Finally, wash and dry your quilt to soften the fabric and give it a cozy feel. Your Puzzle Box Quilt is now ready to be used and cherished!
1. What is the best fabric for a Puzzle Box Quilt?
Cotton quilting fabric is the best choice due to its durability and ease of use. Pre-cut fabric bundles can also simplify the cutting process.
2. Can I make a Puzzle Box Quilt as a beginner?
Yes! This quilt pattern is beginner-friendly, as it consists of simple geometric shapes and straightforward sewing techniques.
3. How do I choose colors for my Puzzle Box Quilt?
Select a mix of light, medium, and dark tones to create contrast. Using a color wheel can help you find harmonious combinations.
4. What is the ideal quilt size for beginners?
A lap-sized quilt (approximately 50×60 inches) is a good starting point. It’s manageable in size while allowing enough room to practice techniques.
5. How do I maintain my Puzzle Box Quilt?
Wash your quilt in cold water with mild detergent and tumble dry on low. Avoid harsh chemicals that may weaken the fabric.
6. Can I use a different quilting technique for this pattern?
Absolutely! You can experiment with free-motion quilting, hand quilting, or decorative stitches to personalize your quilt.
Join our VIP broadcast list and gain access to exclusive patterns, all for free. As a VIP member, you’ll receive the best patterns daily, delivered directly to your device. ✨📱 It’s a unique opportunity to stay up-to-date with the latest trends and designs, curated just for you. Don’t miss out on enhancing your projects and discovering new inspirations with the best patterns every day! 🎨🔝
The Puzzle Box Quilt is a fun and rewarding project that allows for creativity and personal expression. By following this step-by-step guide, you have learned how to select materials, cut and prepare quilt blocks, assemble the quilt top, and complete the finishing touches.
Whether you’re making this quilt for yourself or as a gift, the result will be a beautiful and meaningful handmade creation.
We’d love to hear about your quilting experience! Leave a comment below with your thoughts, suggestions, or any questions you have about the Puzzle Box Quilt. Happy quilting!


