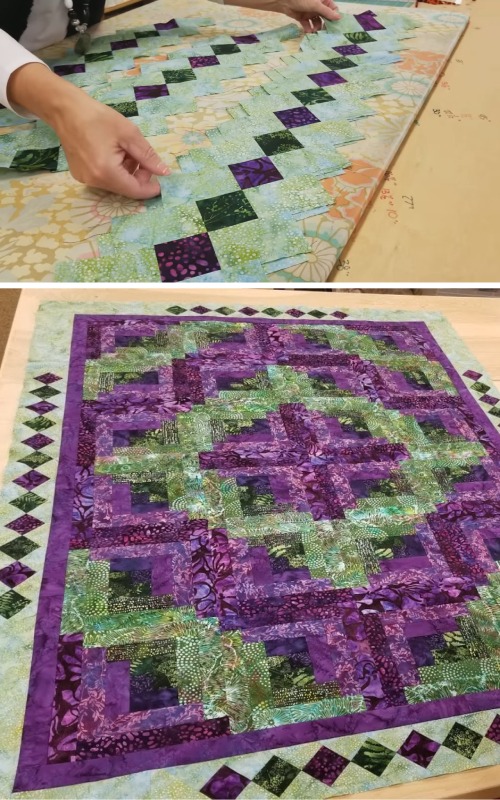
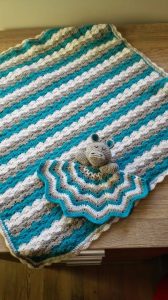
Adding a border to your quilt is one of the simplest ways to enhance its overall design. Easiest fancy borders for any quilt – TUTORIAL is a guide to help you create elegant and professional-looking edges without complicated techniques.
Whether you’re a beginner or an experienced quilter, these easy border ideas will transform your quilts effortlessly.
Advertising
Quilt borders serve both aesthetic and functional purposes. They frame your quilt, highlight the patterns, and provide extra stability to the edges.
With a few simple techniques, you can elevate a plain quilt into a stunning masterpiece. From classic straight borders to decorative scalloped or mitered edges, the right border can make all the difference.
In this tutorial, we will explore some of the easiest fancy borders for any quilt, offering step-by-step instructions and helpful tips. Let’s dive into the first technique and start transforming your quilts today!
1. Straight Borders – The Foundation of Every Quilt
Straight borders are the simplest and most commonly used borders. They provide a clean finish and work well with any quilt design.
Advertising
Measuring Your Quilt: Before cutting your border fabric, measure your quilt top accurately. Take measurements from the center instead of the edges to ensure even alignment.
Choosing the Fabric: Select a fabric that complements the main quilt design. You can opt for solid colors, subtle prints, or bold contrasts depending on the quilt’s overall look.
Cutting the Strips: Cut your fabric strips according to the measured size. Keep them slightly longer than needed to allow for adjustments.
Attaching the Borders: Sew the border strips to opposite sides of the quilt first, then trim the excess. Repeat for the remaining sides.
Pressing the Seams: Use an iron to press the seams outward. This ensures a neat and professional finish.
Final Touches: Inspect your work to ensure the borders are even. Adjust if necessary before moving to the next step.
2. Scalloped Borders – A Decorative and Elegant Finish
Scalloped borders add a graceful, curved edge to your quilt, making it look intricate yet easy to achieve with simple steps.
Marking the Scallops: Using a fabric marker, trace evenly spaced curves along the edge of your quilt. A round template or bowl can help achieve uniform scallops.
Cutting Along the Lines: Carefully cut along the marked scallop lines. Make sure to follow the curves precisely to maintain a symmetrical appearance.
Creating the Bias Binding: Since scalloped edges require flexibility, use bias-cut binding instead of straight-cut strips. Bias binding stretches easily around curves.
Sewing the Binding: Attach the bias binding to the quilt, following the curves. Clip notches along the inner curves to allow smooth attachment.
Pressing and Finishing: After stitching, press the binding outward and fold it over to the back. Hand-stitch or machine-sew to secure it in place.
Admiring Your Work: Scalloped borders bring an artistic touch to any quilt. Once finished, step back and admire your elegant new quilt edge.
3. Mitered Borders – A Professional and Seamless Look
Mitered borders create a seamless and polished appearance, especially when using patterned fabrics that need precise alignment.
Understanding Mitered Corners: Unlike straight-cut borders, mitered corners meet at a 45-degree angle, forming a smooth transition around the quilt.
Cutting the Border Strips: Cut border fabric strips slightly longer than the quilt sides to allow for the angled corners.
Attaching the Borders: Sew the borders to each side of the quilt, stopping 1/4 inch before the edge to allow for the mitered corner fold.
Folding the Corners: Fold one border over the other to form a diagonal seam. Use a ruler to mark a precise 45-degree angle.
Sewing and Trimming: Stitch along the marked line and trim the excess fabric. Press the seam open for a crisp finish.
Securing the Edges: Once all corners are mitered, check for consistency and press the entire border for a smooth appearance.
4. Patchwork Borders – A Creative and Colorful Touch
Patchwork borders are an excellent way to add variety and complement the quilt’s main design using fabric scraps or coordinated colors.
Selecting Fabric Pieces: Choose a mix of fabrics that match or contrast with the quilt top. This adds personality and depth to the design.
Cutting Patchwork Squares or Strips: Decide whether you want a checkerboard effect, diagonal strips, or a random patchwork pattern.
Arranging the Pieces: Lay out the fabric pieces before sewing to visualize the final look. Adjust the arrangement if needed.
Sewing the Patchwork Border: Join the pieces together to form a strip. Ensure that all seams are pressed flat for a neat finish.
Attaching the Border to the Quilt: Sew the patchwork border to the quilt edges, keeping the seams aligned for a seamless appearance.
Adding a Final Binding: To complete the quilt, attach a simple binding around the patchwork border for a refined edge.
FAQ – Frequently Asked Questions
1. What is the easiest quilt border for beginners?
The straight border is the easiest and most beginner-friendly. It requires simple measuring, cutting, and sewing techniques.
2. How do I choose the right quilt border?
Consider the style of your quilt. If it’s modern, go for a straight or mitered border. For a vintage look, scalloped or patchwork borders work best.
3. Can I add multiple borders to a quilt?
Yes! Layering different border styles can create a unique and eye-catching design. Just ensure they complement each other in color and size.
4. Do I need a special tool to create scalloped borders?
No, but using a round template like a bowl or plate will help you mark even scallops.
5. What is the best fabric for quilt borders?
Cotton is the most popular choice for quilt borders due to its durability and ease of handling. Blended fabrics can also work well.
6. How do I prevent wavy quilt borders?
Measure accurately, cut precisely, and avoid stretching the fabric while sewing to ensure smooth and even borders.
Join our VIP broadcast list and gain access to exclusive patterns, all for free. As a VIP member, you’ll receive the best patterns daily, delivered directly to your device. ✨📱 It’s a unique opportunity to stay up-to-date with the latest trends and designs, curated just for you. Don’t miss out on enhancing your projects and discovering new inspirations with the best patterns every day! 🎨🔝
Creating easiest fancy borders for any quilt – TUTORIAL doesn’t have to be complicated. With the right techniques, you can add a professional and stylish touch to your quilts without frustration. Whether you choose straight, scalloped, mitered, or patchwork borders, each style brings unique charm and character to your quilt.
VIDEO TUTORIAL
We hope this tutorial has provided useful insights into quilt border techniques. If you have any questions, tips, or suggestions, feel free to leave a comment. Happy quilting!


