
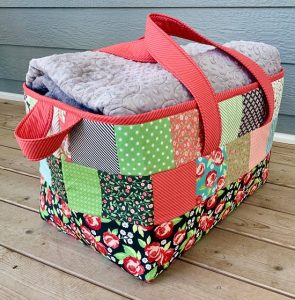
Pie Carrier Sewing Pattern

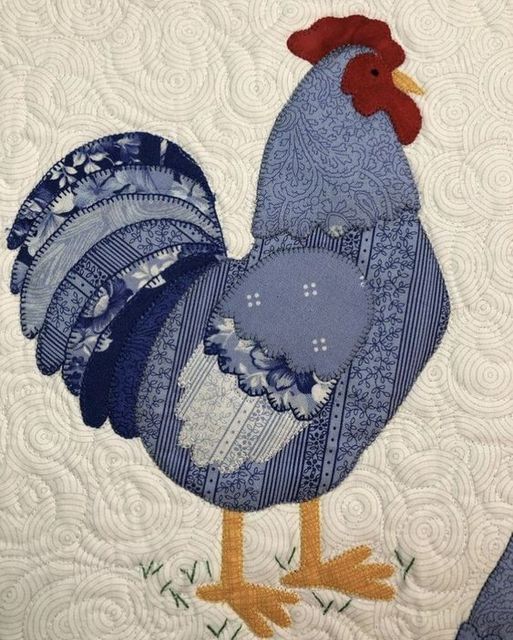
The Rooster Quilt Block Free Pattern is a charming and unique quilting design that brings a rustic and country-inspired touch to any quilt project.
This pattern features a beautifully detailed rooster, making it perfect for farmhouse-style decor, kitchen wall hangings, or personalized gifts.
Whether you’re an experienced quilter or just starting, this pattern is a fantastic way to develop your skills while creating something visually striking.
With its bold colors and intricate design, the Rooster Quilt Block Free Pattern can be adapted to different fabric choices and sizes. Whether you prefer traditional country hues or a modern interpretation with bright tones, this pattern allows for creativity and customization.
The versatility of this block makes it a favorite among quilting enthusiasts who love to incorporate nature and farm-themed designs into their work.
In this tutorial, we will walk you through the materials needed, step-by-step instructions, helpful quilting tips, and creative ideas for using your Rooster Quilt Block Free Pattern.
By following these guidelines, you will master this design and create a stunning quilt block that will be a standout piece in any project.
Before starting your Rooster Quilt Block Free Pattern, gathering the right materials is essential. The correct supplies will ensure precise cuts, smooth sewing, and a beautiful final result.
Choosing quality fabric is crucial. Cotton quilting fabric is the best choice for this pattern as it is easy to work with and provides durability. You can select solid colors or patterned fabrics to give your rooster a more textured and realistic appearance.
A rotary cutter and self-healing cutting mat are necessary for clean and accurate cuts. A quilting ruler will help maintain straight edges and precise measurements, ensuring your quilt block fits perfectly with others.
A sewing machine with a 1/4-inch quilting foot is recommended for consistent seam allowances. However, hand sewing is also an option for those who prefer a more traditional approach.
Thread selection plays an important role in quilting. Choose a high-quality cotton thread that matches or contrasts with your fabric choices, depending on the effect you want.
An iron and ironing board are essential for pressing seams as you go. Well-pressed fabric helps in achieving crisp, flat seams and improves the overall look of the quilt block.
The Rooster Quilt Block Free Pattern is made up of different fabric pieces carefully arranged to form the rooster’s shape. Follow these step-by-step instructions to create your own quilt block.
Start by cutting your fabric pieces according to the pattern template. You will need sections for the rooster’s body, comb, beak, legs, and background.
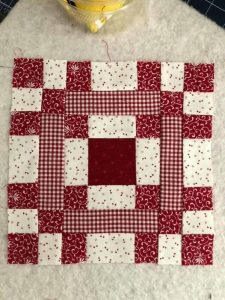
Begin assembling the rooster’s body first. Sew together the pieces that form the main structure of the rooster using a 1/4-inch seam allowance. Press the seams open to reduce bulk.
Next, add the rooster’s comb and beak. These smaller pieces require careful stitching to maintain their shape. Pin them in place before sewing to prevent shifting.
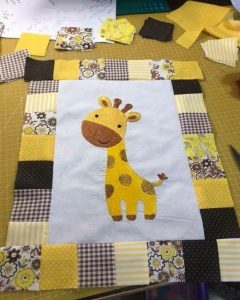
Move on to the legs and feet. Depending on the pattern design, you may use appliqué or piecing techniques to achieve a defined look.
Once the rooster is complete, attach the background pieces to frame the design. These sections should be cut slightly larger to allow for trimming and alignment adjustments.
Finally, press the entire quilt block to ensure flat seams and a smooth appearance. Square up the block by trimming any excess fabric to match the desired dimensions.
Creating a flawless Rooster Quilt Block Free Pattern requires patience and careful attention to detail. Here are some expert tips to help you achieve the best results.
Use high-contrast fabric colors to make the rooster design stand out. Bold reds, yellows, and blacks work well for the rooster’s features, while a neutral background helps highlight the main subject.
When cutting fabric pieces, always double-check measurements before making cuts. Accuracy is key in quilt piecing, and even small errors can affect the overall design.
Pin pieces in place before sewing, especially for curved or angled seams. This prevents fabric from shifting and ensures a more precise assembly.
Press seams open or to one side, depending on the pattern instructions. A well-pressed quilt block makes it easier to sew additional blocks together without added bulk.
If using appliqué techniques for smaller details, consider using fusible webbing to hold the fabric in place before stitching. This method provides added stability and prevents fraying.
Practice on scrap fabric before sewing the final pieces together. Testing stitch lengths, seam allowances, and fabric placement ensures a smoother process when working on the actual quilt block.
The Rooster Quilt Block Free Pattern is a versatile design that can be incorporated into various quilting projects. Here are some creative ideas to make the most of this pattern.
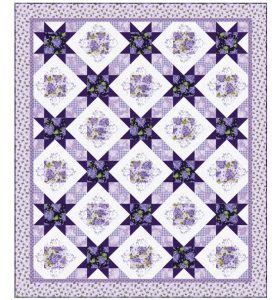
A rooster-themed quilt featuring multiple blocks with different fabric variations can create a beautiful farm-style aesthetic perfect for country homes.
Wall hangings using the Rooster Quilt Block Free Pattern make great decor pieces for kitchens, dining areas, or farmhouse-themed rooms.
Kitchen accessories like potholders, table runners, and placemats can be adorned with the rooster block to add a touch of rustic charm.
A quilted pillow featuring a single rooster block adds a pop of personality to living spaces and complements farmhouse-style decor.
Gift items such as tote bags or fabric baskets can incorporate the rooster design, making them unique and thoughtful presents for quilting enthusiasts.
Seasonal projects, such as fall or harvest-themed quilts, can use the Rooster Quilt Block Free Pattern to celebrate farm life and nature.
1. What size is the Rooster Quilt Block? The standard size varies but is typically 12×12 inches. However, you can adjust the dimensions according to your project needs.
2. What fabrics work best for this pattern? Cotton quilting fabric is ideal, but you can also use batiks or textured fabrics for added visual interest.
3. Can I use this pattern for a beginner quilting project? Yes! While it requires some precision, careful following of the pattern makes it manageable for beginners.
4. How do I join multiple Rooster Quilt Blocks together? You can sew them in a grid pattern with sashing or alternate them with other farm-themed blocks.
5. Can I use appliqué instead of traditional piecing? Yes, appliqué techniques can simplify some of the intricate details and make assembly easier.
Join our VIP broadcast list and gain access to exclusive patterns, all for free. As a VIP member, you’ll receive the best patterns daily, delivered directly to your device. ✨📱 It’s a unique opportunity to stay up-to-date with the latest trends and designs, curated just for you. Don’t miss out on enhancing your projects and discovering new inspirations with the best patterns every day! 🎨🔝
The Rooster Quilt Block Free Pattern is a delightful and engaging project for quilters of all skill levels. Whether you use it in a full quilt, a wall hanging, or home decor accessories, this charming block adds warmth and personality to any space.
By following this guide, you can create your own rooster quilt block with confidence and creativity. Experiment with different fabric choices, layouts, and quilting techniques to make the design truly your own.
We would love to hear from you! Share your thoughts, experiences, and project ideas in the comments. Happy quilting!


