
Pie Carrier Sewing Pattern

The Two Methods for Oversized Flying Geese Including Cutting Charts – Tutorial is an essential guide for quilters who want to create large and visually striking flying geese quilt blocks. These oversized blocks are perfect for modern quilt designs, bold borders, and statement pieces.
Whether you are a beginner or an experienced quilter, learning these two methods will make your quilting projects more efficient and precise.
Flying geese are one of the most versatile and commonly used quilt blocks. They can be used in traditional quilt layouts or incorporated into more contemporary designs.
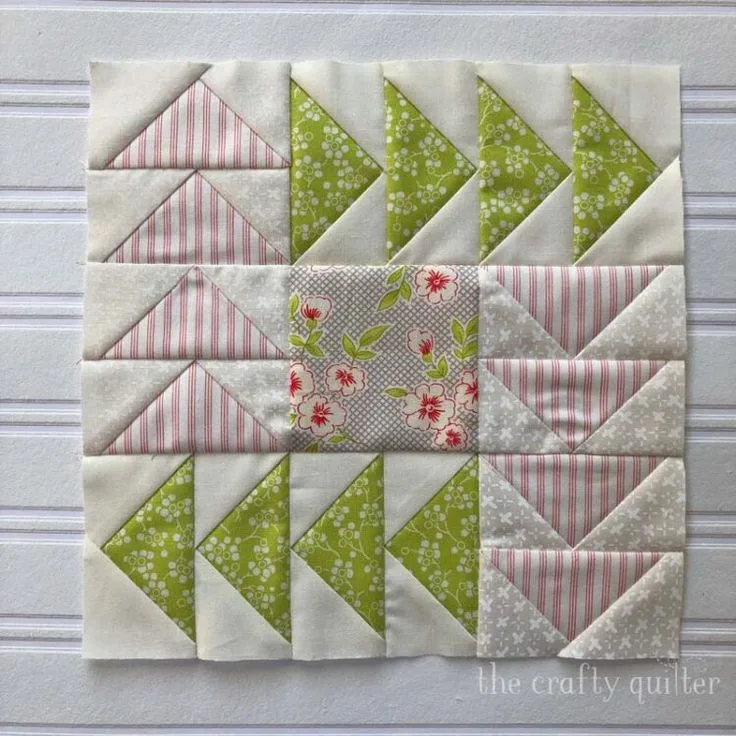
Making them oversized adds a dramatic effect, making your quilt stand out. The two methods outlined in this tutorial will ensure that you achieve accurate results while minimizing fabric waste.
In this article, we will explore Two Methods for Oversized Flying Geese Including Cutting Charts – Tutorial, covering the materials needed, step-by-step instructions, and helpful cutting charts for accurate fabric preparation. By the end, you’ll have the confidence to create beautiful flying geese blocks for your next quilt project.
Before you start making your oversized flying geese blocks, it’s important to gather the right materials. Having the proper tools and fabric will ensure accurate and professional results.
Choose high-quality quilting cotton for precision cutting and durability. Pre-wash your fabric if necessary to prevent shrinkage after the quilt is assembled.
A rotary cutter, cutting mat, and quilting ruler are essential for making clean and accurate fabric cuts. These tools will help maintain consistency in your quilt blocks.
Use high-contrast fabric combinations to make your flying geese blocks stand out. Light and dark fabric pairings work best to create a bold visual effect.
A sewing machine with a ¼-inch presser foot will help you achieve consistent seam allowances, which is crucial for maintaining accurate measurements.
Quilting pins or fabric clips will keep fabric layers aligned, reducing shifting while sewing.
Iron and pressing tools are important for keeping seams flat and ensuring crisp, professional-looking quilt blocks.
The stitch-and-flip method is a classic technique for making flying geese blocks. This method is easy to follow and great for beginners.
Start by cutting one large rectangle for the base of the flying geese block and two smaller squares for the corners. Reference the cutting chart below for accurate measurements.
Place a small square on one corner of the large rectangle, right sides together. Draw a diagonal line across the small square from corner to corner.
Stitch directly on the drawn line, then trim the excess fabric ¼ inch away from the seam. Press the triangle open.
Repeat the process on the opposite corner of the rectangle, ensuring the diagonal seam lines meet at the center.
After pressing both triangles open, your oversized flying geese block is complete. Trim to size if necessary.
Use this method when working with scrap fabric or when precision is not the main priority, as it tends to create some fabric waste.
The no-waste method is an efficient way to create four flying geese blocks at once without fabric waste. This technique is ideal for quilters who need multiple blocks quickly.
Cut one large square for the geese unit and four smaller squares for the corners. Refer to the cutting chart for precise measurements.
Place two small squares on opposite corners of the large square, right sides together. Draw a diagonal line from corner to corner across both small squares.
Sew a scant ¼-inch seam on both sides of the drawn line. Cut along the diagonal line and press open to reveal two partial flying geese units.
Place another small square on the remaining corner of each unit. Draw a diagonal line across each square.
Sew a scant ¼-inch seam on both sides of the drawn line, then cut along the diagonal line. Press open, and you will have four oversized flying geese blocks.
This method is perfect for mass-producing flying geese blocks with precision while eliminating fabric waste.
Using cutting charts helps ensure your flying geese blocks are the correct size. Below are recommended cutting measurements for different block sizes.
For a 4” x 8” finished block, cut one 9 ¼” square for the geese and four 4 ⅞” squares for the corners.
For a 5” x 10” finished block, cut one 11 ¼” square for the geese and four 5 ⅞” squares for the corners.
For a 6” x 12” finished block, cut one 13 ¼” square for the geese and four 6 ⅞” squares for the corners.
For a 7” x 14” finished block, cut one 15 ¼” square for the geese and four 7 ⅞” squares for the corners.
Using these cutting charts will help maintain accuracy, allowing you to create consistent and professional quilt blocks.
1. What is the best method for making oversized flying geese blocks?
Both methods work well, but the no-waste method is more efficient and eliminates fabric waste.
2. Can I use directional fabric for flying geese blocks?
Yes, but be mindful of how the pattern aligns when using directional prints.
3. How do I ensure accurate seams when sewing flying geese blocks?
Using a ¼-inch presser foot and pressing seams properly will improve accuracy.
4. What is the best way to trim flying geese blocks?
Use a quilting ruler to ensure straight edges and uniform block sizes.
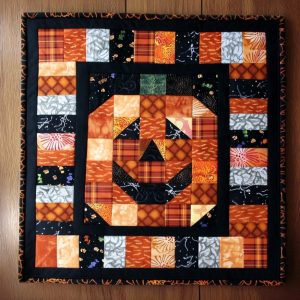
5. How can I use oversized flying geese in quilt designs?
They work well in borders, modern quilts, and as focal points in large-scale quilt patterns.
Join our VIP broadcast list and gain access to exclusive patterns, all for free. As a VIP member, you’ll receive the best patterns daily, delivered directly to your device. ✨📱 It’s a unique opportunity to stay up-to-date with the latest trends and designs, curated just for you. Don’t miss out on enhancing your projects and discovering new inspirations with the best patterns every day! 🎨🔝
The Two Methods for Oversized Flying Geese Including Cutting Charts – Tutorial provides quilters with easy and efficient ways to create oversized flying geese blocks. Whether you prefer the traditional stitch-and-flip method or the no-waste four-at-a-time technique, both methods ensure accurate and professional results.
We hope this tutorial has helped you master oversized flying geese blocks. Have you tried these methods? Share your experience and thoughts in the comments below! Happy quilting!


