
Crochet Multi-Purpose Blouse, Shawl, Runner Model

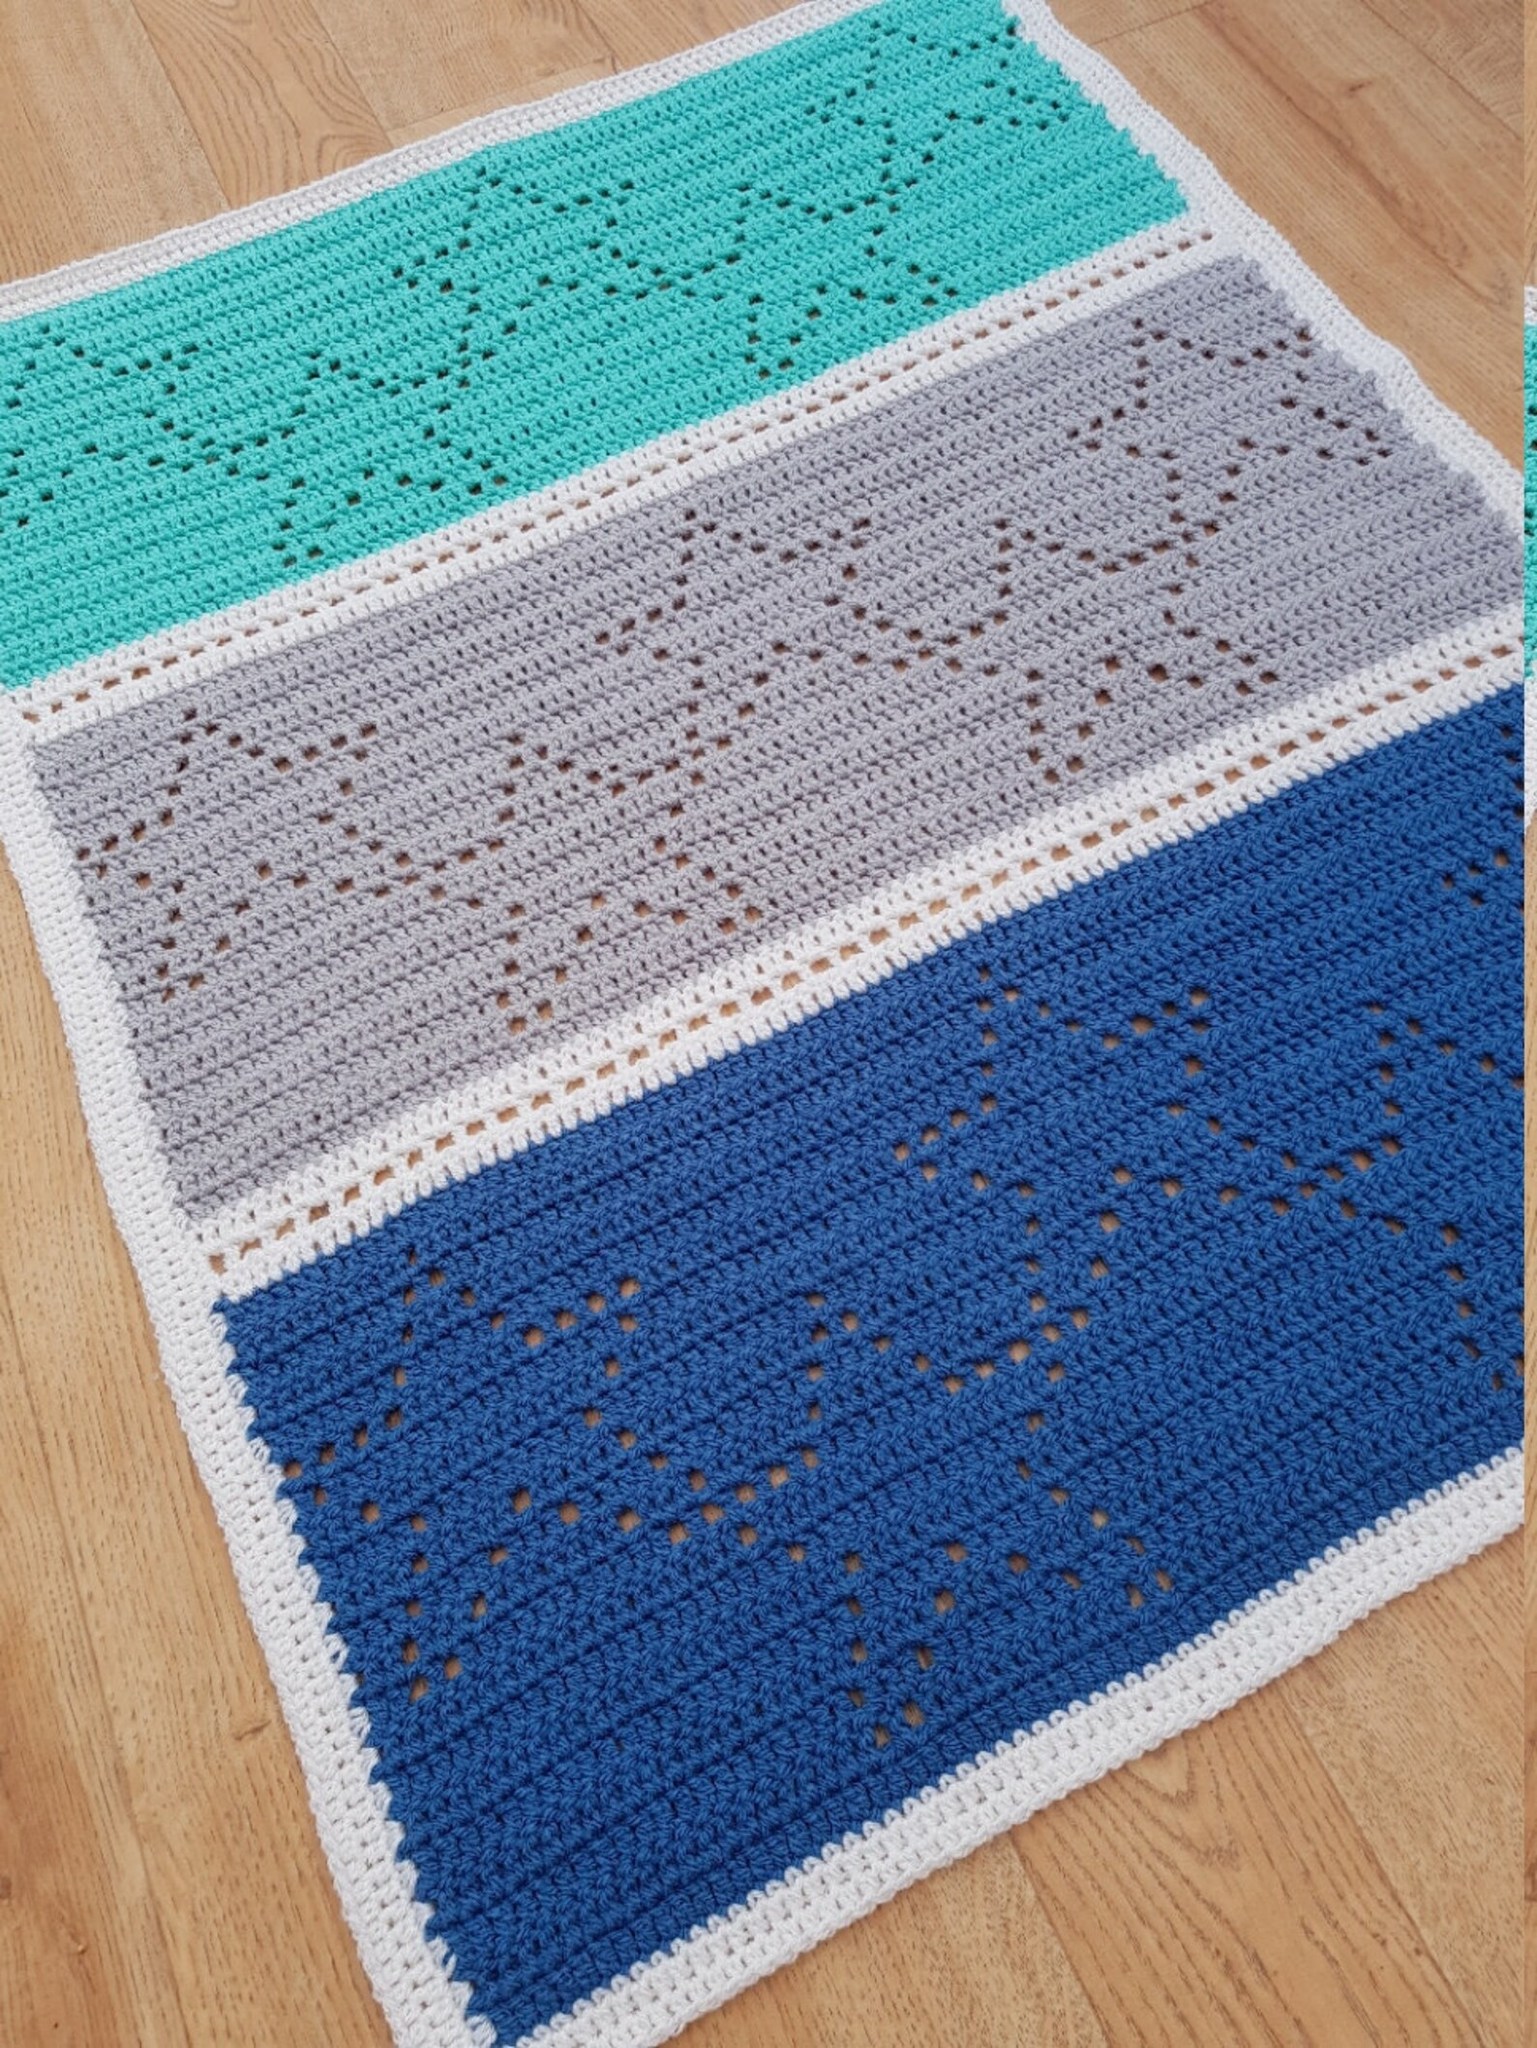
The Crochet Star Links Blanket Pattern is a stunning and unique design that brings warmth and elegance to any space. This pattern features interlocking star shapes that create a visually appealing and intricate texture, perfect for blankets, throws, and baby covers.
Whether you are a beginner looking for a new challenge or an experienced crocheter eager to try something different, this pattern will surely captivate you.
Crafting a Crochet Star Links Blanket Pattern is not only an enjoyable experience but also a rewarding one. The linked stars create a mesmerizing effect, making it an excellent gift or a personal keepsake. By using different yarn colors, you can customize the blanket to suit any décor, making it a versatile addition to your crochet projects.
In this tutorial, we will walk you through the process of creating this gorgeous pattern step by step. From selecting materials to final touches, you will find all the necessary details to ensure a smooth and enjoyable crocheting journey. Let’s get started on crafting your very own Crochet Star Links Blanket Pattern!
To begin your Crochet Star Links Blanket Pattern, you need to gather all the necessary materials. Having the right tools will ensure your project turns out just as you envision.
The choice of yarn color plays a crucial role in the final design. You can opt for monochrome shades for a sophisticated look or go for vibrant hues for a more playful and eye-catching effect. Selecting high-quality yarn ensures durability and softness, making your blanket both comfortable and long-lasting.
Using a comfortable crochet hook that matches your yarn weight is essential. If you are a beginner, practicing the stitch pattern on a small swatch before starting the full blanket can be helpful. Keeping stitch markers handy will make it easier to follow the pattern accurately.
Properly maintaining your materials before and after the project will extend the longevity of your crocheted blanket. Store your yarn in a dry place, and always clean your crochet hooks after use to keep them in good condition.
Understanding the essential stitches used in the Crochet Star Links Blanket Pattern is key to mastering this design. Below are the primary stitches you need to know:
To begin the pattern, you will start with a chain foundation. The star stitch is created by pulling up loops in a specific sequence, forming a star-like shape. Practicing this stitch beforehand will make the pattern easier to follow.
The stitch tension is important in achieving a uniform look. Keeping consistent tension ensures the stars link perfectly. Adjusting your grip on the yarn and hook can help maintain even tension throughout the project.
If you are new to the star stitch, it is beneficial to practice on a small swatch before committing to the entire blanket. This way, you can become familiar with the stitch formation and how it connects to create the star link effect.
Now that you have your materials and knowledge of the necessary stitches, let’s start the Crochet Star Links Blanket Pattern:
The repetition of the star stitch across the rows creates the mesmerizing linked pattern. Keeping track of stitch count ensures the alignment remains perfect. If you make a mistake, unraveling a few stitches instead of an entire row helps in easy corrections.
Blocking the finished blanket can enhance the stitch definition. Simply lay the blanket flat, pin it into shape, and lightly steam block for a professional finish.
Personalizing your Crochet Star Links Blanket Pattern makes it a one-of-a-kind piece. Here are some ideas to customize it:
A multi-colored approach enhances the visual appeal. Combining different textures and patterns can bring out a unique charm. Adding a personal touch to the border design gives it an elegant finish.
Using lightweight yarn for summer blankets or thicker yarn for winter throws provides seasonal versatility. Making sample swatches before finalizing helps in achieving the desired texture and look.
Q1: Is this pattern beginner-friendly? A1: Yes! While the star stitch may seem challenging at first, with practice, beginners can master it easily.
Q2: How long does it take to complete this blanket? A2: The time required depends on the size and your crochet speed. A medium-sized blanket may take a few days to a week.
Q3: What is the best yarn type for this pattern? A3: Soft and durable yarn, such as acrylic or cotton, works best to maintain stitch definition and comfort.
Q4: Can I use different hook sizes? A4: Yes! Adjusting the hook size can alter the blanket’s texture and drape.
Q5: How do I care for my crochet blanket? A5: Wash gently in cold water and air dry to maintain its softness and durability.
Join our VIP broadcast list and gain access to exclusive patterns, all for free. As a VIP member, you’ll receive the best patterns daily, delivered directly to your device. ✨📱 It’s a unique opportunity to stay up-to-date with the latest trends and designs, curated just for you. Don’t miss out on enhancing your projects and discovering new inspirations with the best patterns every day! 🎨🔝
The Crochet Star Links Blanket Pattern is a beautiful and rewarding project for crocheters of all levels. This pattern combines elegance, warmth, and creativity, making it perfect for personal use or as a thoughtful handmade gift. With step-by-step instructions, customization ideas, and useful tips, you can create a stunning blanket that reflects your style.
Have you tried making this pattern? Share your thoughts, experiences, and any modifications you made in the comments below. Happy crocheting!


