
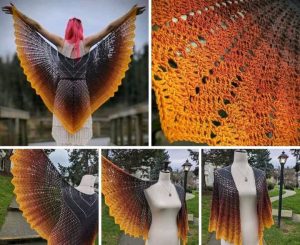
Crochet Multi-Purpose Blouse, Shawl, Runner Model

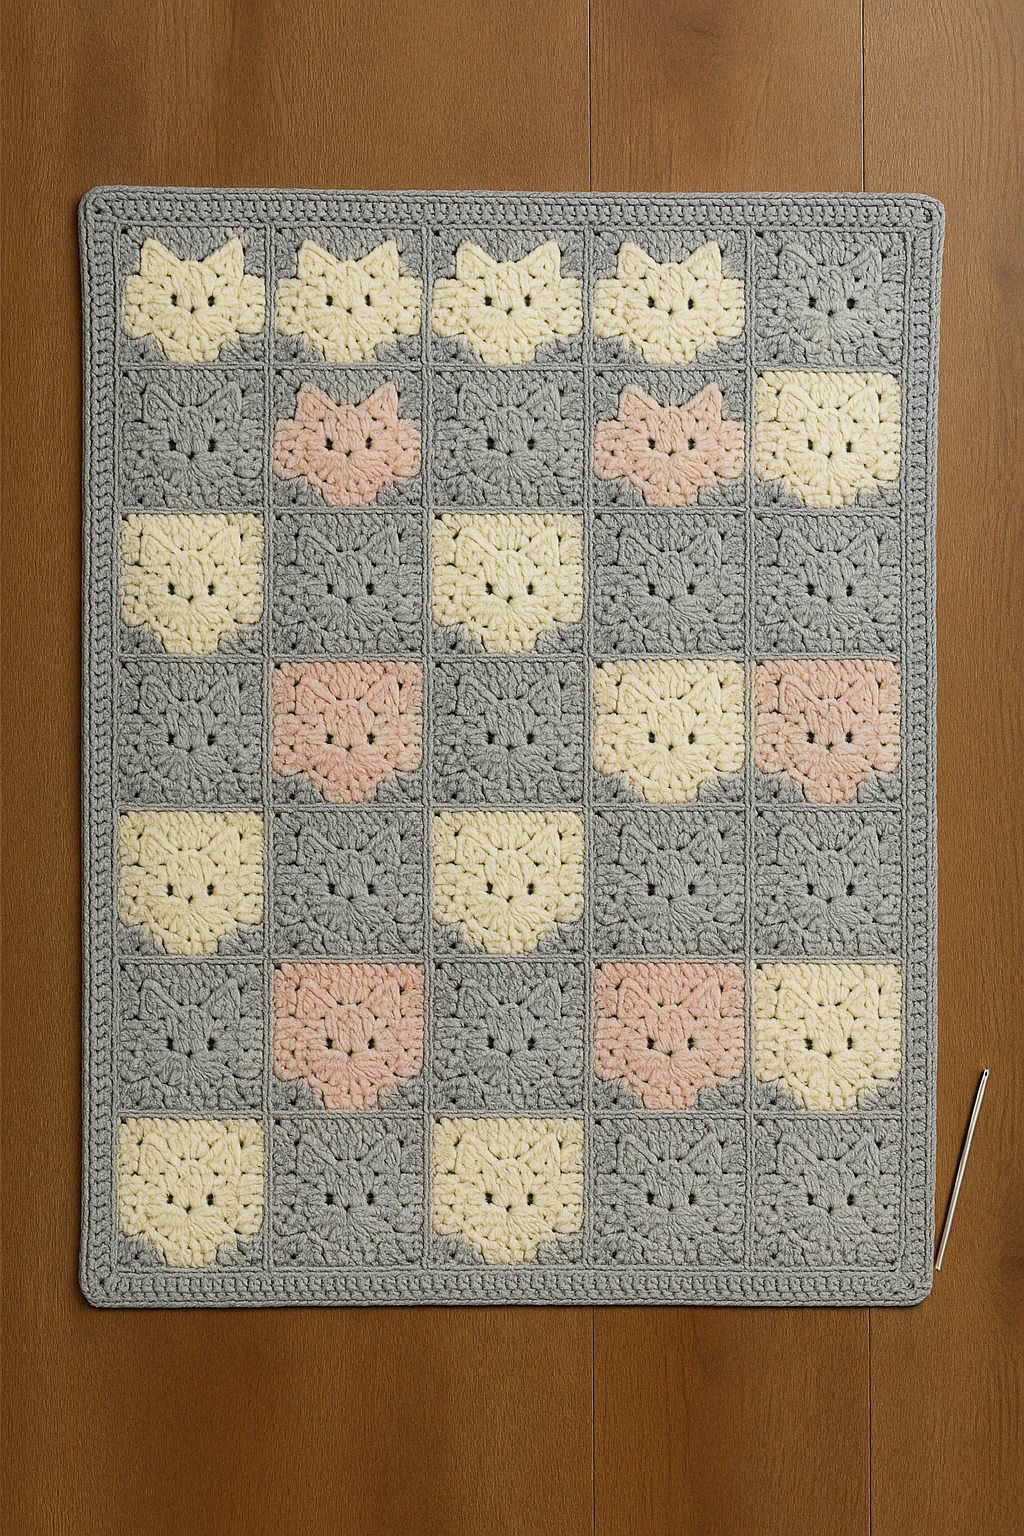
If you’re looking to mix cuteness with classic crochet, the Cat Granny Square Blanket – Full Tutorial is just what you need. Combining the timeless charm of granny squares with adorable cat motifs, this project is a purr-fect blend of fun and coziness.
Whether you’re a beginner or a seasoned crocheter, this blanket will be a heartwarming addition to your handmade collection.
The beauty of the Cat Granny Square Blanket – Full Tutorial lies in its versatility. You can mix and match yarn colors, add playful details to each cat face, and adjust the blanket size to fit your space—be it a baby blanket, a cozy lap throw, or a full-size bedspread. Each square is a mini-project on its own, making it manageable and ideal for crocheting on the go.
This project also makes a wonderful gift for cat lovers. Each square you crochet becomes a loving tribute to feline friends, allowing you to showcase your creativity and affection. Let’s dive into this joyful and rewarding crochet journey together!
To begin your Cat Granny Square Blanket – Full Tutorial, gather soft and durable yarn in your chosen palette. Acrylic and cotton blends are excellent choices due to their ease of care and comfort.
Select a crochet hook that suits your yarn weight. Most worsted-weight yarns pair well with a 5.0mm hook, but always refer to the yarn label for best results. A good grip and comfortable handle make longer sessions easier on your hands.
You’ll also need a yarn needle for weaving in ends, scissors, and optional stitch markers. These simple tools will help you stay organized as you create each granny square.
For the cat face details, you might want black and pink yarn for the eyes, nose, and whiskers. Safety eyes are also a cute addition, especially if you’re making this as a children’s blanket.
Create a test granny square to check your gauge and ensure your squares will line up evenly during assembly. It’s also a chance to practice your cat motif before committing to the full design.
Make a plan for your color layout. Sketching your layout helps visualize the finished piece and keeps your color choices balanced and visually pleasing.
Each square in the Cat Granny Square Blanket – Full Tutorial starts with a traditional granny square base. Begin with a magic ring and work your first few rounds in your chosen background color.
Once you’ve completed the base, it’s time to crochet the cat face. Use contrasting yarn to create a circular face that stands out from the square background. This adds both texture and character to each block.
For the ears, crochet two small triangle shapes and stitch them to the top of the cat face. These can be the same color as the face or in a contrasting shade for a playful twist.
Next, add facial features. Use embroidery to create eyes, a small triangular nose, and whiskers. If using safety eyes, be sure to attach them securely before closing the square.
Repeat this process for each square, creating as many cat faces as needed to reach your desired blanket size. Mixing in a few plain granny squares adds variety and lets the cat faces stand out more.
Once all your squares are ready, block them gently to even out the edges and ensure a uniform size. This step makes joining them much easier and results in a polished finish.
With your cat squares complete, the next step in this Cat Granny Square Blanket – Full Tutorial is joining them together. You can use the slip stitch, single crochet, or the invisible mattress stitch method.
Lay out your squares in rows on a large surface and experiment with arrangements. Balance your colors and mix up the positions of the cat faces for visual interest.
Join the squares row by row. Be consistent with your joining method to keep your seams even and neat. Some crocheters prefer to join as they go, while others complete all blocks before assembly.
After connecting rows, join the columns to complete the entire blanket top. Be sure to align the corners properly to avoid puckering or uneven edges.
Now it’s time to add a border. A few rounds of double crochet, shell stitches, or picots can add charm and definition to the edges of your blanket. Choose a border color that complements your squares.
Finally, weave in all loose ends and trim any excess yarn. Give your finished blanket a light steam block to relax the stitches and smooth out the joins.
The Cat Granny Square Blanket – Full Tutorial is all about creativity. Don’t be afraid to add your personal touch! Use variegated yarns for fun color transitions or mix textures for visual appeal.
You can also vary the expressions of the cat faces. Make some look sleepy, surprised, or happy by adjusting the eye and mouth shapes. This adds personality and uniqueness to each square.
Add names or initials with surface crochet or embroidery to personalize the blanket even more. This is especially lovely if gifting the blanket to a loved one.
For seasonal themes, adjust the colors—warm autumn shades, pastel spring hues, or even festive red and green combos for holidays. The possibilities are endless.
In terms of care, machine-washable yarns make this blanket easy to maintain. Wash on a gentle cycle and lay flat to dry to preserve shape and color.
Store your blanket in a dry, cool space. If giving as a gift, wrap it in tissue paper and add a handmade tag for an extra special touch.
Is this project suitable for beginners?
Yes! While the cat faces add a bit of detail, the basic granny square and assembly techniques are beginner-friendly. Take your time and enjoy the learning process.
How many squares do I need for a full blanket?
It depends on your square size and desired final dimensions. For example, a 5” square arranged in a 10×12 grid creates a 50”x60” blanket.
Can I make this blanket using leftover yarn?
Absolutely. This pattern is great for using up scraps, especially for different colored cat faces and backgrounds.
What if I don’t want to add faces to every square?
That’s fine! Mixing plain and cat-faced squares creates a charming contrast and makes the design more dynamic.
Can I use other animal faces instead of cats?
Definitely! Once you master the technique, you can adapt the pattern for dogs, bears, bunnies, or any other favorite animal.
What is the best way to join granny squares?
It depends on your style. Slip stitch and mattress stitch give a flat finish, while single crochet adds texture. Try both and see what you like best.
The Cat Granny Square Blanket – Full Tutorial walks you through a fun, customizable project that blends classic crochet with whimsical cat designs. From choosing your yarn and stitching each adorable square to assembling and adding final touches, this project is full of joy from start to finish.
Whether you’re making this blanket for yourself, a friend, or a beloved pet, it’s a satisfying project that showcases your creativity. Plus, it’s a great stash-buster and a perfect introduction to motifs and joins.
We’d love to hear what you think! Leave a comment with your experience, ideas, or suggestions for future patterns. Your feedback inspires more cozy, cat-loving creations!


