
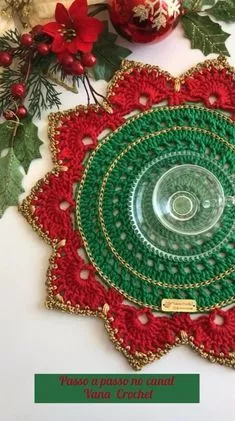
Crochet Multi-Purpose Blouse, Shawl, Runner Model

If you’re searching for a stylish twist on a classic crochet motif, the Mitered Granny Square – Complete Tutorial is the perfect starting point. This square features a clever diagonal design that gives your project a modern geometric flair while maintaining the cozy charm of traditional granny squares.
With this complete guide, you’ll learn everything you need to confidently create mitered squares, perfect for blankets, cushions, bags, and more.
The Mitered Granny Square stands out because of its construction, which shifts from the typical circular rounds of a traditional granny square to a structured, angular build.
This variation allows for bold color blocking and exciting layout opportunities in your finished projects. It’s a wonderful pattern for crocheters who want to experiment with something new while staying in the comfort zone of basic stitches.
Whether you’re a beginner looking to build your skills or an experienced crocheter interested in creative new layouts, this Mitered Granny Square – Complete Tutorial will walk you through each step.
We’ll cover materials, stitch techniques, pattern structure, and ideas for finishing and combining your squares into larger projects.
Before starting your Mitered Granny Square, it’s important to gather the right supplies. Fortunately, this project doesn’t require anything fancy, making it ideal for using up leftover yarn from your stash. Choose medium-weight (worsted) yarn in two or more colors to create contrast and highlight the mitered effect.
You’ll also need a compatible crochet hook—usually a 4.0 mm (G) or 5.0 mm (H) hook works well with worsted yarn. Be sure to check the yarn label to match the hook size for best tension and stitch definition.
A pair of sharp scissors and a yarn needle for weaving in ends are essential tools. If you want to track your stitch count more easily, consider using stitch markers, especially when learning the pattern for the first time.
Many crocheters like to keep a printed or digital version of the Complete Tutorial handy. Visual learners may benefit from diagrams or charts that map out the square’s construction row by row.
The great thing about mitered squares is their flexibility. You can crochet them in a single color for a minimalist look, or mix and match vibrant colors for a playful, patchwork-style blanket.
Lastly, work in a well-lit area with enough space to lay out your squares as you go. Seeing the color progression and how your pieces line up will help you decide on layout options later in the project.
To begin your Mitered Granny Square, start with a foundation chain that forms the base of your first corner. This method differs from the classic granny square, which typically starts in the center. Here, you’ll be working diagonally outward, creating a clean mitered effect.
Your first row will include double crochets and chain spaces to establish the corner point. These chain spaces are essential as they allow the square to “turn” and develop the angled look. Always work into the chain spaces, not just into the stitches, for better shaping.
As you continue adding rows, you’ll notice the square forming as each side grows evenly. It’s crucial to maintain consistent increases at the center corner. This is what creates the symmetrical, mitered layout characteristic of this pattern.
To switch colors, do so at the end of a row for a cleaner transition. Changing colors frequently enhances the contrast and helps emphasize the diagonal structure. Secure the new color and weave in the old end as you go to minimize finishing work.
Repeat the established row pattern until the square reaches your desired size. Most crocheters make squares that are 6×6 inches or 8×8 inches for blankets, but feel free to experiment with scale.
Once finished, fasten off and weave in any remaining yarn tails with a yarn needle. Gently block your square if necessary to straighten the edges and perfect its shape.
After completing your Mitered Granny Square, you might wonder how to use it. These squares are incredibly versatile and can be joined in various configurations to create stunning finished pieces. Their structured design makes them ideal for modern aesthetics.
One popular use is to make blankets or throws. The strong diagonal lines of each square create exciting visual patterns when joined together. Arrange them in alternating color sequences or rotate them for a diamond-style layout.
Cushion covers are another excellent option. A set of four mitered squares sewn together creates a striking pillow front. Add a fabric backing and you’ve got a lovely home décor piece with a handmade touch.
For wearables, consider turning mitered squares into scarves or shawls. Join the squares end to end, edge them with a solid border, and enjoy a warm, eye-catching accessory.
You can also use the squares for bags. A few well-placed mitered squares can be sewn together and lined with fabric to form the body of a colorful tote or project bag.
Smaller mitered squares can be turned into coasters or pot holders. Add a few extra rows or use a cotton yarn for heat resistance and durability in the kitchen.
Finally, mix and match your mitered squares with traditional granny squares or other motifs for a truly unique blanket or project. This gives your work both variety and cohesion while showcasing your creativity.
Once you’ve made several Mitered Granny Squares, it’s time to think about how to join them. There are many techniques to consider, and the right one depends on the look you want for your final project.
The whip stitch is a simple method that creates a nearly invisible seam. Place two squares with the right sides together and sew through the back loops only. This creates a flat and smooth join.
For a decorative edge, try the join-as-you-go method using single crochet stitches. This creates a visible ridge that adds texture and definition between squares. It’s also quicker because you join while crocheting the final round.
Block your squares before joining them to ensure consistency in size. Blocking helps relax the fibers and makes it easier to line up edges accurately, especially if you used multiple yarn types or color changes.
Consider adding a border once all squares are joined. A solid-color border in single crochet or double crochet rounds frames your project and ties everything together. Use a neutral tone or repeat a color from the squares for harmony.
If your project will be used frequently, such as a baby blanket or throw, reinforce the seams and weave in ends securely. This ensures durability and long-lasting beauty.
Once complete, wash your finished item according to the yarn’s care instructions. Lay it flat to dry to maintain shape. Your mitered granny square creation is now ready to use, gift, or display proudly!
What makes the Mitered Granny Square different from a traditional granny square?
The mitered version is built from the corner outward, forming a diagonal design, whereas traditional granny squares are typically worked from the center outward in rounds.
Is the Mitered Granny Square beginner-friendly?
Yes, it’s perfect for confident beginners familiar with basic stitches like double crochet and chain spaces. With the Complete Tutorial, the pattern becomes easy to follow.
Can I use leftover yarn for this project?
Absolutely! This is a great stash-busting project. Using various colors enhances the square’s design and makes each one unique.
How many squares do I need to make a blanket?
It depends on the blanket size. For a throw, you might need around 42–56 squares measuring 6×6 inches each. Adjust according to your desired dimensions.
Can I mix mitered squares with other square motifs?
Yes! Mixing different types of squares adds interest and creativity. Just ensure all squares are the same size before joining.
How do I prevent the square from curling or twisting?
Maintaining even tension and proper increases at the center will help. Blocking your squares also ensures they lay flat.
The Mitered Granny Square – Complete Tutorial offers an inspiring and versatile way to update a beloved crochet classic. With clear instructions, a simple stitch pattern, and endless color possibilities, this project is sure to become a favorite in your creative journey.
You’ve learned how to gather materials, follow the stitch pattern, use your squares creatively, and finish your work with clean, professional touches. Whether you make a bold blanket, a fun pillow, or even stylish accessories, mitered squares allow you to express your personality in every stitch.
We’d love to hear from you! Have you tried this pattern? Share your honest thoughts, questions, or ideas in the comments below. Your feedback helps others and brings the crochet community closer together.


