
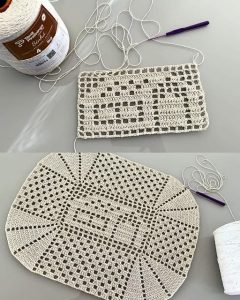
Crochet Multi-Purpose Blouse, Shawl, Runner Model

If you’re searching for a vibrant and detailed project to elevate your crochet skills, this Crochet Peacock Pattern – Full Tutorial is exactly what you need.
Designed to bring elegance and charm to your handmade creations, this tutorial walks you through every step of creating a majestic peacock using yarn and your favorite hook.
Whether you’re decorating a child’s room, crafting a unique gift, or simply exploring new creative territory, this pattern is both fulfilling and fun.
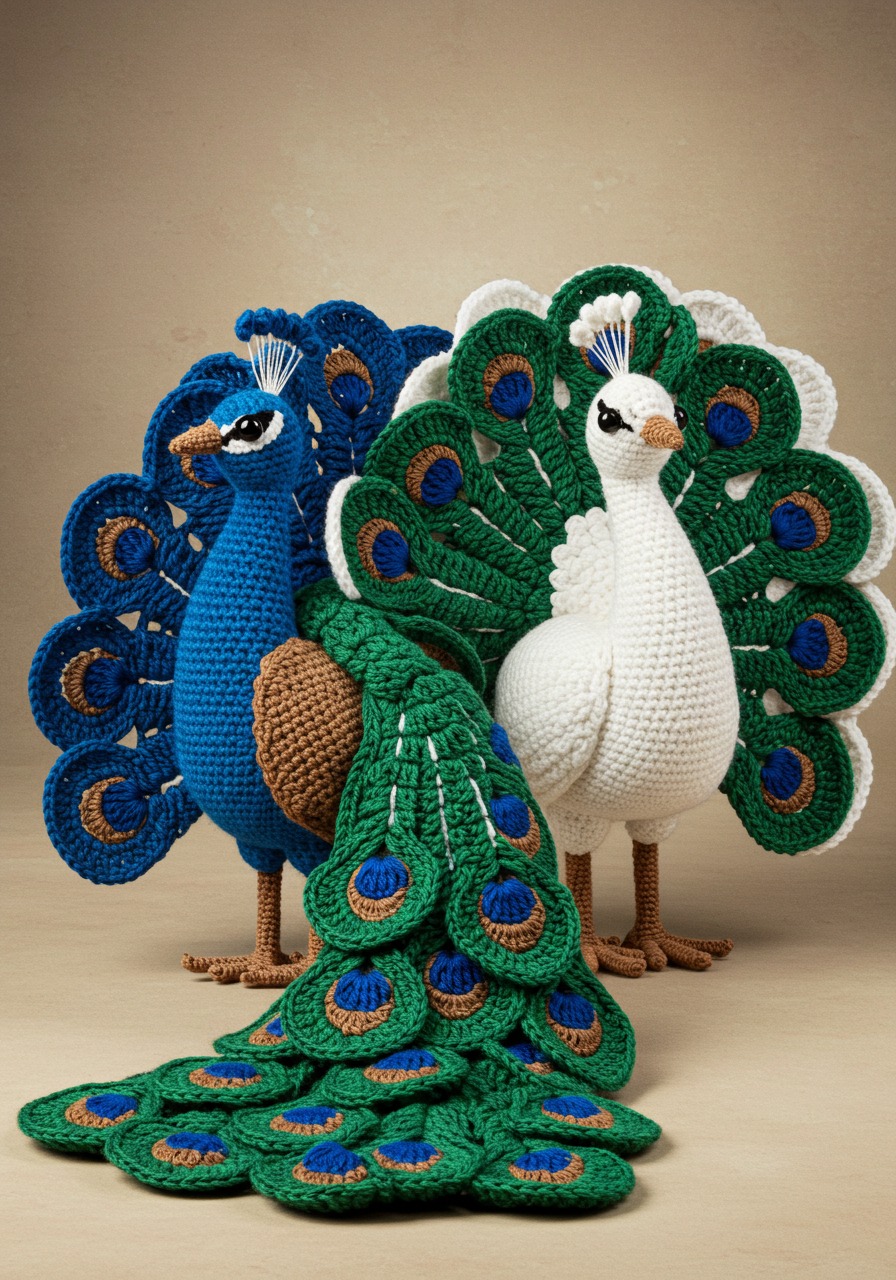
The beauty of the Crochet Peacock Pattern – Full Tutorial lies in its intricate details—graceful feathers, vivid color transitions, and charming features that mimic the real bird in stylized form.
Despite its elaborate appearance, this tutorial is approachable for confident beginners and exciting for experienced crafters alike. With clear instructions and flexibility for customization, you’ll be amazed by what you can create with just a few supplies.
In this article, you’ll learn how to choose materials, understand construction steps, assemble the peacock, and even customize it with your unique flair.
Optimized for SEO and compliant with Google AdSense policies, this guide is educational, original, and crafted to inspire. Let’s begin your peacock journey!
To get started with your Crochet Peacock Pattern – Full Tutorial, gather all the necessary supplies to ensure a smooth and enjoyable crafting experience.
You’ll want to use worsted weight yarn in bold peacock colors—think vibrant blues, rich greens, deep purples, and a touch of gold or bronze. Acrylic yarn works well for structure and color retention, but cotton is also a great option for a sturdier finish.
A 3.5 mm or 4 mm crochet hook is typically ideal for amigurumi-style patterns. Tighter stitches help your project hold its shape and keep stuffing from poking through.
Additional materials include polyester fiberfill for stuffing, safety eyes (or embroidered ones for a child-safe version), a yarn needle for sewing pieces together, and scissors for finishing touches.
You may want to add embellishments like sequins or beads to the tail feathers for a shimmering effect. These are optional but can enhance the final presentation significantly.
If you plan to hang or display your peacock, consider adding a loop at the top or a small weighted base for stability. Craft wire can also be used to make the tail poseable.
Choosing high-quality materials will elevate your final result, so don’t hesitate to use your favorite yarn brand and invest in the best notions you have.
Now that you have your materials, let’s dive into the actual construction. The Crochet Peacock Pattern – Full Tutorial is divided into manageable parts, starting with the body and head.
Begin by crocheting a magic ring and working in the round to form a sphere for the head. Use single crochet stitches throughout, increasing evenly to create a rounded shape.
After the head, continue working the same method for the body, making it slightly larger and oval-shaped. Maintain a consistent tension to avoid bulging or twisting in the shape.
Before closing the body, stuff it firmly with polyester filling. Don’t overstuff—just enough to give it shape without stretching the stitches.
Once the body is complete, attach the head securely. Use a whip stitch with matching yarn and take your time to align the pieces properly so the peacock sits upright.
Add facial features like safety eyes, a beak (made with orange or yellow yarn), and a small crest on top of the head using a few strands of thread or chain stitches.
Finally, embroider or sew a line to define the neck area, separating the head visually from the body and giving the peacock a more realistic posture.
The highlight of the Crochet Peacock Pattern – Full Tutorial is the extravagant tail. This is where creativity and patience truly pay off with an eye-catching design.
Start by crocheting several oval-shaped feathers in your chosen colors. Each feather is worked flat and shaped using increases and decreases to form a pointed end.
For extra dimension, create two or three layers of feathers. The bottom layer can be larger and darker, with smaller, brighter feathers layered above to mimic real plumage.
Embroider eye spots or add tiny beads to the center of each feather to replicate the peacock’s iconic tail pattern. Use gold, blue, and black to match the bird’s natural coloring.
Join the feathers together by sewing them onto a semi-circular base made of felt or crocheted fabric. This keeps them evenly spaced and prevents sagging.
Once the tail piece is complete, securely attach it to the back of the peacock’s body. Reinforce this step well, as the tail may be heavier depending on how many feathers you include.
Pose the feathers slightly outward in a fan shape for a stunning display. Use light blocking or light wiring if needed to hold the shape in place.
One of the best aspects of the Crochet Peacock Pattern – Full Tutorial is how adaptable it is. Let’s explore ways to personalize your peacock and how to display it beautifully.
Change the size by adjusting the yarn weight and hook size. For a tiny keychain version, use fine cotton yarn and a 2 mm hook. For a plush decor piece, use bulky yarn and a 5 mm hook.
Customize the colors to match your décor or season. A pastel peacock works well for spring themes, while jewel tones make a dramatic holiday decoration.
Add embroidery or surface crochet on the body for texture. Swirls, scallops, or mandala-like patterns bring a whimsical touch to the simple form.
For a toy version, embroider all features instead of using beads or plastic parts to make it baby-safe. You can also attach a rattle or crinkle paper inside for sensory play.
Create a standing version by adding weighted pellets to the base or inserting small rods for legs. Felt or pipe cleaners also work well for shaping feet and giving stability.
Display your finished project on a shelf, hang it as a mobile, or use it as a centerpiece for themed parties or cultural events. The possibilities are endless and entirely up to your imagination.
1. Is the Crochet Peacock Pattern – Full Tutorial suitable for beginners?
Yes, confident beginners can follow this pattern. It requires knowledge of basic stitches and working in the round but includes straightforward instructions throughout.
2. How long does it take to complete a peacock?
Depending on the size and detail, it can take between 6 to 12 hours. Taking breaks and working on one section at a time helps make it enjoyable and manageable.
3. Can I use different yarn types?
Absolutely! Acrylic is recommended for its durability, but cotton, bamboo, and even velvet yarns can be used based on the effect you want to achieve.
4. How do I clean the finished peacock?
Spot cleaning with a damp cloth is best, especially if your peacock has beads or embroidery. If fully made of yarn, gentle hand washing is acceptable.
5. Can I sell the finished product made from this tutorial?
Yes, you can sell your finished item. Just be sure to credit the source of the original pattern if required and respect any designer’s terms of use.
6. Can I scale the pattern for smaller or larger versions?
Definitely. Adjust your hook size and yarn thickness, or follow the same instructions with fewer rows and stitches for a mini version.
The Crochet Peacock Pattern – Full Tutorial offers a rewarding journey through color, texture, and detailed craftsmanship. From gathering the right materials to stitching the final feather, each step brings your handmade peacock to life in a stunning way.
We’ve covered materials, step-by-step body construction, how to design and attach tail feathers, and ideas for customizing your project. This pattern invites creativity and allows for personal expression through yarn.
If you’ve tried this tutorial, we’d love to hear from you! Please leave your honest opinion in the comments and share your suggestions for future tutorials. Your feedback helps build a more connected and inspiring crochet community. Happy crocheting!


