
Crochet Multi-Purpose Blouse, Shawl, Runner Model

If you’ve ever wanted to learn a simple yet beautiful crochet technique, then this guide on How to Crochet the Suzette Stitch – Easy Tutorial is exactly what you need.
The Suzette stitch is a beginner-friendly pattern that creates a dense and textured fabric, making it perfect for scarves, washcloths, blankets, and more. Whether you’re brand new to crochet or looking to expand your stitch library, this stitch is a must-learn.
The best part of learning how to crochet the Suzette stitch is its simplicity. It only requires knowledge of two basic stitches: the single crochet and the double crochet.
These two stitches are alternated in the same stitch space to create the elegant, woven look that makes Suzette so popular. It’s a one-row repeat, so once you’ve got the rhythm, you’ll be crocheting with confidence and ease.
In this tutorial, we’ll walk you through the materials needed, a step-by-step guide on how to start and complete the Suzette stitch, as well as tips for projects, troubleshooting, and creative ways to use this versatile stitch.
Let’s begin this creative journey and discover how to crochet the Suzette stitch in a way that’s both easy and enjoyable.
Before jumping into how to crochet the Suzette stitch – easy tutorial, it’s important to gather your materials. Using the right tools and yarn can make your learning process much smoother and more enjoyable.
For yarn, choose a worsted weight (medium #4) yarn if you’re just starting out. This size is easier to see and control, which is great for beginners trying a new stitch like Suzette. Cotton or acrylic yarns both work well for this stitch.
Use an appropriately sized crochet hook for your yarn. For worsted weight yarn, a 5mm (H-8) crochet hook is standard. A larger hook will create looser stitches, while a smaller hook will make the fabric more compact.
Have a pair of sharp scissors on hand to trim your yarn ends cleanly. This makes finishing your project neat and tidy, especially if you’re creating items like washcloths or placemats.
A yarn needle is helpful for weaving in your ends once the project is complete. It gives your work a polished finish and helps your project last longer without unraveling.
A stitch marker isn’t required but can be useful, especially when you’re working with longer rows or need to mark the beginning of your work. It’s a helpful tool for keeping track of your progress.
Keep a notebook or printout of your pattern nearby. While the Suzette stitch is a simple repeat, it’s good to have a reference as you build your confidence and rhythm with the stitch.
Now that you’re ready, let’s go through how to crochet the Suzette stitch – easy tutorial step by step. This stitch pattern is made using a simple one-row repeat of single crochet and double crochet in the same stitch.
Start by making an even number of chains. This is crucial because the pattern works best when each repeat covers two stitches. For practice, chain 20.
In the second chain from the hook, work one single crochet and one double crochet in the same chain. This creates the first Suzette stitch. Skip the next chain.
In the next chain, again work one single crochet and one double crochet in the same chain. Continue this pattern across the row: skip one chain, then work a single and double crochet in the next.
At the end of the row, you’ll finish with a single crochet in the final chain. Turn your work to start the next row.
For row two and all following rows, you’ll work your Suzette stitches into the single crochets from the previous row. That means, in each single crochet, you will do a single and a double crochet again, skipping the double crochets.
Repeat this row pattern until your project reaches the desired length. It’s that easy! The consistency and texture will develop beautifully as you progress.
Learning how to crochet the Suzette stitch can be easy and fun with the right tips in mind. Even though it’s a beginner-friendly stitch, these tricks can help make your results even better.
Pay close attention to your tension. The stitch has a natural texture, but if your tension varies too much, it might look uneven. Try practicing a few swatches before starting a large project.
If you find your edges are looking uneven, count your stitches at the end of each row. You should have the same number of Suzette stitch groups as your starting chain divided by two.
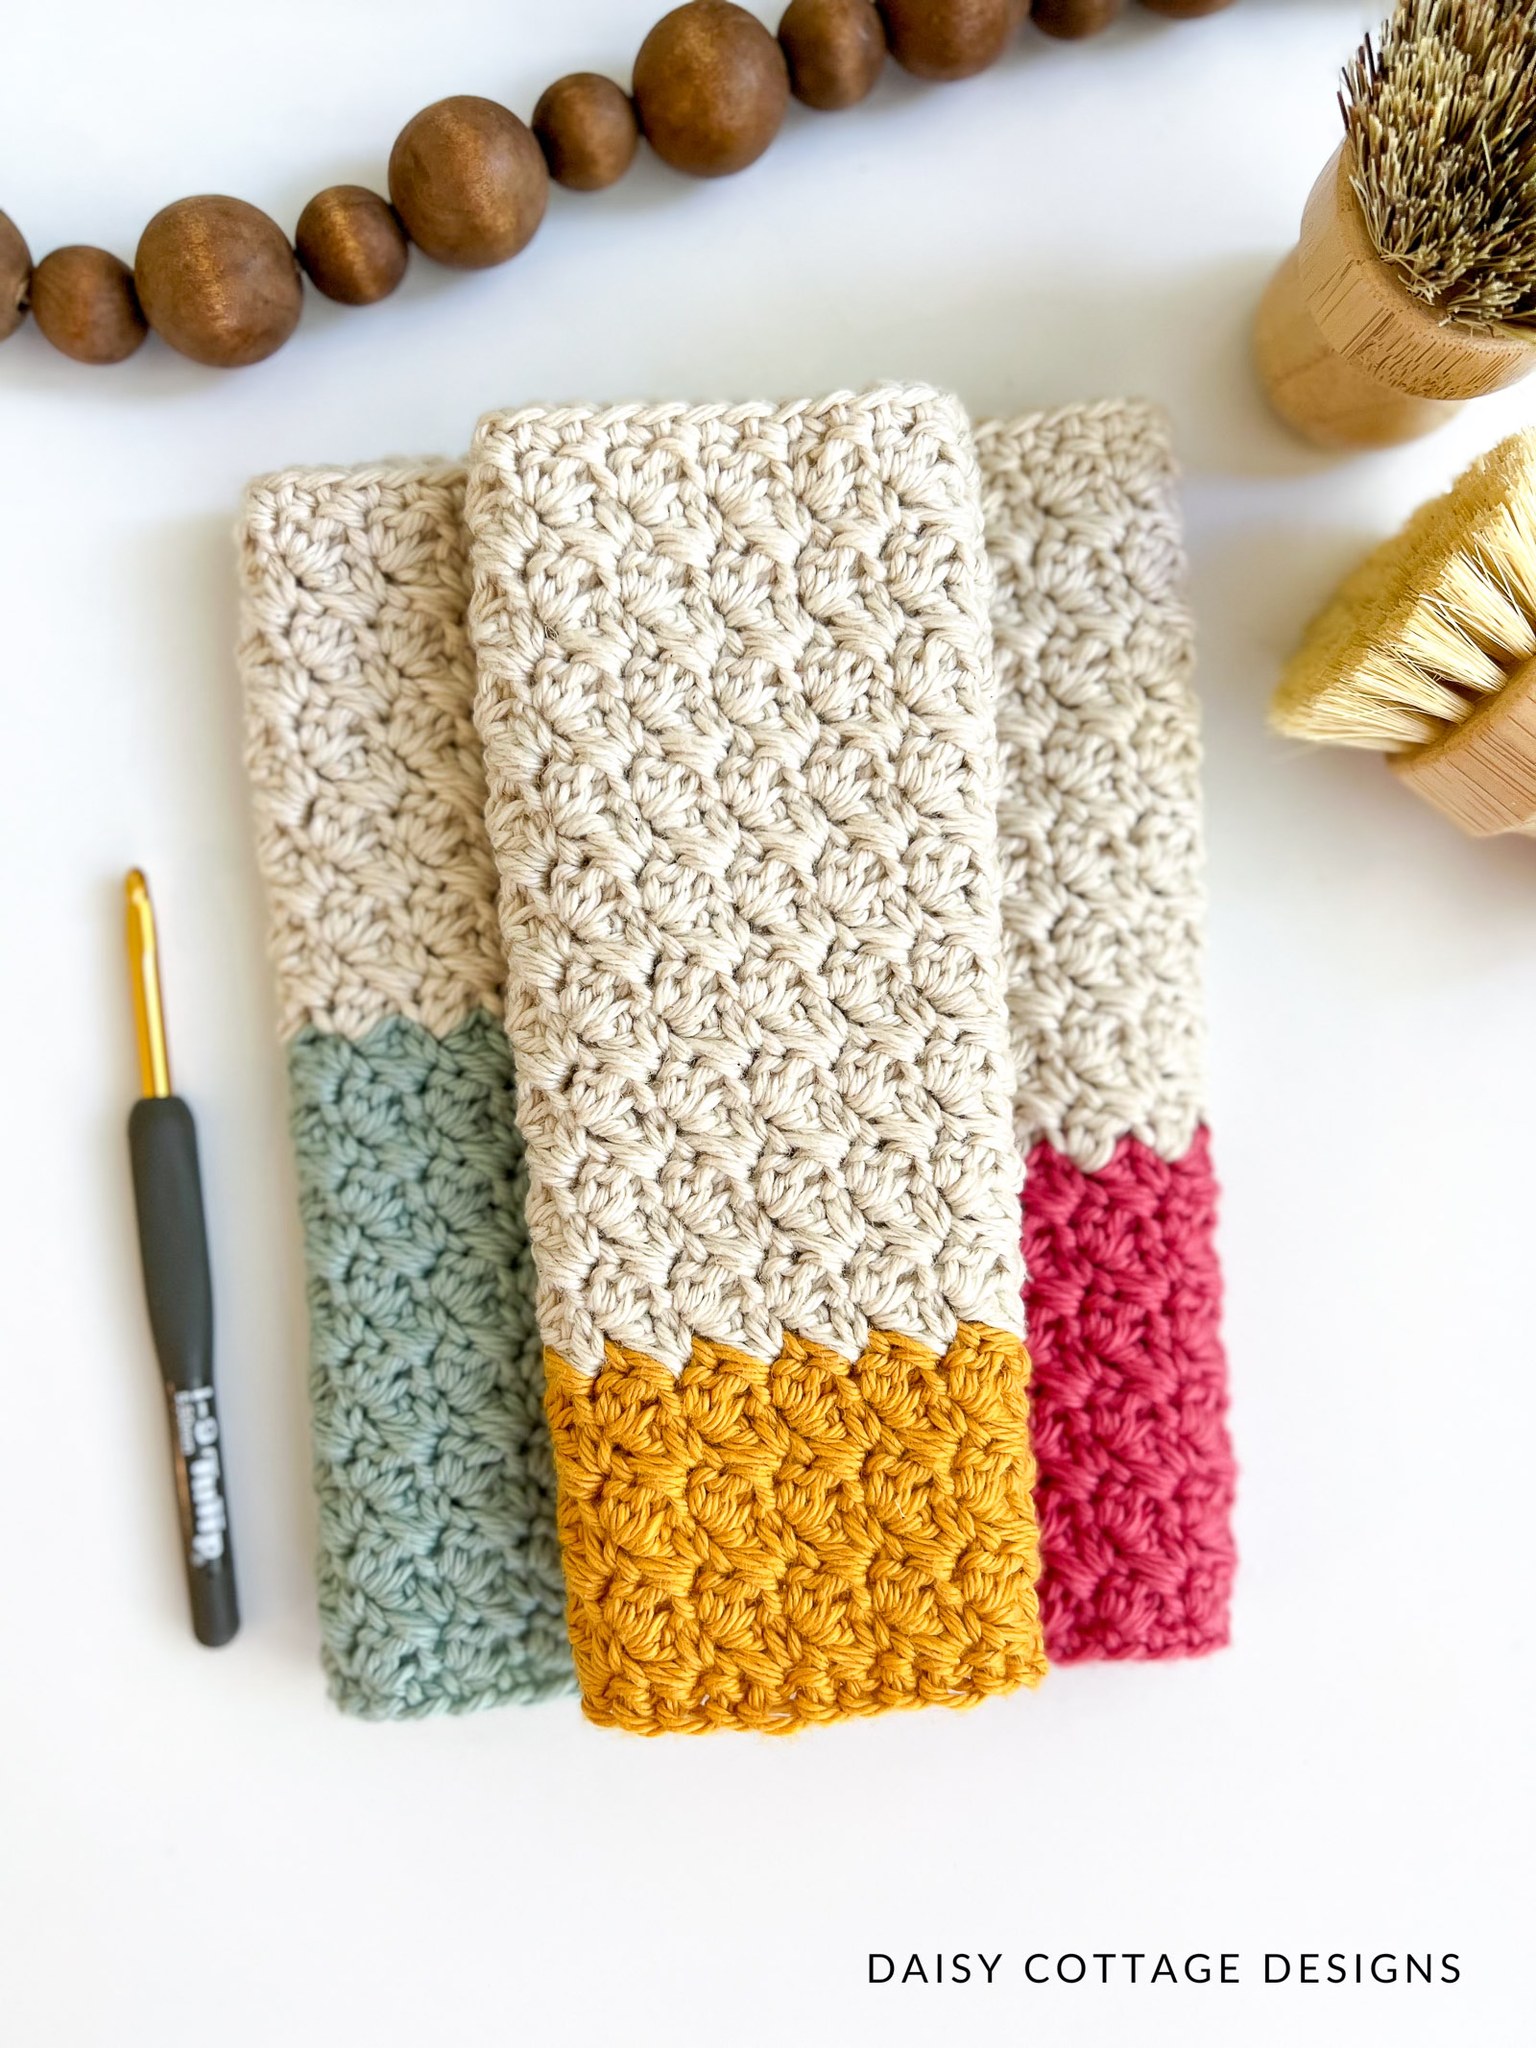
Use solid-colored yarn to start. The texture of the Suzette stitch can get lost in variegated or multicolor yarns. Solid or heathered yarns show off the beautiful stitch detail best.
Block your finished project for best results. This stitch pattern holds its shape well, but blocking can help smooth the edges and give your item a clean, professional look.
Experiment with different yarn weights once you’re confident. The Suzette stitch works beautifully in bulky yarns for cozy scarves or in thinner yarns for baby items or decorative cloths.
Try combining the Suzette stitch with other simple stitches like half double crochet or single crochet for borders and trims. This adds contrast and elevates your project’s design.
Now that you know how to crochet the Suzette stitch, you might be wondering what projects you can make using it. The dense and cozy texture of this stitch lends itself to a wide variety of handmade items.
A popular first project is a dishcloth or washcloth. The Suzette stitch creates a scrubby texture that’s great for cleaning without being rough on surfaces. It’s also quick to make!
Scarves and cowls made with this stitch are warm and stylish. Since it’s a one-row repeat, you can crochet these while watching TV or chatting with friends — it’s that relaxing.
Blankets are another excellent option. The stitch pattern creates a thick, warm fabric that’s ideal for lapghans, baby blankets, or full-size afghans. Use color changes or stripes for extra flair.
Tote bags and market bags made with the Suzette stitch are both sturdy and fashionable. The texture adds durability while keeping the bag flexible enough for everyday use.
Try making pillow covers using the Suzette stitch for a beautiful, textured home decor element. The stitch looks elegant in neutral tones or bold in bright, vibrant shades.
Lastly, consider using the Suzette stitch for wearable items like vests or cardigans. While more advanced, the stitch lends itself well to structured garments when paired with shaping techniques.
Q: Is the Suzette stitch beginner-friendly?
A: Yes! The Suzette stitch is very beginner-friendly, using only single crochet and double crochet stitches in a simple repeat pattern.
Q: What kind of yarn works best with this stitch?
A: Worsted weight cotton or acrylic yarn is ideal. Solid colors show off the texture best, especially for beginners.
Q: Can I use this stitch for garments?
A: Absolutely. While the stitch creates a dense fabric, it works well for structured garments like cardigans, especially in cotton or lighter yarns.
Q: Why are my edges uneven?
A: This often happens if the number of stitches isn’t consistent across rows. Be sure to count your stitch groups regularly and start each row in the correct place.
Q: Is it possible to work this stitch in the round?
A: Yes, with some adaptation. You can work in continuous rounds or joined rounds by placing the Suzette stitch into every other stitch, similar to working in rows.
Q: How do I wash items made with the Suzette stitch?
A: Follow the care instructions of your yarn. Most cotton and acrylic items are machine washable on gentle cycles. Lay flat to dry to maintain the shape.
Learning how to crochet the Suzette stitch – easy tutorial is a wonderful way to grow your crochet skills with a pattern that’s both functional and beautiful. This guide has covered everything from tools and step-by-step instructions to helpful tips and creative project ideas.
With only two basic stitches, you can create a variety of stunning and practical items, whether for your home, wardrobe, or gifts. The Suzette stitch’s dense texture and one-row repeat make it perfect for beginners and enjoyable for seasoned crafters.
We hope this tutorial has been helpful and encouraging. Please leave your honest opinion and any suggestions you have in the comments below. Sharing your feedback helps us create better content and grow a warm and welcoming crochet community. Happy stitching!


