
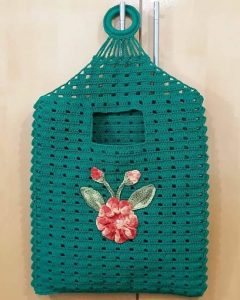
Crochet Multi-Purpose Blouse, Shawl, Runner Model

If you’ve been searching for a beautiful Crochet Rose Free Pattern, you are in the right place. Crocheting roses is a wonderful way to add a touch of elegance and charm to your handmade projects.
Whether you want to decorate a scarf, embellish a hat, or create a stunning bouquet that lasts forever, this guide will help you create the perfect crochet rose.
Learning how to make a rose using a Crochet Rose Free Pattern is not only enjoyable but also accessible for beginners and experienced crocheters alike.

This simple project requires only a few materials and basic crochet stitches, yet the result is incredibly beautiful and versatile.
In this tutorial, we will guide you step by step, covering everything from choosing the right yarn and hook to assembling your rose with perfection. By the end of this article, you will feel confident and inspired to create your own crochet roses for various projects.
Before starting with the Crochet Rose Free Pattern, it’s essential to gather all the materials needed. Having the right supplies ensures your rose turns out beautiful and lasts for years.
First, choose the right yarn. Worsted weight cotton or acrylic yarn works well for a sturdy and well-shaped rose. However, lighter yarn like DK or sport weight can also be used if you prefer a more delicate flower.
Next, select an appropriate crochet hook. The hook size will depend on your yarn, but typically, a 3.5mm to 5mm hook is ideal for most Crochet Rose Free Pattern designs. Check your yarn label for recommendations.
You’ll need a pair of sharp scissors to cut your yarn cleanly without fraying. Having quality scissors makes your work neater and more precise.
A tapestry needle is necessary to weave in the ends and assemble the rose. Choose a needle with a large eye so it’s easy to thread the yarn through.
If you want to create a stemmed rose, you can use floral wire or pipe cleaners. These materials help shape the flower and make it suitable for bouquets or vases.
Optional items include a hot glue gun if you plan to attach your rose to accessories like hair clips, brooch pins, or gift wraps. This gives your crochet rose more versatility beyond decorations.
Now that you have your materials, let’s dive into how to use the Crochet Rose Free Pattern to create your beautiful flower. This step involves crocheting a long strip that will later be rolled into a rose.
Start by making a slip knot and chaining between 51 and 61 stitches, depending on how large you want your rose to be. A longer chain means a fuller rose.
In the second chain from the hook, work a single crochet (SC). Then, in the next chain, do a half double crochet (HDC). Follow this by placing two double crochets (DC) in the next chain. Repeat this pattern—SC, HDC, 2 DC—across the entire row.
As you work across the chain, you will notice the fabric beginning to ruffle slightly. This is exactly what you want because it will help the rose curl into shape naturally.
When you reach the end of the chain, fasten off, leaving a long tail. This tail will be used to stitch the rose together.
Lay the strip flat on a table, and starting from one end, begin rolling it into a spiral. This forms the shape of the rose, with the smallest stitches (SC and HDC) becoming the center and the DC sections forming the petals.
Thread the tapestry needle with the long tail and sew through the base of the rolled flower. Stitch back and forth a few times to secure the shape. Make sure it feels stable and holds together well.
A crochet rose isn’t complete without some pretty leaves! This step of the Crochet Rose Free Pattern will show you how to make simple leaves that add a realistic and decorative touch to your flower.
To crochet a leaf, start with a slip knot and chain 8. In the second chain from the hook, work a single crochet (SC). Then do a half double crochet (HDC) in the next stitch, followed by two double crochets (DC) in the next.
Continue with another HDC in the following stitch, then a SC, and finally slip stitch (SL ST) into the last chain. This forms one half of the leaf.
Turn your work to crochet along the other side of the foundation chain. Mirror the stitches: SC, HDC, 2 DC, HDC, SC, and SL ST into the beginning stitch to complete the leaf shape.
Fasten off, leaving a long tail for attaching the leaf to the rose. Make as many leaves as you like. Typically, two or three leaves are enough for one rose.
Position the leaves behind the rose, adjusting their placement until you are happy with how it looks. Sew the leaves to the back of the rose using the tails and your tapestry needle.
If you’re making a bouquet, now is the time to insert floral wire or pipe cleaners into the base of the rose. Wrap green floral tape around the wire for a clean, professional finish.
Finally, weave in any loose ends and trim excess yarn. Your rose is now ready to be displayed, gifted, or used as decoration on clothing, accessories, or home items.
Once you master the Crochet Rose Free Pattern, the possibilities for using your crochet roses are endless. These flowers are incredibly versatile and can be adapted for many projects.
One popular idea is to create a bouquet of crochet roses. This makes for a beautiful, everlasting gift for special occasions like weddings, anniversaries, or Mother’s Day.
You can also attach a rose to a hair clip or headband. This creates a unique accessory that stands out and adds a touch of handmade charm to any outfit.
Decorate home items like pillows, table runners, or curtains by sewing crochet roses onto them. This gives your home a warm, cozy, and personalized touch.
Another creative option is to use crochet roses as gift toppers. Instead of using bows, attach a handmade rose to gift wrap for a beautiful, eco-friendly finishing touch.
If you enjoy making jewelry, smaller versions of the Crochet Rose Free Pattern can be turned into earrings, necklaces, or brooches.
Lastly, crochet roses can be used in scrapbooking, card-making, or as embellishments for bags and hats. They add texture, color, and personality to any project.
1. Is the Crochet Rose Free Pattern suitable for beginners?
Yes! This pattern is beginner-friendly. It uses simple stitches like single crochet, half double crochet, and double crochet, which are easy to learn.
2. How long does it take to make one crochet rose?
On average, it takes about 30 to 60 minutes to complete one rose, depending on your skill level and the size of the rose.
3. What type of yarn works best for crochet roses?
Cotton yarn gives the rose a crisp shape, but acrylic yarn also works well and offers more color variety. Choose worsted or DK weight for best results.
4. Can I make a larger or smaller rose with the same pattern?
Absolutely! Simply adjust the starting chain length. A longer chain creates a fuller, larger rose, while a shorter chain makes a smaller one.
5. How do I attach the rose to other items?
You can sew the rose directly onto fabric items or use a hot glue gun to attach it to clips, pins, or cards.
6. Can crochet roses be washed?
Yes, but handwashing is recommended to maintain their shape. If using cotton yarn, it will hold its form better than other materials.
This guide on the Crochet Rose Free Pattern has shown you how to create beautiful, handmade roses with just a few materials and simple stitches. From gathering your supplies and crocheting the flower to adding leaves and exploring creative uses, you now have all the knowledge needed to craft stunning crochet roses.
We hope this tutorial has inspired you to pick up your hook and start creating. We’d love to hear your thoughts! Please leave your honest opinion and suggestions in the comments. Your feedback helps us continue sharing valuable content with fellow crochet enthusiasts.


