
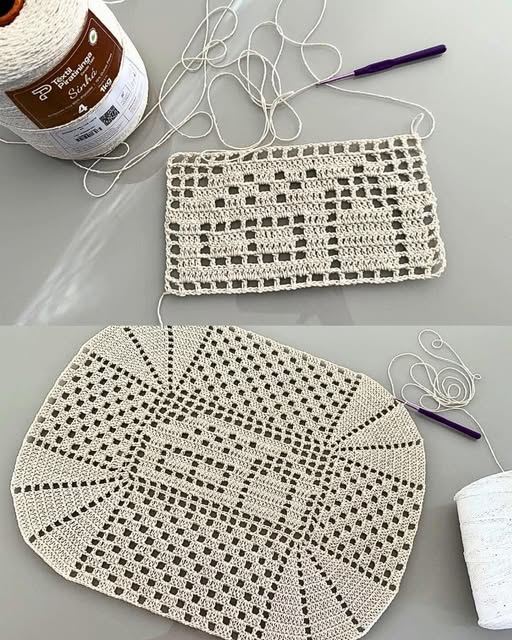
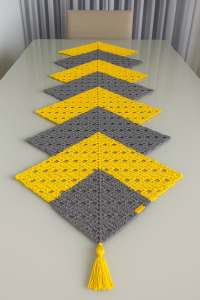
Crochet Multi-Purpose Blouse, Shawl, Runner Model

The Crochet House – STEP BY STEP is a charming and creative project that allows crafters to build adorable miniature homes using yarn and simple crochet techniques.
Whether you want to make a playful decoration, a children’s toy, or a unique gift, learning how to create a Crochet House – STEP BY STEP can be a rewarding experience.
Starting your journey with the Crochet House – STEP BY STEP is perfect for crochet enthusiasts of all levels.
This project introduces basic shapes and easy stitch patterns, making it accessible even for beginners who are just starting to explore crochet.
Throughout this article, we will guide you through the process of making a Crochet House – STEP BY STEP, covering materials, instructions, creative options, and helpful tips to achieve the best results.
Before diving into your Crochet House – STEP BY STEP, it is essential to prepare the right materials to ensure your project is enjoyable and successful.
Start by selecting medium-weight yarn in the colors you want for your house, roof, doors, and windows. Cotton yarn is often a good choice because it provides structure and helps the house hold its shape.
Choose a crochet hook that matches the size recommended on your yarn label. Using the correct hook will help you create tight stitches that keep the house firm and upright.
You will need polyester fiberfill or soft stuffing to give the Crochet House – STEP BY STEP its 3D shape. Make sure the filling is soft but firm enough to support the structure.
Gather a yarn needle to weave in the ends and to sew the parts together neatly. Clean and precise finishing will make your Crochet House – STEP BY STEP look professional.
You can also add small embellishments like buttons, beads, or embroidery threads to decorate windows, doors, or flower gardens around your house.
Finally, having scissors and stitch markers on hand will make the crafting process smoother and more organized, especially when working on small, detailed parts.
Let’s now walk through the Crochet House – STEP BY STEP process to help you build your own beautiful miniature house with ease.
Begin by crocheting the base of the house. This is usually a square or rectangular shape made using simple stitches like single crochet to provide a sturdy foundation.
Once the base is complete, crochet the four side walls. Each wall can be made as a flat panel using rows of single crochet or half double crochet stitches to maintain a tight fabric.
After making the walls, crochet the roof pieces. Depending on the design, the roof may consist of two flat panels or a single large rectangle that folds over the top.
Sew the walls together using a yarn needle, connecting each side carefully to form a box shape. Make sure the seams are tight to keep the Crochet House – STEP BY STEP structure solid.
Stuff the house with fiberfill as you assemble the walls, adding enough to make the house stand firmly but without overfilling to avoid stretching the stitches.
Attach the roof pieces on top, sewing them securely in place. Optionally, you can leave part of the roof open if you want to create a small storage container or toy.
One of the most delightful aspects of the Crochet House – STEP BY STEP is the chance to customize it and make it truly your own.
You can use various yarn colors to create vibrant houses that reflect different seasons, holidays, or even match your home decor.
Consider adding small crochet elements such as doors, windows, chimneys, or flower pots. These decorative touches make the Crochet House – STEP BY STEP more detailed and appealing.
You can create themed houses like a gingerbread house for Christmas, a beach house for summer, or a spooky haunted house for Halloween using creative color combinations.
Add embroidery details to the walls and roof. Small stitched flowers, vines, or patterns can give your house extra charm and a handmade feel.
Using beads as doorknobs, buttons as windows, or ribbons for garden fences can bring your Crochet House – STEP BY STEP to life with extra personality.
If you’re making this as a gift or toy, consider adding a small loop on the roof to turn your house into a keychain, ornament, or bag charm for practical use.
Creating a neat and balanced Crochet House – STEP BY STEP requires attention to detail and some useful techniques to ensure the best outcome.
Always crochet with tight, consistent stitches. This helps your house maintain its shape and prevents the stuffing from showing through the fabric.
Use stitch markers to keep track of rounds or rows, especially when crocheting the small and detailed parts of the house to avoid losing your place.
When assembling the house, sew the panels together carefully. Align the edges correctly to prevent gaps or uneven walls.
Test the firmness of the stuffing as you build the house. The structure should feel solid but not overly tight, which can distort the shape.
If your house leans or becomes misshaped, gently adjust the stuffing and the seams before closing the final stitches to balance the structure.
Take your time when adding decorative elements. Small details like window frames or garden flowers can make a big visual impact on your Crochet House – STEP BY STEP.
Is the Crochet House – STEP BY STEP project suitable for beginners?
Yes, this project is great for beginners. It uses basic stitches and simple shapes that are easy to assemble, making it a fun learning experience.
What type of yarn works best for the Crochet House?
Medium-weight cotton yarn is ideal because it holds its shape well and provides a sturdy structure. You can also use acrylic yarn for softer results.
How do I keep the house from collapsing?
Using tight stitches, firm stuffing, and correct assembly will help your house stay upright and maintain its intended shape.
Can I wash the Crochet House?
It’s best to hand wash and air dry the crochet house to protect its structure and decorations. Machine washing may cause it to lose shape.
How can I personalize the Crochet House?
You can personalize it by changing yarn colors, adding small decorations, sewing on beads or buttons, or creating themed designs like holiday houses.
What size should I make the Crochet House?
You can adjust the size based on your project. Small houses can become keychains or toys, while larger houses make great decorations or storage containers.
In this guide, we explored the Crochet House – STEP BY STEP, covering everything from essential materials and detailed instructions to creative customization options and useful tips. This project is not only a delightful way to improve your crochet skills but also an opportunity to craft unique, decorative items that bring warmth and charm to any space.
The Crochet House – STEP BY STEP is perfect for beginners and experienced crocheters alike, offering endless possibilities for creativity and personalization. I hope you feel inspired to start building your own crochet houses and enjoy the process of bringing them to life.
Please leave your honest feedback, share your experiences, and let me know if you have suggestions for future patterns. I would love to hear from you and see your beautiful creations!


