
Crochet Multi-Purpose Blouse, Shawl, Runner Model

The PERFECT CROCHET SQUARE – FREE PATTERN is an essential skill that every crochet enthusiast, beginner or advanced, should master. Crochet squares are the foundation of countless projects, from cozy blankets and stylish bags to wearables and home décor.
This guide will take you step-by-step through the creation of a flawless crochet square that lies flat, maintains its shape, and offers endless creative potential. With the right pattern, yarn, and tension, you can make perfect squares every time.
In this tutorial, we’ll explore how to create a perfect crochet square that is symmetrical, solid, and easy to join with other motifs. Whether you’re making a single square for practice or planning a large-scale afghan, the principles remain the same.

We’ll also provide tips for common mistakes, how to block your square, and fun project ideas once your square is complete. The best part? It’s a free pattern that you can revisit and adapt as you grow in your crochet journey.
The PERFECT CROCHET SQUARE – FREE PATTERN can be customized with different stitches, colors, and borders. You’ll learn how to keep your edges straight, prevent warping or twisting, and create professional-looking corners.
Once you feel confident with this pattern, you’ll find it’s the gateway to countless new creations. Whether you prefer a classic granny style or a more modern solid square, this pattern can be easily tailored to your preferences.
Choosing the right yarn is key. Opt for medium-weight (worsted) yarn for a well-defined, sturdy square.
Use a crochet hook size appropriate for your yarn—usually recommended on the yarn label.
A stitch marker can help you identify the beginning of each round or row.
Scissors and a yarn needle are necessary for finishing and weaving in ends.
Have a blocking mat and pins on hand for shaping your finished square.
Choose complementary colors if you plan to use multiple shades within your square.
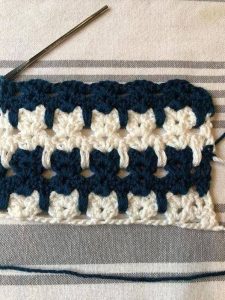
Begin with a magic ring or chain 4 and join to form a ring—this is the base of your center.
Round 1: Chain 3 (counts as 1 dc), work 2 dc into ring, ch 2, 3 dc—repeat 3 more times. Join.
Round 2: Slip stitch to corner space, ch 3, 2 dc, ch 2, 3 dc in same space; continue 3 dc, ch 2, 3 dc in each corner.
Round 3+: Continue with 3 dc in each side space and (3 dc, ch 2, 3 dc) in each corner.
Adjust the number of rounds to make your square larger, keeping the corner structure consistent.
Always finish each round by joining with a slip stitch and begin the next with a chain 3.
Check your tension regularly—tight tension may curl your square, while loose tension may cause it to ripple.
Count your stitches at the end of each round to ensure consistency on all four sides.
Use stitch markers to mark the corners to avoid accidentally skipping stitches.
Block your square after completion using a damp cloth and pins for professional, even edges.
Avoid pulling your slip stitch too tightly when joining rounds to keep sides even.
Practice makes perfect—the more squares you make, the more naturally your shape will hold.
Join multiple squares to create a colorful, cozy afghan or baby blanket.
Sew 4 or more squares together to make a pillow front, adding a fabric backing.
Use leftover squares to create pot holders, coasters, or dishcloths for a sustainable home.
Create a tote bag by sewing squares into panels and lining with fabric.
Add an edge to your square with shell, picot, or crab stitch borders for an elegant finish.
Make a temperature blanket by crocheting one square per day using colors to represent the weather.
What size is the finished square in this pattern?
The default pattern produces a 6-inch square, but you can easily make it larger by continuing the rounds.
Why is my square curling or twisting?
This usually happens due to uneven tension or skipped stitches. Blocking can help correct minor curling.
Can I use this pattern with cotton yarn?
Yes! Cotton yarn is great for kitchen items or summer projects and will hold the square shape nicely.
How do I join multiple squares together?
You can use whip stitch, slip stitch, or join-as-you-go methods depending on your preference.
Is this square pattern suitable for beginners?
Absolutely. The pattern uses basic stitches (double crochet, chains) and offers a great learning experience.
How do I keep my edges from becoming uneven?
Be sure to count your stitches in each row or round, and mark your corners to maintain straight sides.
The PERFECT CROCHET SQUARE – FREE PATTERN is a must-have for any crocheter looking to build solid foundations in their craft. This simple, repeatable design offers beauty, balance, and plenty of room for creative flair. Whether you’re creating your first square or your hundredth, the joy of seeing a perfect shape come together never fades.
We hope this guide has helped you feel inspired and confident in making your own perfect crochet square. Have you tried this pattern? Let us know what you created with it! Feel free to leave a sincere opinion, tips, or suggestions in the comments. Your input supports our creative community and helps others on their crochet journey.


