
Pie Carrier Sewing Pattern

If you’ve ever wondered how to make DIY make a stylish zipper bag easily and simply in one go, this guide is for you!
Whether you’re a beginner looking for a quick sewing project or a seasoned crafter who wants to add something chic and practical to your handmade collection, a zipper bag is the perfect project. In just one go, you can create something beautiful, functional, and personal.
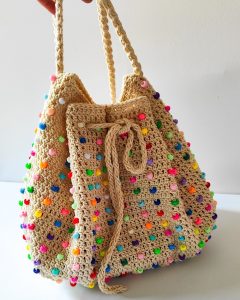
The beauty of a DIY stylish zipper bag lies in its versatility. You can use it as a makeup pouch, pencil case, travel organizer, or even as a mini clutch for a night out.
With the right fabric and a few simple tools, you can make a zipper pouch that matches your personality and style—all without complicated patterns or expensive equipment.
In this article, we’ll walk you through every step of how to make DIY make a stylish zipper bag easily and simply in one go. You’ll learn what materials you need, how to sew the bag from start to finish, tips for choosing fabric, and how to add your personal touch. By the end, you’ll be confident and excited to create many more!
Making a zipper bag by hand is not only practical—it’s empowering. You get to choose the size, color, shape, and even the purpose of your creation. And the best part? You’ll finish it in one sitting.
One of the biggest benefits of this project is that it’s beginner-friendly. You don’t need an expensive sewing machine or advanced sewing skills. With just straight stitches and a zipper installation, you’ll feel like a pro in no time.
Another reason to try this DIY zipper bag is cost. Store-bought zipper pouches can be pricey, especially when they feature designer fabrics. Making your own allows you to use fabric scraps, old clothes, or recycled materials, turning something unused into something beautiful.
Handmade bags also make fantastic gifts. Whether it’s a birthday, Mother’s Day, or a simple thank-you, a custom zipper bag shows care, effort, and creativity—all wrapped up in a useful item.
Sewing is also a calming, mindful activity. Taking time to measure, cut, and stitch allows you to disconnect from stress and focus on something creative and rewarding.
Lastly, once you learn how to make DIY make a stylish zipper bag easily and simply in one go, you’ll open the door to endless variations. Add inner pockets, change the size, or experiment with patchwork. The possibilities are endless!
Before starting your project, gather all your materials. Keeping everything nearby makes the process faster and more enjoyable. Here’s what you’ll need to make a stylish zipper bag easily and simply in one go:
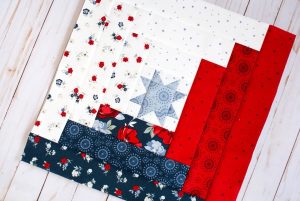
First, choose your fabric. Cotton is a great choice for beginners because it’s easy to work with and widely available. You’ll need two pieces: one for the outside and one for the lining. Each should be the same size—8″ x 10″ is a good starting point.
Next, you’ll need a zipper. A 9″ nylon zipper works perfectly for small to medium-sized bags. Choose a color that matches or contrasts with your fabric for added style.
You’ll also need interfacing to give your bag structure. Fusible interfacing is ironed onto the fabric and helps the bag hold its shape without being stiff.
Basic sewing tools include scissors or a rotary cutter, pins or clips, a ruler, an iron, and of course, a sewing machine. Most home machines can easily handle this project with a universal needle.
Optional but helpful tools include a zipper foot for easier zipper installation, fabric marking pens, and a turning tool to help invert the bag cleanly.
Lay out all your materials before you start. When everything is ready, you can complete your zipper bag in one go without needing to stop and search.
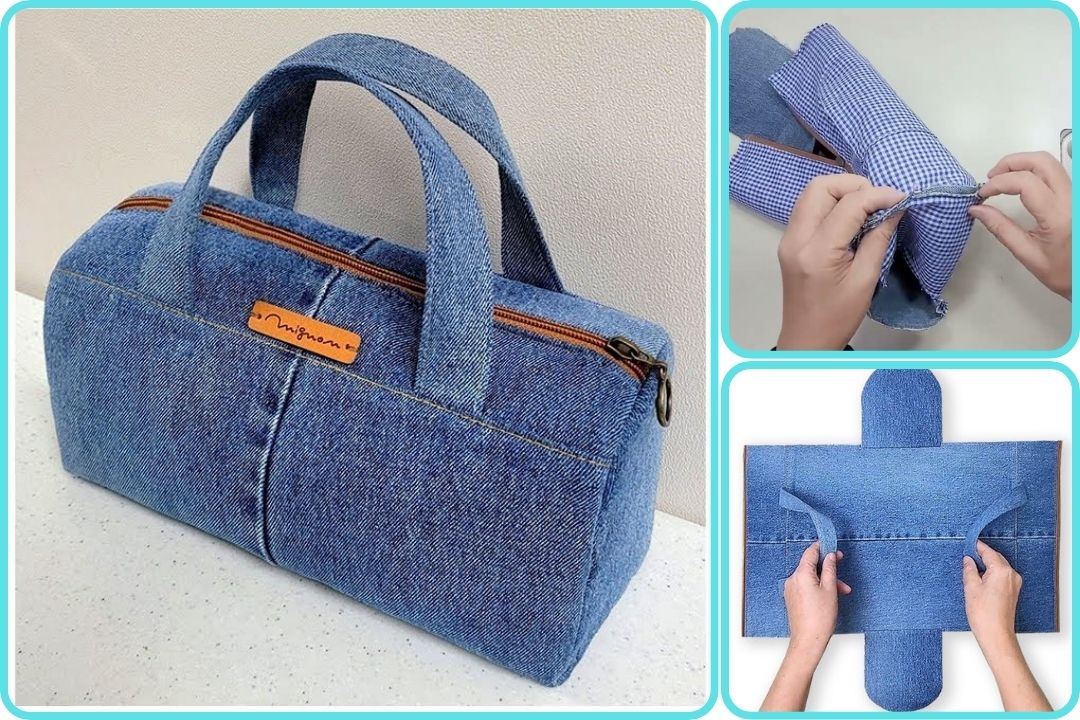
Now comes the exciting part—actually sewing your bag! Follow these simple steps to learn how to make DIY make a stylish zipper bag easily and simply in one go.
Start by ironing the interfacing to the wrong side of your outer fabric. This will give your bag structure and a professional finish.
Next, place your zipper right side down along the top edge of the outer fabric. Then, place the lining fabric on top, right side down, aligning all edges. Pin in place and sew along the zipper edge using a straight stitch.
Open the layers and press the fabric away from the zipper. Repeat the same steps on the other side of the zipper with the second outer and lining pieces.
Once both sides are attached, open the zipper halfway (this is very important!) and pin the outer fabrics right sides together and the lining fabrics right sides together.
Sew all around the edges, leaving a 3″ gap in the lining for turning. Make sure to backstitch at the beginning and end.
Trim the corners to reduce bulk, then turn your bag right side out through the gap. Push out the corners gently and sew the lining gap closed with a small invisible stitch.
Congratulations! You’ve just completed your DIY stylish zipper bag easily and simply in one go.
Now that you know how to make DIY make a stylish zipper bag easily and simply in one go, you can get creative with your next ones. Here are some customization ideas to make your bags stand out.
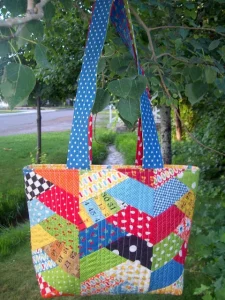
Try using different fabrics for the outer and inner layers. Combine solids with florals, denim with lace, or bold prints with neutrals for added interest.
You can also adjust the size. Want a pencil pouch? Make it longer and thinner. Need a small clutch? Go wider and add a wrist strap.
Add embellishments like embroidery, iron-on patches, or even buttons for a unique look. Personalize the bag with someone’s name for a special gift.
Use contrast stitching for visual impact, or add a decorative ribbon or bias tape along the zipper line to frame the bag.
Want even more function? Sew in a small interior pocket for coins or keys. It adds a level of sophistication and practicality.
For extra flair, consider adding a charm or tassel to the zipper pull. This tiny detail can give your handmade bag a boutique-style touch.
Can I make a zipper bag without a sewing machine?
Yes! While it’s faster with a machine, you can hand sew this bag using a backstitch. It will take longer but still works well for small bags.
How long does it take to make a zipper bag?
On average, about 30 to 45 minutes from start to finish, especially once you’ve made one or two and know the steps.
What’s the best fabric for beginners?
Cotton is the most beginner-friendly. It’s stable, easy to sew, and widely available in countless patterns and colors.
Do I really need interfacing?
For best results, yes. Interfacing gives the bag shape and prevents it from looking floppy or wrinkled after a few uses.
How do I avoid puckering near the zipper?
Make sure to press your fabric before sewing, use a zipper foot if available, and sew slowly to keep everything aligned.
Can I wash the zipper bag?
Absolutely. If you’ve used washable fabric and interfacing, it’s safe to hand wash or use a gentle machine cycle.
Now that you’ve learned how to make DIY make a stylish zipper bag easily and simply in one go, you’re ready to explore the endless creative possibilities this project offers. From choosing fabrics to adding your own flair, every step is a chance to express your style and grow your skills.
We hope this tutorial inspired you to pick up your sewing kit and create something both beautiful and useful. Your first zipper bag may be simple, but it marks the beginning of many fun and fulfilling DIY adventures.
If you enjoyed this guide, please leave a sincere comment below with your thoughts or suggestions. We’d love to hear how your project turned out and what kind of patterns you’d like to see next. Happy sewing!


