
Crochet Multi-Purpose Blouse, Shawl, Runner Model

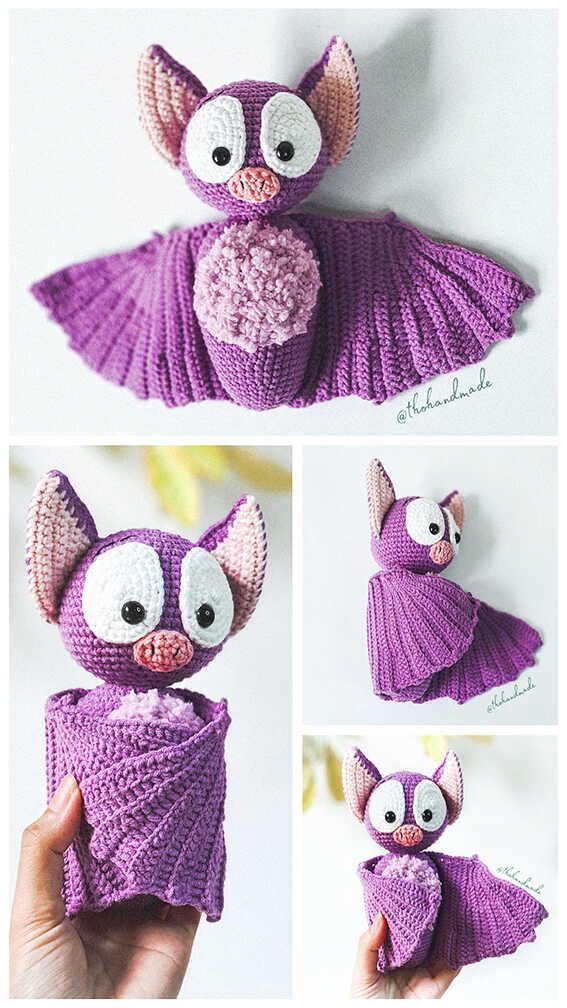
If you’re looking for a cute, spooky, and fun project, this Amigurumi Bat Recipe – Free Pattern is just what you need!
Whether you’re crafting for Halloween, decorating a nursery, or just love adorable handmade creatures, this crochet bat is sure to win hearts.
The charm of amigurumi bats lies in their round bodies, tiny wings, and expressive eyes. They’re small enough to finish in one sitting, but delightful enough to become a staple in your handmade gift basket or seasonal decor. Plus, using this free pattern, you’ll learn how to crochet a bat from start to finish—even if you’re a beginner.
In this guide, we’ll walk you through materials, step-by-step instructions, customization options, and essential amigurumi tips so you can bring your own little bat friend to life!
The Amigurumi Bat Recipe – Free Pattern offers a delightful blend of creativity, simplicity, and purpose. It’s a perfect project for both beginner and experienced crocheters who enjoy whimsical and quick makes.
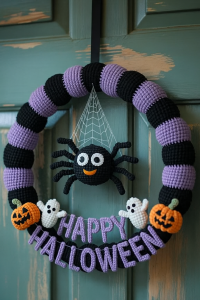
First, amigurumi bats make great seasonal decorations, especially around Halloween. Hang them from garlands, display them in windows, or use them as tabletop decor for spooky charm that doesn’t scare the kids.
Second, they’re incredibly giftable. Whether for a child who loves animals, a friend who collects cute creatures, or as party favors, these crochet bats spread smiles everywhere they go.
Third, making amigurumi improves your overall crochet skills. You’ll practice working in the round, increasing, decreasing, stuffing, and shaping—all fundamental amigurumi techniques that help you with other crochet creatures.
Fourth, they’re small, portable projects. You can take your bat-in-progress with you in your bag and work on it during commutes, appointments, or cozy evenings at home.
Lastly, this project is a great stash buster. You only need small amounts of yarn, making it ideal for using up those leftover skeins from other projects.
Before starting your Amigurumi Bat Recipe – Free Pattern, gather these essential materials. You likely have most of them in your craft box already!
Yarn: Worsted weight or DK yarn in black, gray, purple, or any color you like. Acrylic yarns like Red Heart or Paintbox are ideal for structure and affordability.
Crochet Hook: Use a 2.5 mm or 3.0 mm hook to create a tight fabric so the stuffing won’t show through.
Safety Eyes or Embroidery Thread: 6mm or 8mm safety eyes are standard. If you’re making this for a small child, consider embroidering the eyes for safety.
Polyfill Stuffing: This keeps your bat soft but shaped. Don’t overstuff—just enough to hold its form.
Tapestry Needle: Needed for sewing parts together and weaving in ends.
Stitch Marker: Helps track the beginning of each round in the body and head.
Scissors: A sharp pair for cutting yarn cleanly.
Optional: Felt for fangs or ears, embroidery floss for a smile, or pipe cleaners inside wings for flexibility.
With your materials ready, you’re set to start crocheting your adorable amigurumi bat!
Here’s a simple overview of how to crochet your Amigurumi Bat Recipe – Free Pattern. Each part is worked separately and then assembled.
Step 1 – Make the Body
Using a magic ring, work single crochets in the round to build a ball-shaped body. Increase evenly over several rounds, then maintain even stitches before decreasing again to close the body. Stuff before sealing.
Step 2 – Crochet the Head
Repeat a similar process for the head: magic ring, increase rounds, maintain, then decrease. Before closing, insert safety eyes, stuff, and embroider a small smile or fangs for personality.
Step 3 – Make the Wings
Each wing is crocheted separately, often in flat rows or semi-circles. Bat wings have a signature scalloped look, which can be made using a shell stitch or curved decreases.
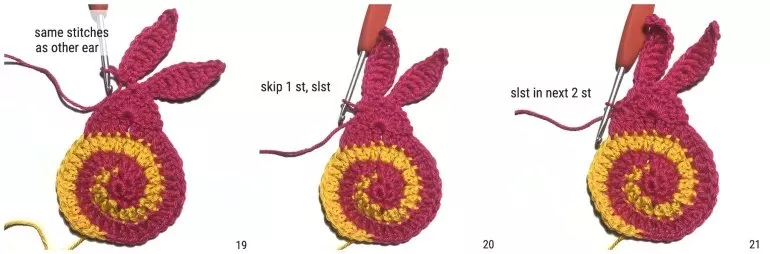
Step 4 – Add Ears
Ears are small triangles or ovals, usually made with just a few rows. Stitch them to the top of the head symmetrically.
Step 5 – Assemble the Bat
Use a tapestry needle to sew the head to the body. Then attach wings to each side and ears to the top of the head. Make sure everything is secure and symmetrical.
Step 6 – Personalize Your Bat
Now’s the fun part! Add a bowtie, fangs, blushed cheeks, or even tiny clothes. Customize your bat’s colors and expressions to make it one-of-a-kind.
This Amigurumi Bat Recipe – Free Pattern is flexible and fun. Once you’ve made one, you’ll want to make a whole colony!
To get the most out of your Amigurumi Bat Recipe – Free Pattern, follow these expert tips:
Use Tight Stitches
Amigurumi should be dense so stuffing doesn’t peek through. If your stitches are loose, go down a hook size.
Work in Continuous Rounds
Unlike flat crochet, amigurumi is usually made in spirals without joining rounds. Use a stitch marker to keep track of the beginning.
Count Carefully
Missing one stitch can distort the shape. Keep count or use a row tracker to stay on track.
Stuff Lightly but Evenly
Use small tufts of fiberfill and press them in gently. Overstuffing can stretch stitches or misshape your bat.
Secure All Pieces Firmly
When sewing parts, make sure your stitches are tight and neat. Children especially might tug on wings or ears!
Experiment with Colors and Textures
Try velvet yarn for a soft plush feel, or add sparkly thread for magical bats. Play with color combinations for seasonal or themed variations.
With practice, you’ll find your rhythm, and soon your handmade bats will be flying off the hook!
Q: Is this pattern good for beginners?
Yes! The Amigurumi Bat Recipe – Free Pattern is beginner-friendly with simple shapes and basic stitches. It’s a great way to learn amigurumi basics.
Q: Can I sell bats made with this pattern?
Yes, you can sell finished products, especially at craft fairs or online. Always credit the pattern source if the designer requests.
Q: What safety precautions should I take?
If making for children under 3, avoid safety eyes and instead embroider features to prevent choking hazards.
Q: Can I use cotton yarn instead of acrylic?
Yes. Cotton gives great stitch definition but is less stretchy than acrylic. Either works well for small amigurumi projects.
Q: How do I clean an amigurumi bat?
Hand wash with cold water and mild soap. Avoid wringing it out—gently squeeze and reshape before air drying.
Q: Can I make a bigger or smaller version?
Absolutely. Use thicker yarn and a larger hook for a bigger bat, or fine thread and a smaller hook for a mini version.
We hope you’ve loved learning how to crochet this Amigurumi Bat Recipe – Free Pattern. It’s a fun, easy, and rewarding project that brings spooky charm and cuddly cuteness together. From creating the body to adding personal flair, this amigurumi is perfect for seasonal décor, gifts, or your growing collection of handmade creatures.
Now it’s your turn! Did you enjoy making your bat? Did you add any fun details or custom colors? We’d love to hear about your experience. Please leave a sincere comment below with your feedback, suggestions, or photos of your finished bats. Let’s keep the creativity flying!


