
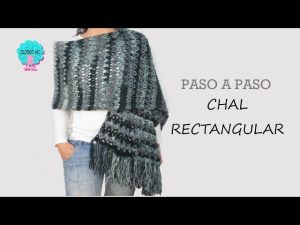
Crochet Multi-Purpose Blouse, Shawl, Runner Model

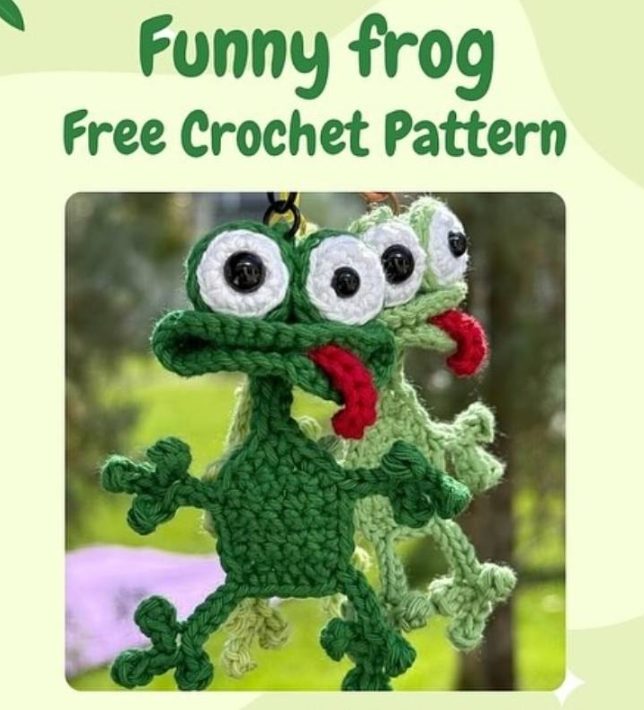
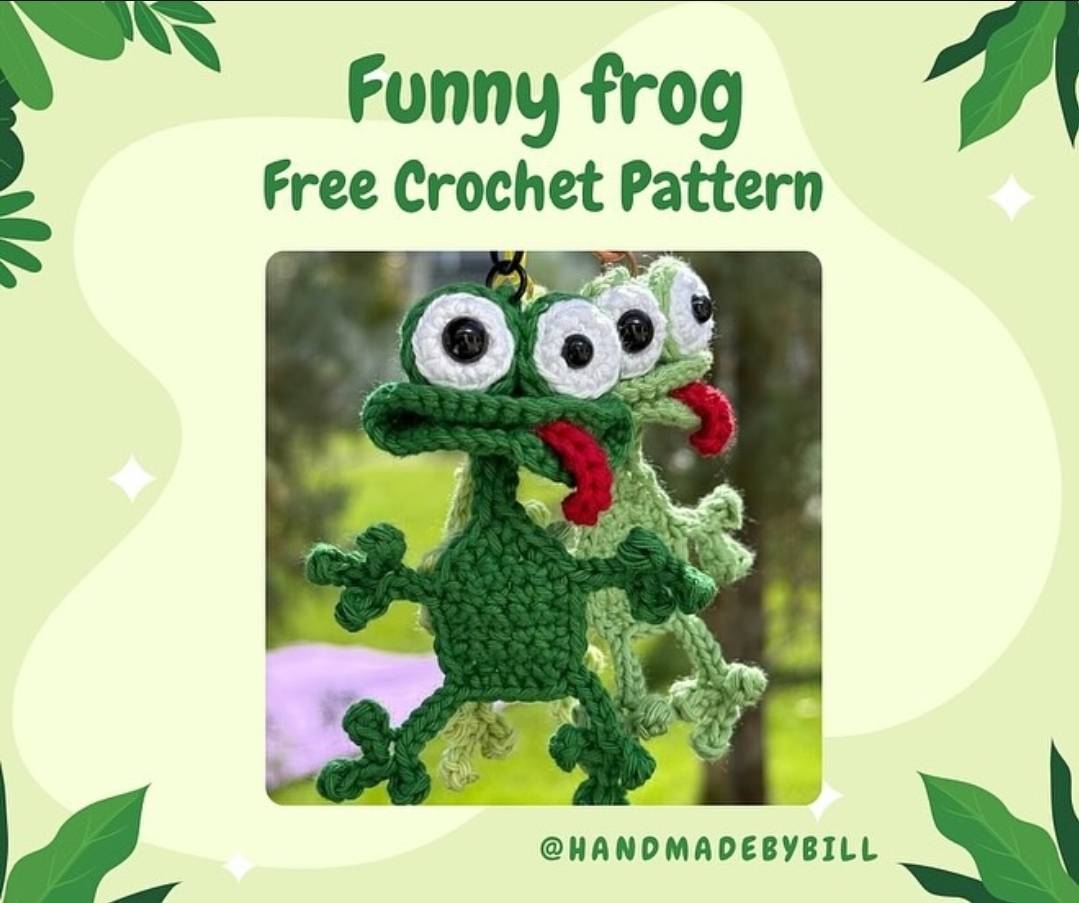
If you’re looking for a delightful and charming crochet project to brighten your day, the Funny Frog – Free Crochet Pattern is exactly what you need. This playful and expressive frog pattern is perfect for crocheters of all levels, from beginners looking for a fun amigurumi introduction to advanced crafters who want to add whimsy to their collection.
Not only is this project rewarding and quick, but it’s also a wonderful way to use up leftover yarn and create a handmade toy that brings smiles to people of all ages.
The Funny Frog – Free Crochet Pattern stands out because of its cheerful expression, bouncy limbs, and adorable round belly. These features make it a favorite choice for gifts, children’s toys, or even quirky home décor.
The pattern can easily be customized with different yarn colors, eye styles, or accessories like tiny bows or scarves, giving each frog a unique personality. This flexibility adds to its popularity in the crochet community and makes it a beloved project to revisit often.
Crocheting a frog might sound challenging at first, but this pattern is structured step by step to ensure clarity and success at each stage. Whether you’re using cotton yarn for a firm texture or opting for a soft plush yarn for extra cuddliness, the instructions guide you through making the body, limbs, and facial details.
In this article, we’ll walk through everything you need to know to bring your own Funny Frog – Free Crochet Pattern to life—from materials and stitches to assembly and finishing touches.
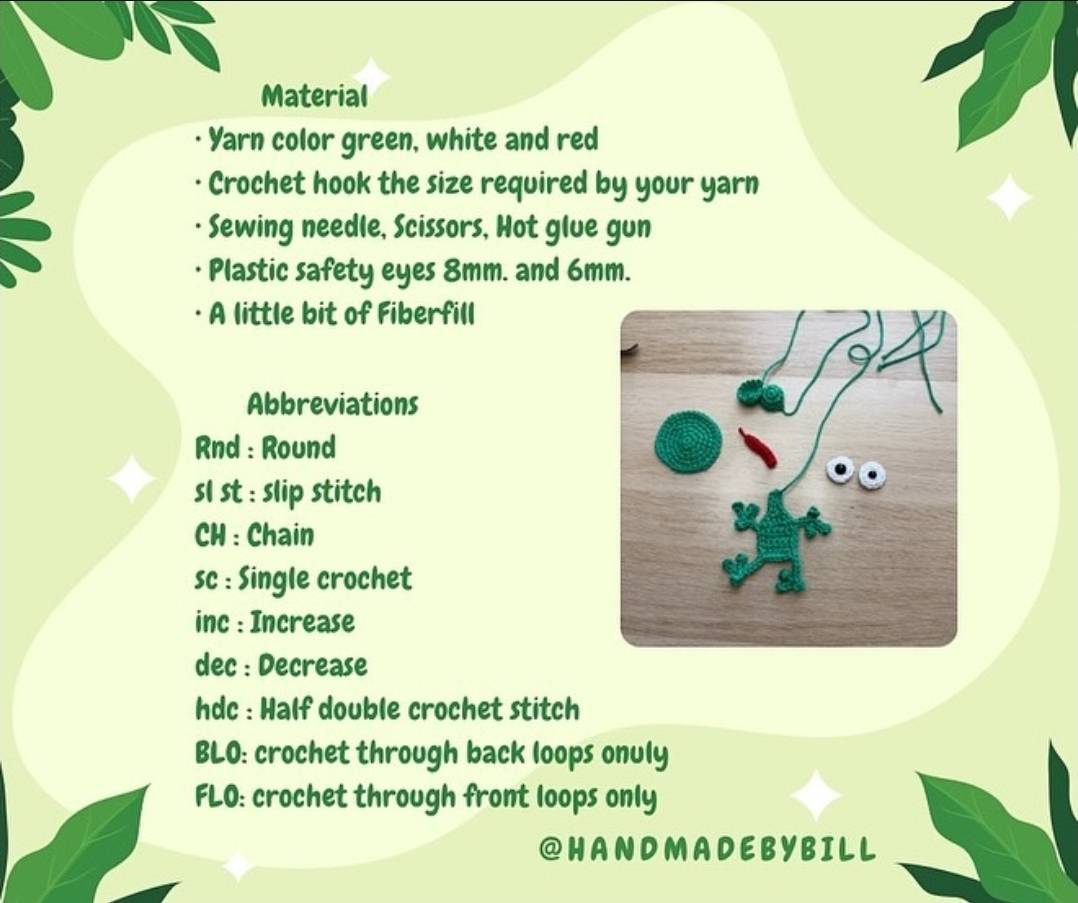
To begin your Funny Frog – Free Crochet Pattern, gathering the right materials is key to achieving the best results. Choose yarn that is soft, durable, and easy to work with. Worsted weight or DK yarns are ideal, especially if you’re planning to gift your frog to a child. Consider using 100% cotton or a cotton blend for a firm finish that holds shape well.
You’ll also need a crochet hook that matches your yarn’s weight. Typically, a 3.0 mm to 4.0 mm hook works well for amigurumi. A smaller hook helps create tighter stitches so that the stuffing stays neatly inside and the toy has a clean look. Don’t forget about scissors, a yarn needle for sewing parts together, and stitch markers to help track your rounds.
For stuffing, polyester fiberfill is most commonly used. It’s lightweight, washable, and holds shape over time. Stuff your frog firmly but avoid overstuffing, which can stretch the stitches and affect the final appearance. If you’re adding safety eyes, be sure to insert them before closing the head. Alternatively, you can embroider the eyes using black and white yarn for a safer, baby-friendly option.
You may also want to keep some blush or fabric paint on hand to add rosy cheeks or color details. Small buttons or felt can be used to accessorize your frog. Be creative with these finishing touches—they really bring your Funny Frog – Free Crochet Pattern to life.
Having all materials ready before you begin ensures a smooth crochet experience. Double-check your yarn label for recommended hook sizes and washing instructions, especially if you’re making a frog for a child or baby. Safety and softness should always be top priorities.
Finally, find a comfortable and well-lit workspace, maybe with your favorite music or a cup of tea nearby. Crocheting is not just about the final product—it’s about enjoying the creative journey as you bring a little frog friend to life.
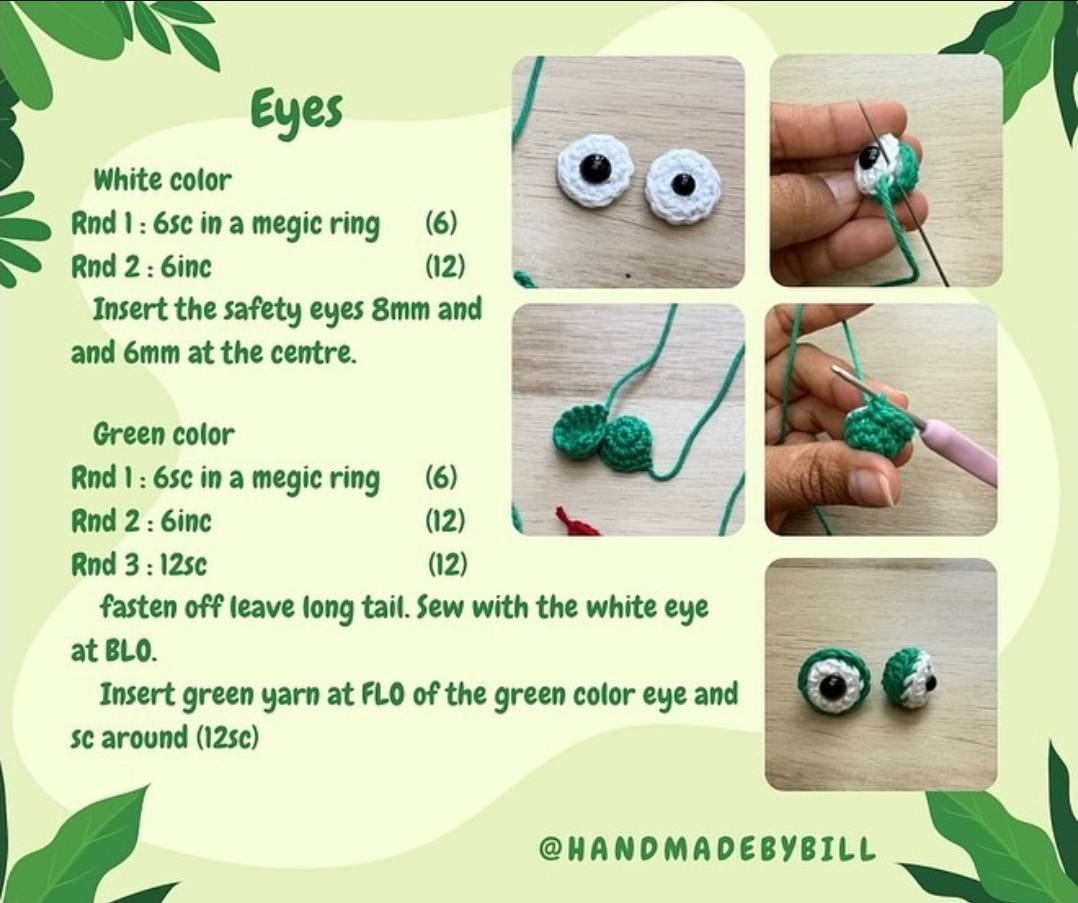
Start with a magic ring for the frog’s head. This technique creates a tightly closed center, which is essential for amigurumi. Work in continuous rounds using single crochet (sc) stitches. Gradually increase your stitch count in the early rounds to form a sphere. Use a stitch marker to keep track of the first stitch in each round, which helps you stay organized and accurate.
Once the increase rounds are complete, continue working even rounds to build height. You’ll begin to see a round, bulbous shape forming—the signature funny frog head. Before you finish the head, insert the safety eyes and stuff it evenly with fiberfill. Remember to shape it as you go for a clean finish.
Next, the body is created similarly, though slightly smaller than the head. Begin again with a magic ring and increase your stitches gradually. The body should have a round, squat shape. When you reach the desired height, stuff the body and sew it closed, leaving a flat base so your frog can sit up properly.
Now, attach the head to the body using your yarn needle. Align the pieces carefully to ensure a symmetrical look. Whipstitch around the edge securely and weave in the ends neatly. Take your time here—a well-attached head gives the frog a polished appearance.
Once the main body is assembled, you can begin shaping the character of your frog. Add subtle details like nostrils, a smile, or blush with embroidery or fabric paint. These tiny features give the Funny Frog – Free Crochet Pattern its adorable, animated charm.
Lastly, do a quality check. Make sure all stitches are secure, the body is stuffed evenly, and nothing feels loose. A well-finished body and head set the stage for the frog’s funny personality to shine through in the next steps.
The legs and arms give your frog its whimsical and playful look. Begin each limb with a magic ring and work in tight rounds. The limbs should be long and slightly tapered. You can stuff them lightly or leave them unstuffed for more flexibility and floppiness.
Frogs often have slightly webbed toes. You can mimic this look by crocheting tiny fingers or adding little picots at the ends of the limbs. If you’re a beginner, simple rounded ends work just fine and still look super cute. Be consistent with stitch counts on both limbs to ensure symmetry.
Attach the arms slightly below the frog’s head and the legs on the lower sides of the body. Position them before sewing to find the funniest posture. Some crafters prefer their frogs sitting straight, while others enjoy exaggerated poses like splayed arms or crossed legs. This is where the “funny” part of the Funny Frog – Free Crochet Pattern really comes into play.
The eyes are often a standout feature. You can crochet small white spheres and sew them on top of the head, or use felt and embroidery for a flatter design. A little black yarn or safety eyes in the center completes the look. Slight tilts or asymmetry in the eyes can enhance the humorous character.
Once all the limbs and eyes are attached, gently shape your frog to sit upright. Adjust stuffing if necessary and bend limbs slightly to create a dynamic pose. Your frog will start to take on its own personality with every added part.
Feel free to make multiple frogs with different eye positions or arm gestures. Some may look surprised, others sleepy, and some might even look mischievous. That’s the joy of customizing this Funny Frog – Free Crochet Pattern—every frog is one of a kind.
Once the basic form is complete, it’s time to add finishing touches that really make your frog stand out. One simple way is by giving your frog accessories—a tiny scarf, a top hat, or even a crocheted lily pad to sit on. These additions add layers of personality and humor.
You can also use embroidery to add a big smile, dimples, or even little freckles. Use thin yarn or embroidery floss and a sharp needle for precision. Lightly blush the cheeks with safe fabric coloring or even a touch of pink chalk pastel for a soft, sweet effect.
If you’re giving the frog as a gift, consider adding a name tag or a personalized note. Stitching a small heart on the chest or a monogram on the back makes the toy feel more unique. These thoughtful touches elevate a simple pattern into a treasured keepsake.
Want your frog to be part of a themed collection? Try making seasonal versions: a Christmas frog with a Santa hat, a Halloween frog holding a pumpkin, or a summer frog in sunglasses. The Funny Frog – Free Crochet Pattern is versatile enough to be adapted for any occasion.
Storage and care are important too. If your frog is going to a child, make sure all attachments are secure. Use machine-washable yarns if possible and avoid small parts for very young children. Always test your construction before gifting.
Lastly, don’t forget to photograph your creation! Sharing your Funny Frog – Free Crochet Pattern results online helps others and is a great way to celebrate your hard work. Join crochet communities and show off your froggy friends—they’re sure to bring a smile.
Can beginners try this pattern?
Yes! The Funny Frog – Free Crochet Pattern is beginner-friendly. If you’re comfortable with single crochet and working in the round, you can complete this project with ease.
How long does it take to crochet the frog?
Depending on your experience level, it can take between 4–6 hours to complete. Some crafters finish it in an afternoon, while others enjoy spreading it over a couple of days.
Can I use any type of yarn?
Worsted weight cotton or acrylic yarn is best. You can also try plush or velvet yarn for a soft, cuddly frog. Just make sure your hook size matches your yarn.
What size is the finished frog?
The frog typically measures around 6 to 8 inches tall, depending on your yarn, hook, and stuffing. You can adjust the size by using thicker or thinner yarns.
Are safety eyes safe for babies?
Not recommended. If you’re making this frog for a baby, embroider the eyes with yarn or use felt to avoid any choking hazard.
Can I sell frogs made from this pattern?
Yes, you can sell finished items made from the Funny Frog – Free Crochet Pattern, but always credit the original pattern source if it’s publicly available and follow licensing terms if any.
The Funny Frog – Free Crochet Pattern is more than just a fun project—it’s an opportunity to let your creativity and joy shine through your stitches. From the first magic ring to the final detail, every part of this pattern invites you to explore and enjoy the art of crochet.
Whether you make one for yourself, a child, or a friend, your handmade frog will surely bring laughter and warmth wherever it goes.
We hope this guide helped you bring your frog to life! If you loved this tutorial, please leave a sincere comment below and share your ideas or suggestions for future patterns. Your feedback helps us continue crafting beautiful and helpful content just for you. Happy crocheting!


