
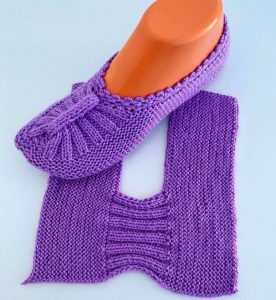
Crochet Multi-Purpose Blouse, Shawl, Runner Model

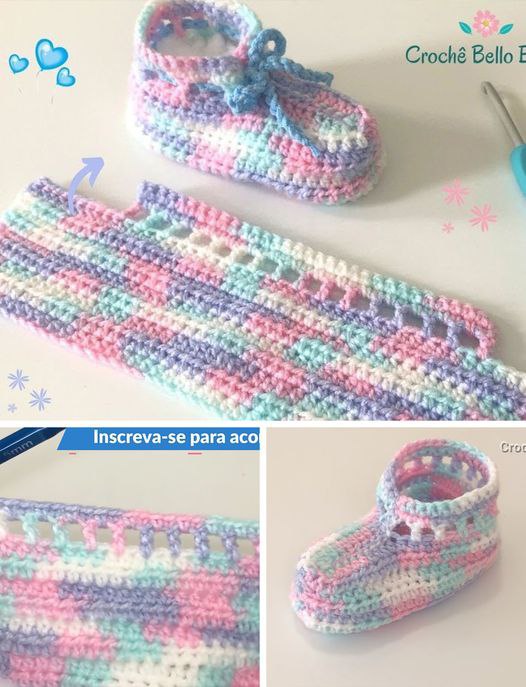
Creating your first pair of crochet baby booties – pattern is a heartwarming journey filled with creativity, care, and a touch of nostalgia. Whether you’re crafting a gift for a baby shower, preparing for your own little one, or simply enjoying the relaxing rhythm of crochet, this project is a perfect mix of simplicity and charm.
In this guide, we’ll take you through everything you need to know, using a crochet baby booties – pattern that’s both beginner-friendly and deeply rewarding.
The beauty of a crochet baby booties – pattern lies in its delicate detail and practical use. These tiny shoes not only keep little feet warm but also serve as adorable keepsakes.
Many crafters find joy in personalizing their booties—choosing the softest yarns, experimenting with gentle pastel colors, and adding small embellishments such as buttons or bows. It’s a project where love is woven into every stitch.
As you explore this guide, you’ll find that the crochet baby booties – pattern included here focuses on both style and comfort. It’s designed to give your final piece a snug, gentle fit, while remaining soft and stretchable.
You’ll also discover useful tips, stitch explanations, and variations to help make the pattern your own. Let’s dive in and get started with this delightful project.
When choosing materials for your crochet baby booties – pattern, start with baby-friendly yarn. It should be soft to the touch, hypoallergenic, and machine washable. Cotton blends and premium acrylic yarns are excellent choices for comfort and durability.
A lightweight yarn, such as DK (double knitting) or sport weight, is ideal for baby booties. These yarns provide the right balance of warmth and breathability, perfect for little feet. Avoid bulky or overly textured yarns, as they may irritate a baby’s sensitive skin or affect the fit of the booties.
Hook size matters, too. A 3.5mm to 4.5mm crochet hook is commonly used for this type of project, depending on the yarn. Always check your yarn label for the recommended hook size, and consider making a small gauge swatch if you want a precise fit.
You’ll also want a yarn needle for weaving in ends and possibly a stitch marker to keep track of rounds. If you plan to embellish the booties, consider small buttons (sewn securely), pom-poms, or crocheted flowers.
Safety is crucial—avoid any loose pieces that could come off and become a choking hazard. The crochet baby booties – pattern provided here includes optional decoration ideas that keep safety in mind.
Finally, have a pair of scissors ready and a tape measure to ensure your sizing matches up with standard baby foot lengths. Preparation is key to making your project smooth and enjoyable.
We’ll start this crochet baby booties – pattern by working the sole of the bootie. Begin with a magic ring and a few single crochets to set your foundation. This adjustable start helps create a neat, round shape that forms the base of the foot.
Increase in the next few rounds to shape the length and width of the sole. You’ll be using single and half-double crochet stitches, working in the round to build a smooth, flat base. It’s important to count your stitches accurately to keep the sole even.
Once the sole is the desired size, begin building up the sides of the bootie. This involves crocheting in the back loop only, which helps create a defined edge that bends upward, forming the shoe-like structure of the bootie.
Next comes the top of the bootie. Here, you’ll shape the toe by decreasing strategically. You can follow a stitch count or try the bootie on a small doll or baby foot model to check the fit and shape. This part of the crochet baby booties – pattern gives the bootie its snug, rounded front.
After shaping the toe, create the ankle area. You can keep it simple with a ribbed cuff or go for a more decorative finish with scalloped edges or a buttoned strap. This is a great place to get creative and personalize your crochet baby booties – pattern.
Finish by weaving in all ends securely. If desired, add decorative touches, keeping safety in mind. Your baby booties are now complete—congratulations!
One of the joys of using a crochet baby booties – pattern is the opportunity to personalize your design. From color combinations to textures, the possibilities are endless.
Start with color choices. Soft neutrals like beige, cream, and gray are timeless, while pastel pinks, blues, and mint greens are perfect for a baby’s wardrobe. For a modern twist, consider pairing neutrals with bold accents like mustard or teal.
You can also play with stitch patterns. Adding a textured stitch, such as the shell or puff stitch, gives your booties a unique look and extra warmth. Just ensure the pattern stays soft and not too bulky.
Consider adding a strap with a button closure. Not only does it help the bootie stay on, but it also adds a charming detail. Make sure any buttons used are securely sewn on and pose no choking risk.
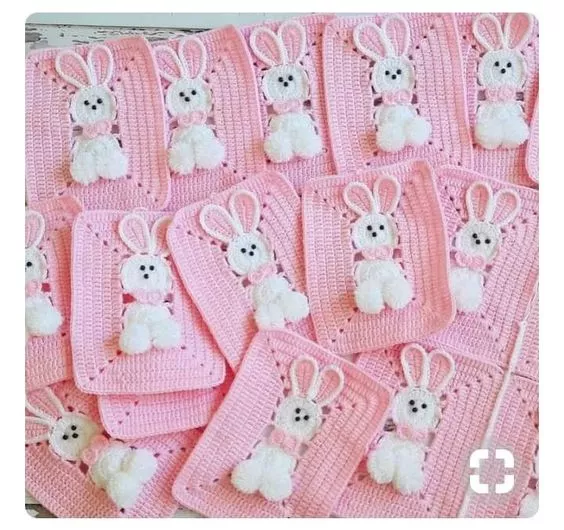
Personal touches like a tiny crocheted flower, heart, or bow can make the booties even more special. These are especially lovely if you’re gifting the booties or selling them at craft fairs.
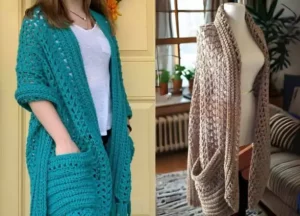
Want to make a matching set? Use the same yarn and stitches to create a coordinating baby hat or cardigan. A full handmade ensemble makes a beautiful baby gift.
Lastly, don’t forget the packaging. Wrapping your booties in tissue with a handmade tag or placing them in a tiny box adds that finishing touch that says “made with love.”
Crocheting baby booties takes patience and practice. Following a crochet baby booties – pattern step-by-step will ensure a better outcome and boost your confidence as a maker.
Start by reading the entire pattern before beginning. This gives you an overview of the project and allows you to spot any unfamiliar stitches or terms ahead of time.
Use a stitch marker to keep track of your rounds, especially when working in the round without joining. This small tool can prevent confusion and help you maintain an even shape.
Always check your gauge if the pattern recommends it. Gauge is crucial when making wearables to ensure the item fits correctly. A bootie that’s too big may fall off, while one that’s too tight could be uncomfortable.
Crochet in good lighting and take breaks to rest your hands. Baby booties are small, but they require precision. Avoid rushing, and enjoy the rhythm of the stitches.
If your first pair isn’t perfect, don’t worry. Practice makes progress. Each time you follow a crochet baby booties – pattern, you’ll learn new tricks and improve your technique.
Consider keeping a notebook of your projects—jot down yarn used, hook size, and any changes you made. This makes it easier to recreate or adjust the pattern later.
Q: What is the best yarn to use for crochet baby booties?
A: Soft, breathable yarns like cotton blends or baby-safe acrylic are ideal. Always choose yarn labeled as suitable for babies and ensure it’s washable.
Q: How long does it take to crochet a pair of baby booties?
A: Depending on your skill level, a simple pair can take 1 to 2 hours. More complex designs or embellishments may take longer.
Q: What size are standard crochet baby booties?
A: Standard newborn booties measure about 3.5 to 4 inches in length. You can adjust the pattern to fit older babies by adding stitches or rounds.
Q: Can I sell booties made from this pattern?
A: Yes, you can usually sell handmade items from free or original patterns, as long as you don’t copy or redistribute the pattern itself. Always check the pattern’s usage terms.
Q: How can I make the booties stay on a baby’s feet?
A: Adding a cuff, strap, or snug ribbing helps keep the booties in place. Make sure they are neither too loose nor too tight for comfort.
Q: What hook size should I use for baby booties?
A: A 3.5mm to 4.5mm hook works well with most baby-weight yarns. Match your hook to your yarn and pattern recommendations.
Throughout this article, we explored the charm and practicality of the crochet baby booties – pattern. From choosing the right materials to adding creative details, each step was designed to help you craft a beautiful and useful baby item with love and care. Whether you’re a beginner or seasoned crocheter, this project is a rewarding way to express your creativity and make something meaningful.
Now that you’ve learned how to create these lovely booties, we’d love to hear from you! Leave a sincere opinion below and share any suggestions or experiences you had while following this pattern. Your feedback helps build a stronger crafting community!


