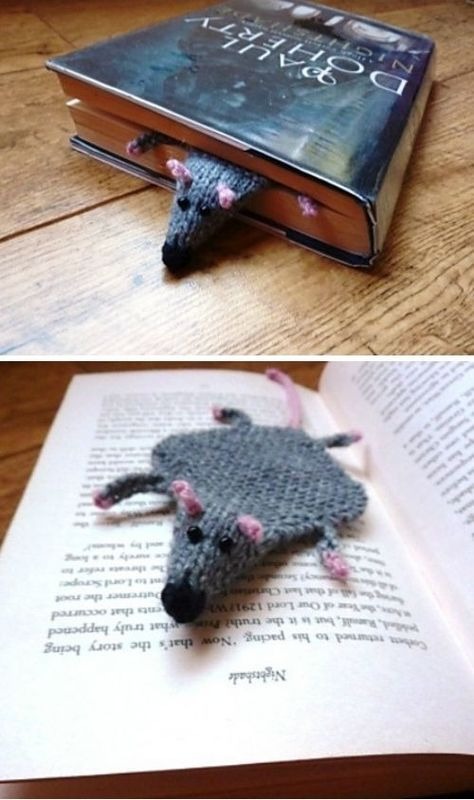
11 Animal Bookmarks Free Knitting Patterns

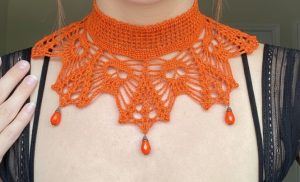
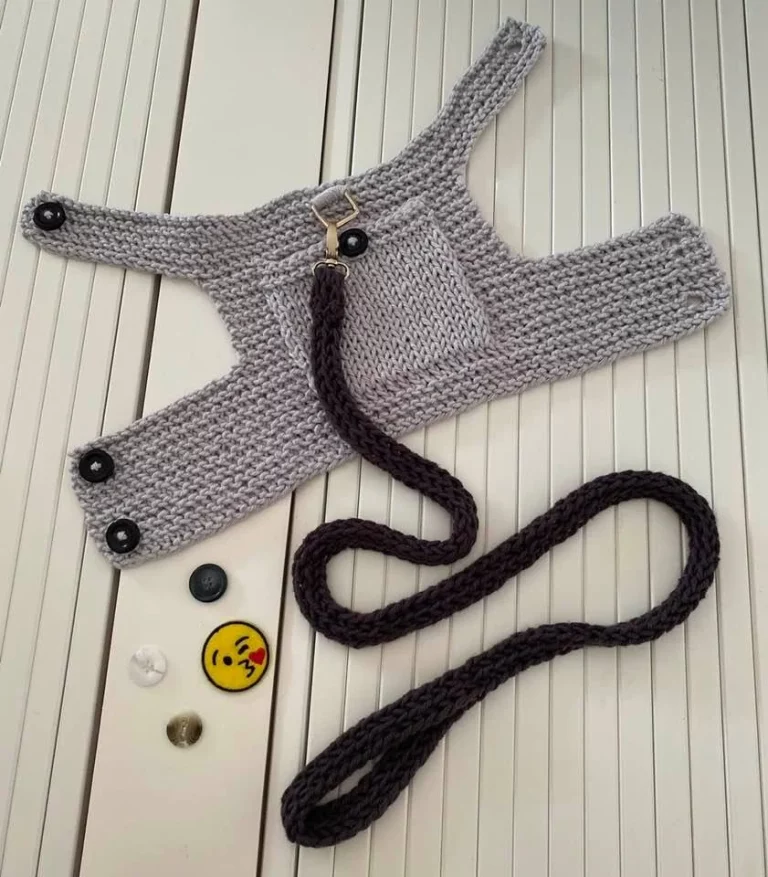
The Charm Collar – Pattern is a delightful accessory that adds a touch of elegance and personality to any outfit. Whether you’re creating it for yourself, a child, or as a thoughtful handmade gift, a crochet charm collar can be a stylish, creative project.
The best part? It’s beginner-friendly and customizable, and it gives crafters a chance to play with different textures, stitches, and color palettes.
In this article, you will learn everything you need to know to create your own charm collar. We will walk you through materials, techniques, and detailed steps, making sure the process is enjoyable and easy to follow.

Whether you want to add lace, beads, or a pop of color, this Charm Collar – Pattern offers countless opportunities for expression.
Crocheting a charm collar isn’t just about making something pretty—it’s also a wonderful way to relax, boost creativity, and practice mindfulness. The repetitive motion of crochet is known to ease anxiety and bring mental clarity.
By the end of this article, you’ll be equipped to craft your own stylish and functional collar with confidence.
Before diving into the project, it’s important to gather all your materials. The Charm Collar – Pattern works well with lightweight yarns like cotton or bamboo, which provide a soft, flexible finish. You may also choose a fine lace thread for a more delicate look.
You’ll need a crochet hook suitable for your yarn. For most collars, a 2.5mm to 3.5mm hook will suffice. It’s also helpful to have scissors, a yarn needle for weaving ends, and optional closures such as buttons, ribbons, or ties.
Pick colors that match the style you’re aiming for. A neutral tone gives an elegant, vintage touch, while bright shades create a more playful or modern effect. You might even consider using two or more colors to add contrast or visual interest.
Make sure your workspace is well-lit and comfortable. Having a clear, quiet environment will help you follow the Charm Collar – Pattern with fewer mistakes and more enjoyment.
Gauge isn’t critical for this pattern unless you’re aiming for a precise neck fit. You may crochet a small swatch if you’re concerned about size, but feel free to make adjustments as you go—collars are quite forgiving projects.
Lastly, consider what embellishments you’d like to include. Beads, small crocheted flowers, or embroidered details can make your charm collar stand out as a one-of-a-kind piece.
The Charm Collar – Pattern uses basic stitches that even beginners can master with a little practice. Most collars begin with a foundation chain that determines the overall length of the piece.
Single crochet (sc), half double crochet (hdc), and double crochet (dc) are frequently used. These stitches allow you to build the body of the collar evenly and quickly. If you’re already comfortable with these, feel free to explore picots, shells, or lace stitches for decorative edges.
Once you complete the foundation row, the pattern will often alternate between rows of basic stitches and decorative edges. Some patterns incorporate increases or decreases to help the collar lay flat or curve gently around the neckline.
The turning chain is essential to maintain your stitch count and create clean edges. Always make sure your turning chains are consistent to avoid uneven rows.
For beginners, keeping track of stitch counts can be helpful. Use stitch markers if needed, especially when working with shell patterns or fans. These decorative motifs require precise spacing.
Blocking your finished collar is a recommended step to enhance the shape and drape. Use a damp cloth or steam block depending on the yarn fiber to gently stretch and set the stitches.
Once the main piece of the Charm Collar – Pattern is crocheted, you’ll want to finish it with care. Weaving in the yarn tails securely ensures durability, especially if the collar will be worn often.
A closure is typically added at the center front or back. You can use a small button and loop, ties made from chained yarn, or even a snap sewn onto the fabric. Choose a method that complements the look of your collar.
Personalizing your charm collar is where the fun really begins. Add beads to the scalloped edges or embroidery along the band for an elegant flourish. Tiny crochet flowers or stars can also be stitched on for a charming effect.
If you enjoy working with color, consider using ombré yarns or creating stripes. Alternating colors in each row adds a whimsical or bold style, depending on the palette.
You can also experiment with collar shapes. Some prefer a pointed Peter Pan style, while others may like a gentle curve or even a V-neck shape. Small pattern modifications will make your collar unique.
Wearing your finished collar over sweaters, dresses, or blouses adds instant charm to any look. It’s a great conversation piece and a beautiful showcase of your crochet skills.
The Charm Collar – Pattern makes for an excellent handmade gift. It’s relatively quick to make, easy to customize, and ideal for birthdays, baby showers, or holidays. Packaged with love, it becomes a treasured keepsake.
If you plan to sell your collars, creating a few variations in color and style will help attract more buyers. Consider offering custom orders for specific neck sizes or embellishments.
Be sure to photograph your collars clearly and professionally. Use a neutral background and good lighting to highlight the texture and colors of the yarn. This will enhance your visibility if you’re listing the items online.
Add a small branded tag or care card to your collar to elevate its presentation. Explain how to wash the item and what materials were used. Customers appreciate the personal touch and transparency.
Pricing should reflect the time, materials, and creativity involved. Handmade items often carry sentimental value and should not be undervalued.
Lastly, encourage feedback from your customers. Ask what they liked about the item, and how it could be improved. These insights can help you refine future versions of your Charm Collar – Pattern creations.
What is the best yarn for the Charm Collar – Pattern?
A soft cotton or cotton blend is ideal. For a more delicate look, lace-weight yarn works beautifully, while worsted weight can create a chunkier, more textured effect.
How long does it take to crochet a charm collar?
Depending on the complexity and your crochet speed, it can take between 1 to 3 hours. Simpler designs take less time and are perfect for beginners.
Can I make the collar adjustable?
Yes! Adding ties, buttons, or loops makes the collar easy to adjust to different neck sizes. Elastic threads or crochet chains also work as closures.
Do I need to block the finished collar?
Blocking is recommended to ensure the collar lays flat and the pattern design is visible. It also improves the fit and finish of the final product.
Is this pattern suitable for beginners?
Absolutely. The Charm Collar – Pattern uses basic stitches like single and double crochet. With clear steps, it’s a great beginner project that yields beautiful results.
Can I wash the collar in the machine?
That depends on the yarn. Most cotton and acrylic yarns are machine-washable, but handwashing is best for delicate fibers and to preserve embellishments.
Creating your own Charm Collar – Pattern is more than a simple craft—it’s a form of artistic expression that’s accessible to all skill levels. You’ve learned about materials, essential stitches, how to assemble your collar, and ways to personalize it for gifts or sales. The beauty of this pattern is its flexibility—there’s no one-size-fits-all, and each version tells a unique story.
We hope this guide has inspired you to pick up your hook and begin your own charm collar project. If you’ve tried this pattern or have questions, we’d love to hear from you. Please leave a sincere opinion and any suggestions in the comments. Your feedback helps us grow and inspires other crafters too!
