
Macrame Heart Bracelet - Free Tutorial

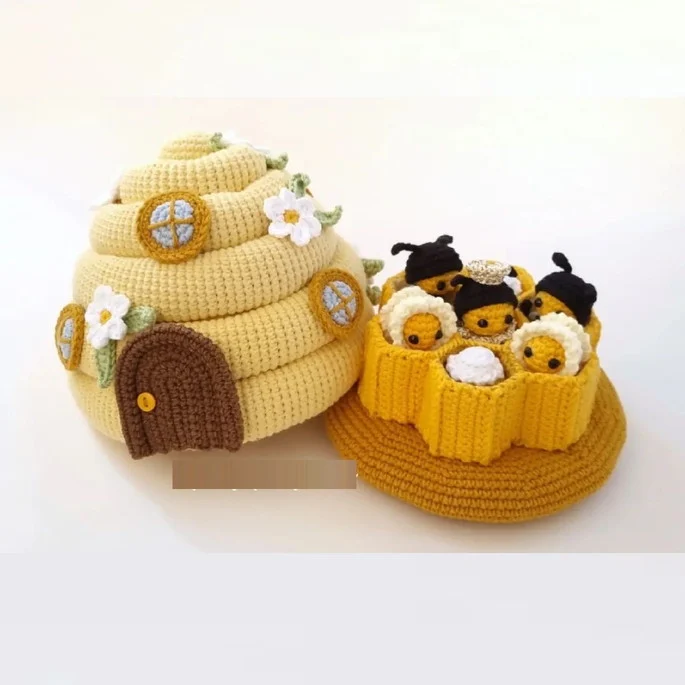
Creating an Amigurumi Beehive Pattern is a delightful crochet project that allows crafters to experiment with textures and shapes. This charming design is perfect for decorating nurseries, playrooms, or simply adding a whimsical touch to your crochet collection.
Whether you are a beginner or an experienced crocheter, this pattern provides a fun challenge with rewarding results.
One of the most exciting aspects of this Amigurumi Beehive Pattern is the ability to customize it with adorable bees, vibrant colors, and unique details.
The design is typically worked in rounds, ensuring a seamless and polished finish. Additionally, using soft yarn and a tight stitch pattern helps achieve the ideal structure and durability.
In this guide, we will cover everything you need to know about crafting an Amigurumi Beehive Pattern. From materials and techniques to step-by-step instructions, you’ll be equipped with all the knowledge required to complete this adorable crochet project. Let’s get started!
To create your Amigurumi Beehive Pattern, you’ll need a few essential materials. Gathering high-quality supplies ensures a neat finish and long-lasting results. Here’s what you will need:
Having the right materials makes the process smoother and allows you to focus on crafting a charming and sturdy amigurumi piece.
Now that you have your materials ready, let’s dive into the crochet process. The Amigurumi Beehive Pattern follows a structured method to achieve the classic beehive shape.
Following these steps ensures a well-shaped and structured beehive, perfect for adding embellishments and bees.
Adding mini bees to your Amigurumi Beehive Pattern enhances the design’s charm. Here’s a simple way to crochet tiny bees:
These cute bees add a whimsical touch to your beehive, making the project even more delightful.
Crocheting an Amigurumi Beehive Pattern requires patience and practice. Here are some useful tips:
Following these tips will help you create a professional-looking amigurumi beehive with an adorable finish.
Q: Is the Amigurumi Beehive Pattern suitable for beginners?
A: Yes! With basic crochet skills and patience, beginners can successfully complete this pattern.
Q: What type of yarn works best for an amigurumi beehive?
A: Cotton or acrylic yarn in worsted weight is ideal for structure and durability.
Q: How long does it take to complete this pattern?
A: Depending on skill level, it can take anywhere from a few hours to a couple of days.
Q: Can I make a larger version of the beehive?
A: Absolutely! Adjusting the stitch count and using a larger hook can increase the size.
Q: How do I ensure my bees are securely attached?
A: Using a strong stitch and sewing them firmly onto the beehive prevents them from falling off.
Join our VIP broadcast list and gain access to exclusive patterns, all for free. As a VIP member, you’ll receive the best patterns daily, delivered directly to your device. ✨📱 It’s a unique opportunity to stay up-to-date with the latest trends and designs, curated just for you. Don’t miss out on enhancing your projects and discovering new inspirations with the best patterns every day! 🎨🔝
Creating an Amigurumi Beehive Pattern is a fun and rewarding crochet project that brings creativity to life. With simple techniques and a bit of patience, you can craft a charming beehive complete with adorable buzzing bees. Whether you make it for yourself or as a gift, this amigurumi design is sure to be a delightful addition to any collection.
We’d love to hear your thoughts! Share your experience with this pattern in the comments below and let us know if you have any tips or suggestions for fellow crocheters. Happy crocheting!


