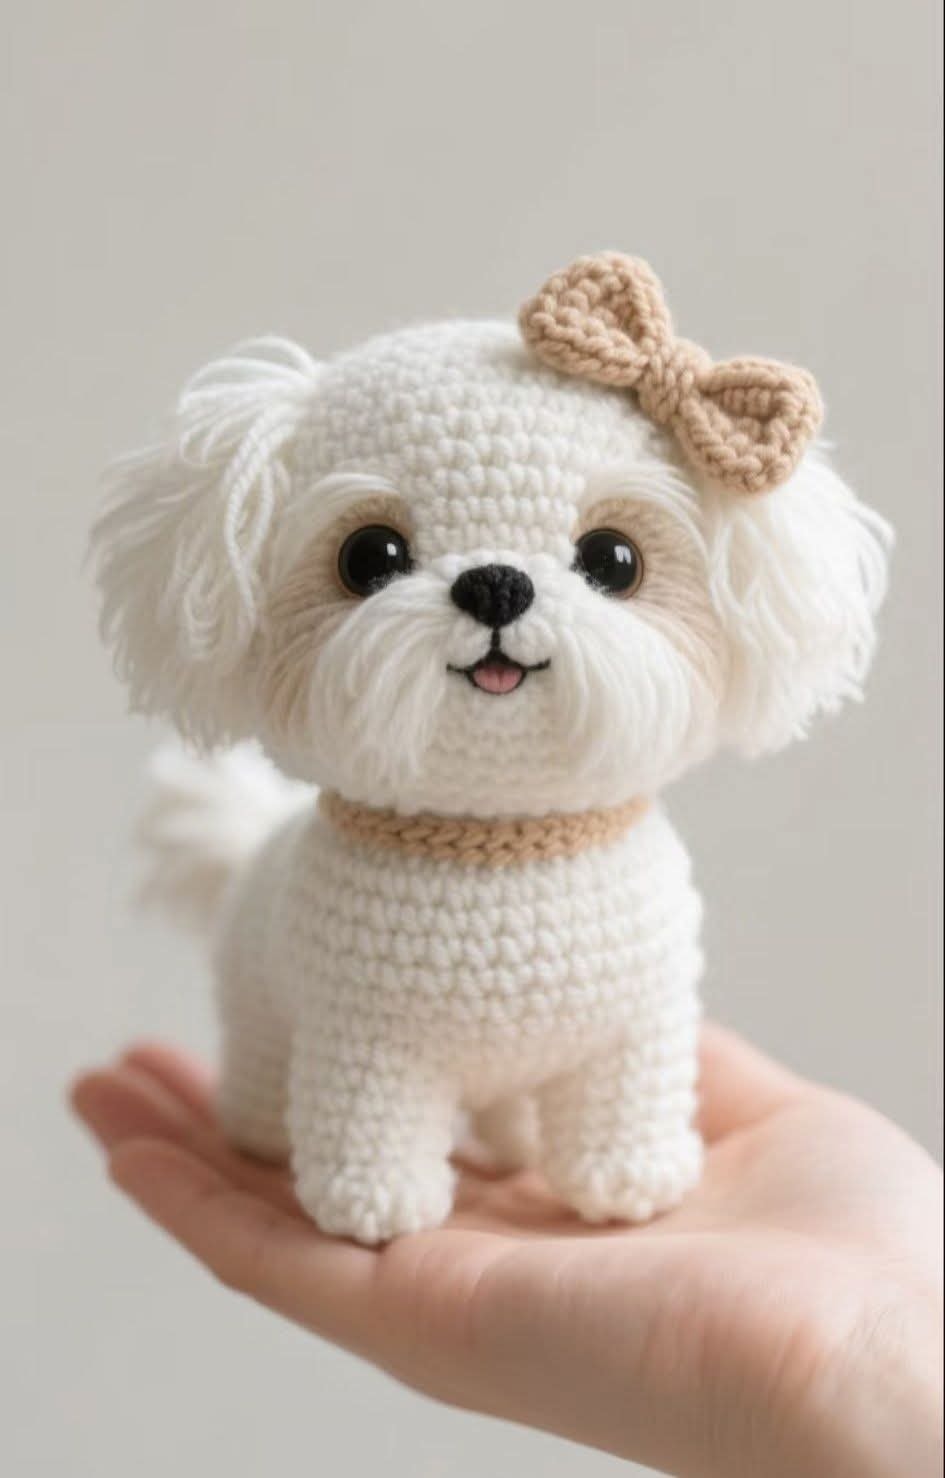
Amigurumi Little Dog Free Pattern is one of the most beloved crochet projects for crafters who adore creating soft, charming, and customizable toys. These delightful mini pups are more than just yarn creations—they’re little companions made with love.
Whether you’re a seasoned amigurumi artist or just starting your crochet journey, making your own little dog brings joy and satisfaction unlike any other.
The popularity of amigurumi (the Japanese art of crocheting small stuffed animals and creatures) has surged in recent years, and Amigurumi Little Dog Free Pattern projects are a top choice.
Not only do they make heartwarming gifts, but they’re also perfect for using up small yarn leftovers and experimenting with color combinations. From floppy ears to button noses, each pup can reflect your personal style.
In this article, we’ll explore everything you need to know about how to make your own amigurumi little dog, including the steps, materials, and techniques. With our carefully written guide, you’ll gain the confidence to dive into this project and enjoy every stitch. Let’s get started on this adorable crochet adventure!
Before you begin your Amigurumi Little Dog Free Pattern, it’s important to gather all the necessary materials. Using the right tools and yarn can make a big difference in your final result. Choose soft, durable yarn that feels pleasant to the touch—typically, cotton or acrylic blends work best for amigurumi.
You’ll also need a crochet hook suited to your yarn thickness. A smaller hook creates tighter stitches, which is ideal for stuffed animals. For most patterns, a 2.5mm to 3.5mm hook is recommended. Don’t forget fiberfill stuffing for shaping your dog, and stitch markers to keep track of your rounds.
Safety eyes or embroidered details can be used for the face, depending on your preference. If making the amigurumi little dog for a baby or toddler, embroidered eyes are safest. A yarn needle is essential for sewing parts together and weaving in loose ends.
It’s always helpful to read through the full pattern before starting. This gives you a clear understanding of how each piece comes together. Some projects might include accessories like collars, scarves, or even tiny bones to add personality.
If this is your first amigurumi project, start with a simple pattern. Once you’ve mastered the basic shapes and stitches, you can move on to more complex dog designs with detailed features and colors. The beauty of the Amigurumi Little Dog Free Pattern is how customizable it can be.
Remember to have patience and enjoy the process. The magic of amigurumi lies in watching your project grow with each round. Mistakes can be undone and fixed easily, so don’t stress—just keep going!
The Amigurumi Little Dog Free Pattern is typically worked in several pieces: the head, body, legs, ears, tail, and facial features. Each part is crocheted separately and then sewn together. This approach allows you to shape each part carefully and place them where they look most natural.
Most amigurumi patterns use the magic ring technique to start in the round. This method prevents a hole in the starting point and creates a clean, neat base. From there, increases and decreases are used to form the desired shapes.
The head is usually a round or oval shape with increases at the beginning and decreases toward the end. This allows the face to have a natural curve. Many amigurumi little dog patterns include snouts or muzzles that are sewn onto the face after the main head is finished.
The body can be round or cylindrical, depending on the style of the pattern. Some patterns make standing dogs, while others create sitting or lying positions. The versatility of the Amigurumi Little Dog Free Pattern allows for different poses and expressions.
Ears add a lot of personality to your dog. Floppy ears, pointed ears, or even curly ones can be made with simple shapes. Placement is important to achieve the desired expression. Similarly, tails can be straight, curled, or short—each gives the dog its own charm.
Legs are generally simple cylinders or cones. They can be made flexible with wire or left soft and cuddly. Once all the parts are complete, they are sewn securely to the body. Take your time with assembly—careful stitching makes a big difference in the final look.
One of the best aspects of using an Amigurumi Little Dog Free Pattern is that you can personalize your creation in so many ways. Changing colors, adding accessories, or altering facial expressions can make your dog truly one of a kind.
Try using multicolor yarn or variegated yarns to create spotted or patchy fur. You can also mix and match yarns for the ears and tail. Think about real dog breeds for inspiration—create a tiny dalmatian, poodle, or beagle using simple color changes.
Adding accessories gives your dog personality. A small collar with a button or charm, a bow, or even a tiny crocheted sweater can make your amigurumi extra adorable. Seasonal details like scarves for winter or flower crowns for spring are fun touches.
Facial expressions can be made with a few stitches. A happy smile, sleepy eyes, or a surprised face all bring emotion to your project. Safety noses, plastic eyes, or embroidered features each give a unique result.
For extra creativity, consider turning your amigurumi little dog into a keychain, mobile, or baby rattle. Adding a rattle insert or bell inside the stuffing is a great way to turn the project into a baby-friendly toy.
You can also scale your pattern by changing the yarn weight and hook size. Using bulky yarn creates a larger plush dog, while fine thread can make a tiny charm. This flexibility is part of what makes Amigurumi Little Dog Free Pattern projects so popular.
Don’t forget to name your finished dog and perhaps make a matching one for a friend. Many crocheters enjoy gifting their creations, and a personalized amigurumi pup makes a heartwarming present for all ages.
Assembling your Amigurumi Little Dog is the final step and where your project really comes to life. Begin by sewing the head to the body using a strong yarn tail and tight stitches. It’s helpful to pin the pieces in place before attaching.
Next, attach the legs evenly so that your dog stands or sits properly. Check balance and symmetry to ensure it looks natural. Use small stitches and secure knots to keep everything in place. The more attention you give to placement, the more polished your final dog will be.
Ears can dramatically change your dog’s expression. Try different positions—upright for alertness or drooping for calmness. You can even bend or fold them for extra charm. Use the same yarn or contrast colors to enhance their shape.
The tail adds balance and character. Sew it securely to the back of the body, angled according to the dog’s pose. A curly or wagging tail shape adds a playful element. If you’re adventurous, you can even add a wire for bendable tails.
Finally, attach any additional details like noses, tongues, or accessories. Use fabric glue if necessary, or sew with tiny invisible stitches. Make sure all parts are securely fastened, especially if your toy will be used by children.
Take a moment to admire your finished amigurumi little dog. Each stitch, shape, and detail has come together into a unique, lovable character. Whether it’s your first or hundredth dog, completing the pattern is always a joyful achievement.
What is the best yarn for Amigurumi Little Dog Free Pattern projects?
Cotton yarn or soft acrylic yarn is best. It holds shape well, is durable, and is comfortable to work with.
How long does it take to crochet an amigurumi dog?
Depending on the size and complexity, it can take anywhere from 4 to 10 hours. Beginners might take a bit longer.
Can I sell items made from a free pattern?
Yes, most free patterns allow you to sell finished products, but always check the pattern’s terms of use to be sure.
Is this pattern suitable for beginners?
Absolutely! Start with a simple Amigurumi Little Dog Free Pattern and follow step-by-step instructions. Practice makes perfect.
Can I wash my amigurumi dog?
Yes, if made with washable yarn and no fragile accessories. Hand wash with mild soap and air dry for best results.
What if I don’t have safety eyes?
You can use embroidery thread to stitch eyes directly onto the face, making it safe for young children or babies.
The Amigurumi Little Dog Free Pattern is a rewarding and delightful project for crocheters of all skill levels. From choosing your yarn to the final stitch, creating a tiny dog brings a sense of joy and accomplishment. This guide has walked you through materials, techniques, personal touches, and final assembly—everything you need to succeed.
We hope you feel inspired to start your own amigurumi dog. Each one tells a story, reflects your creativity, and brings smiles wherever it goes. If you enjoyed this guide, please leave your honest opinion in the comments and feel free to share any suggestions or ideas you have for future projects. Happy crocheting!