
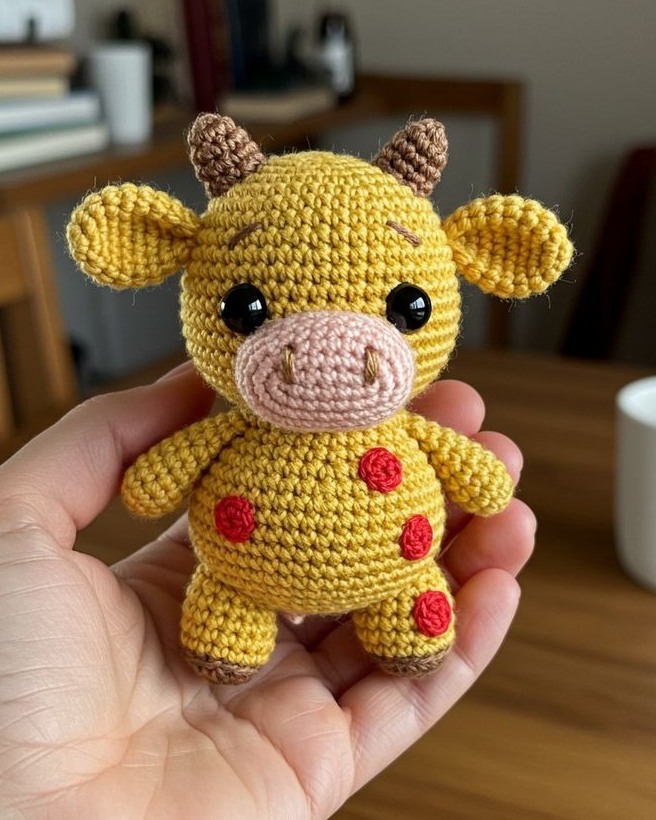
The Amigurumi Mini Cow – Pattern is one of the cutest crochet projects that any crafter can create. This adorable design has gained popularity among beginners and advanced crocheters alike because of its simple construction and charming result.
Whether you are looking to make a handmade gift, a decorative piece, or even start a small craft business, learning how to make this crochet cow will be both fun and rewarding.
Creating your own Amigurumi Mini Cow – Pattern is not just about making a toy, it’s also a way to connect with the art of crochet. The process involves patience, attention to detail, and a love for handmade creations.
With the right yarn, hooks, and stuffing, you can design a cow that fits your own personal style. The miniature size makes it even more appealing, as it can be finished faster than larger amigurumi projects and requires less material.
Another great reason to try the Amigurumi Mini Cow – Pattern is its versatility. You can customize the colors, add accessories like bows or scarves, or even turn it into a keychain or bag charm. This makes it a wonderful project for gift-giving occasions such as birthdays, baby showers, or holidays.
It’s a project that invites creativity, allowing every crocheter to add their personal touch while following a structured and easy-to-understand guide.
1. Materials Needed for Amigurumi Mini Cow – Pattern
To create a beautiful Amigurumi Mini Cow – Pattern, you first need to gather the right materials. Having everything prepared before you start ensures a smooth and enjoyable crafting process. The essentials include yarn, a crochet hook, stuffing, safety eyes, and some additional tools for shaping and finishing.
Choosing the right yarn is crucial. For amigurumi projects, cotton or acrylic yarn is often recommended because it gives a neat finish and holds its shape well. You can choose the traditional white and black for your cow, or experiment with fun colors like pink, brown, or even rainbow shades for a playful twist.
The crochet hook size will depend on the thickness of your yarn, but smaller hooks are usually preferred for amigurumi because they keep the stitches tight. A common size would be between 2.0 mm and 3.5 mm. Using a hook that is slightly smaller than what the yarn label suggests is a good tip for amigurumi projects.
Stuffing is what gives your mini cow its adorable shape. Polyester fiberfill is commonly used because it is soft, lightweight, and keeps the toy fluffy. Make sure to add enough stuffing so your cow looks firm but avoid overstuffing, which can stretch the stitches.
Safety eyes are another important detail. They bring life to the cow’s face and make it look extra cute. If you are making the Amigurumi Mini Cow – Pattern for a child, you can embroider the eyes instead to make it safe for all ages. A yarn needle and stitch markers are also useful tools to keep your work neat and organized.
Lastly, having some optional materials like ribbons, tiny bells, or felt can allow you to personalize your mini cow. Accessories can make each creation unique, giving you endless possibilities for creativity.
2. Step-by-Step Instructions for Amigurumi Mini Cow – Pattern
Once you have your materials ready, it’s time to dive into the Amigurumi Mini Cow – Pattern step by step. Following a clear sequence will help you achieve a neat and consistent result.
The first step is to crochet the head. Most patterns start with a magic ring and then work in continuous rounds. Increasing and decreasing stitches help form the spherical shape of the head. This part will later be decorated with safety eyes, embroidered details, and small ears.
Next, you will move on to the body. The body is usually slightly oval and worked in the same continuous round technique. By carefully following the stitch counts, you can ensure that the cow maintains its miniature proportions. At this stage, it is important to stuff the body gradually as you crochet to avoid lumps.
The legs and arms are crocheted separately and then sewn onto the body. These parts are small but essential for giving your cow its adorable look. They can be left plain or decorated with tiny hooves in contrasting yarn colors. This is also a good opportunity to practice sewing pieces together neatly.
The ears and horns are small but add a lot of character to the Amigurumi Mini Cow – Pattern. The horns can be made in light brown or beige to mimic a real cow, while the ears can match the main body color. Attaching them symmetrically is key to making your cow look balanced.
One of the most fun details is the cow’s tail. A short crochet chain with a tiny tuft at the end gives the cow a realistic yet playful appearance. This simple touch makes the final design feel complete.
Finally, assembling all the pieces together is the last step. Sewing should be done carefully and securely to ensure the toy is durable. Once everything is attached, you can add finishing touches such as a ribbon around the neck or a small bell to make it even cuter.
3. Tips for Making Your Amigurumi Mini Cow – Pattern Unique
One of the joys of working on the Amigurumi Mini Cow – Pattern is that you can truly make it your own. While following the basic instructions ensures structure, adding personal touches transforms the project into something unique.
Color customization is one of the easiest ways to personalize your cow. Instead of the traditional white with black spots, you might try a pastel cow, a completely pink cow, or even a multicolored one. This makes your project stand out and feel special.
Adding accessories is another great option. You can crochet a small scarf, add a bow on one ear, or even create tiny clothing items like a vest or hat. These small additions make the mini cow even more charming and can turn it into a themed decoration for holidays or special events.
Texture also plays an important role. Using different stitches, such as bobble stitches for spots, can add dimension to your mini cow. Some crafters also mix yarn textures, like combining cotton with a fluffy yarn, to give certain parts a soft and playful touch.
If you are making the Amigurumi Mini Cow – Pattern as a gift, personalizing it with the recipient’s favorite colors or initials embroidered on it will make it extra meaningful. Handmade gifts always carry emotional value, and customization takes it one step further.
You can also experiment with size. By changing the yarn thickness and hook size, you can create a smaller keychain version or a larger plush toy. This versatility allows you to adapt the pattern to different purposes.
Finally, think about the cow’s expression. A slight change in eye placement or adding blush with fabric paint can completely alter the cow’s personality. From shy to cheerful, the expression you choose will give life to your creation.
4. Why You Should Try the Amigurumi Mini Cow – Pattern
There are many reasons why the Amigurumi Mini Cow – Pattern has become a favorite among crochet lovers. It’s not just a project; it’s an opportunity to learn, relax, and create something meaningful.
One of the biggest advantages is that it’s beginner-friendly. Even if you’re new to crochet, the simple stitches and clear structure make this project approachable. It’s a wonderful way to build confidence while producing a cute and satisfying result.
The time required to complete the mini cow is relatively short compared to larger amigurumi projects. This makes it perfect for crafters who want quick results or those looking to make multiple items for gifts or craft fairs.
Another reason to try this pattern is its versatility. The Amigurumi Mini Cow – Pattern can be adapted for many purposes: a toy, a home decoration, a bag charm, or even a collectible set if you create cows in different colors. The possibilities are endless.
Crocheting has therapeutic benefits as well. The repetitive movements of crochet help reduce stress and promote relaxation. Working on a small project like this allows you to enjoy the calming process without feeling overwhelmed.
Lastly, completing your mini cow gives a strong sense of accomplishment. Holding a finished handmade item that you created stitch by stitch is deeply rewarding and motivating to continue exploring more patterns.
FAQ – Amigurumi Mini Cow – Pattern
1. Is the Amigurumi Mini Cow – Pattern suitable for beginners?
Yes, this pattern is beginner-friendly as it uses basic stitches like single crochet, increases, and decreases.
2. How long does it take to complete the mini cow?
On average, it takes about 4 to 6 hours, depending on your crochet speed and experience.
3. What yarn is best for this pattern?
Cotton yarn is recommended for a neat finish, but acrylic yarn also works well and gives a softer touch.
4. Can I make the mini cow larger?
Yes, by using thicker yarn and a larger hook size, you can create a bigger version of the cow.
5. How do I make the toy safe for small children?
Instead of safety eyes, embroider the eyes with yarn or thread to avoid choking hazards.
6. Can I sell the mini cows I make from this pattern?
Yes, handmade items from the pattern can usually be sold, but always check if the original designer has specific restrictions.
7. Do I need special skills to add accessories?
No, simple crochet accessories like bows, scarves, or hats can be made with basic stitches and added easily.
8. How do I keep the shape of the mini cow firm?
Proper stuffing with polyester fiberfill and tight stitches will help maintain the shape.
9. What size should the safety eyes be?
For mini cows, eyes between 6 mm and 10 mm usually work best, depending on the overall size of the toy.
10. Can I make different farm animals with the same base pattern?
Yes, with small modifications, the base pattern can be adapted into other animals like sheep, pigs, or dogs.
Conclusion
The Amigurumi Mini Cow – Pattern is a delightful crochet project that combines simplicity, creativity, and endless customization options. From gathering the right materials to assembling the final piece, each step is an opportunity to enjoy the art of crochet and create something meaningful.
VIDEO TUTORIAL
Whether you want to make a gift, a decoration, or just enjoy a relaxing hobby, this pattern is a perfect choice. I hope this guide has inspired you to try making your own mini cow. Share your honest opinion and suggestions in the comments—I would love to know how your project turns out and what personal touches you decide to add!


