
If you’re searching for a fun and relaxing crochet project, look no further than this Amigurumi Turtle Free Pattern. Perfect for beginners and experienced crocheters alike, this adorable turtle is a great way to practice your amigurumi skills and create something irresistibly cute.
Whether you’re making a gift for a child, a charming desk companion, or just a piece to brighten your shelf, this turtle pattern is an ideal choice.
The beauty of using an Amigurumi Turtle Free Pattern is that it allows you to explore different yarn colors and textures, making each turtle unique. From soft pastels to bright tropical shades, the creative possibilities are endless.
Plus, amigurumi projects like this one are portable and quick to finish, making them excellent for those who enjoy crafting on the go.
This tutorial is written with a human touch, designed to guide you every step of the way in a clear and friendly tone. You don’t need to be an expert—just bring your enthusiasm and a few basic supplies. So, grab your crochet hook and yarn, and let’s dive into the wonderful world of making your own amigurumi turtle!
1. Materials and Tools You’ll Need
To start working on your Amigurumi Turtle Free Pattern, you’ll need a few basic supplies. Gathering everything before you begin ensures a smooth, uninterrupted crafting experience. You probably already have most of these items in your crochet kit.
First, choose your yarn. A worsted weight cotton yarn is ideal for amigurumi projects because it provides good structure and durability. Choose green for the shell, brown or beige for the body, or any fun combination you like.
Next, select a suitable crochet hook. Most amigurumi patterns, including the Amigurumi Turtle Free Pattern, call for a smaller hook to create tight stitches. A 2.5 mm to 3.5 mm hook works well for worsted yarn.
You’ll also need safety eyes for that classic amigurumi look. If you’re making this turtle for a small child, consider using embroidered eyes instead to ensure it’s baby-safe.
Polyester fiberfill stuffing is used to give your turtle shape. It’s lightweight, washable, and perfect for plushies. Be sure to stuff the head and shell evenly to maintain the cute, round shape.
A tapestry needle will help you sew the turtle’s parts together, such as the legs, head, and shell. You’ll also use it to weave in your yarn ends neatly.
Finally, consider having stitch markers on hand to help you keep track of your rounds. Amigurumi is typically crocheted in continuous rounds, so markers are a helpful guide.
2. Step-by-Step Instructions to Crochet Your Turtle
With all your supplies ready, it’s time to dive into the actual process of making your turtle using this Amigurumi Turtle Free Pattern. The turtle is made in separate parts: the head, body, legs, and tail, which are all stitched together in the final step.
Start with the shell, which forms the centerpiece of your turtle. Begin by crocheting a magic ring and working in single crochet stitches to create a flat circle. Then, increase your rounds evenly to build the dome shape. You can switch to a contrasting color to add decorative rings to the shell.
Next, crochet the body. This part is usually done as a slightly smaller dome, with less shaping than the shell. Make sure your tension is consistent to ensure the two parts match up when joined.
For the head, work another sphere using single crochets in the round. Stuff it lightly to give it shape. Before closing it off, attach your safety eyes or embroider the facial features for personality.
Create four small legs using short tubes or flattened ovals. These will be sewn to the sides of the turtle. Be sure to stuff them lightly to maintain flexibility and make them easier to position.
Add a tiny tail—just a few stitches in a cone shape will do. It’s a small detail, but it adds charm to your finished turtle.
Once all parts are complete, it’s time to assemble. Use your tapestry needle to sew the body to the shell, then attach the legs, head, and tail. Take your time to ensure everything is symmetrical and securely stitched.
3. Customizing Your Amigurumi Turtle
One of the joys of working with an Amigurumi Turtle Free Pattern is the freedom to customize your creation. You can tailor every detail to make your turtle truly one-of-a-kind.
Start with color. Try using pastel shades for a gentle, nursery-style turtle, or go bold with neon brights for a playful touch. You can even mimic real turtle patterns with mottled greens and browns.
Consider using variegated yarn for a beautiful, blended effect. These multicolored yarns create interesting textures without the need for color changes.
Add accessories to your turtle. A tiny crochet bow, a mini hat, or even a little scarf can turn your turtle into a fun character. These additions are especially cute if you’re gifting your turtle.
Personalize your amigurumi by embroidering a name or date on the bottom of the shell. This makes it a perfect keepsake for birthdays or baby showers.
Experiment with yarn texture. Using chenille or velvet yarn can give your turtle a plush, luxurious feel. Just be sure to use a smaller hook for tighter stitches, as these yarns can be slippery.
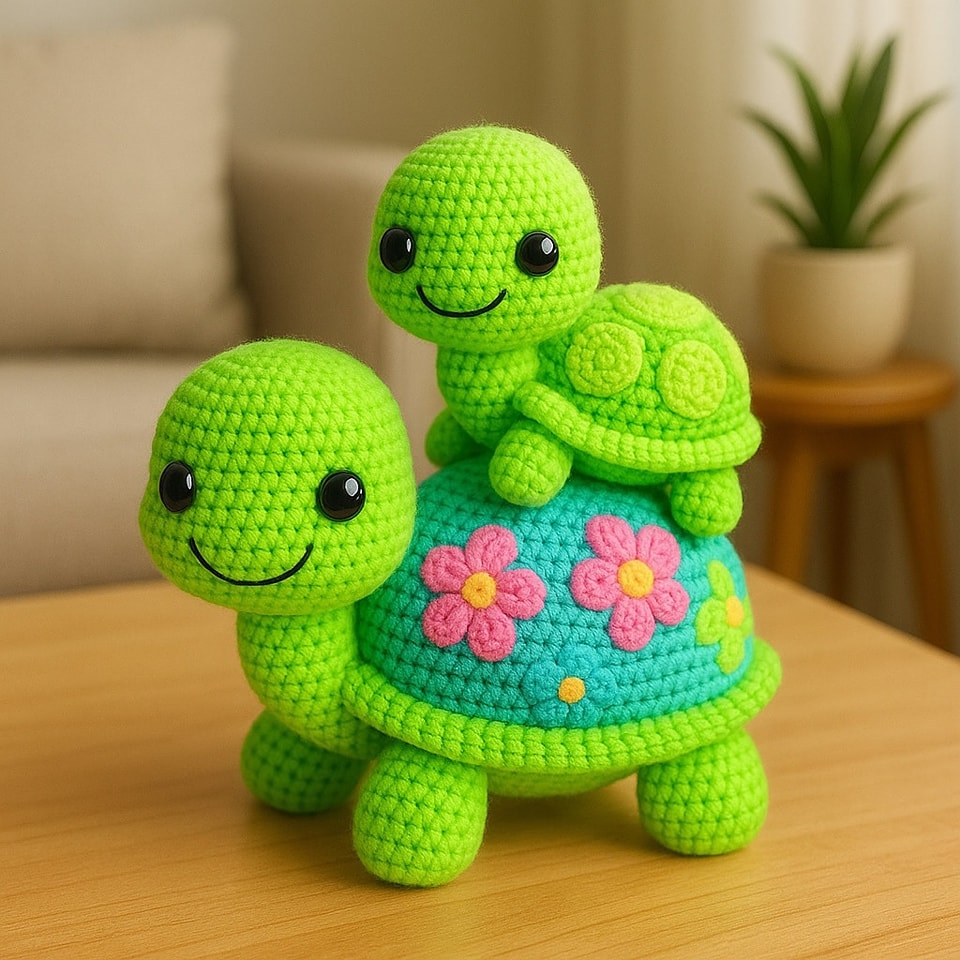
You can also play with size. By adjusting your yarn weight and hook size, you can create a whole family of turtles in different sizes. Imagine a large “mama turtle” with several tiny “baby turtles”!
4. Tips for Amigurumi Success
Even if you’re new to crochet, you can succeed with this Amigurumi Turtle Free Pattern by keeping a few helpful tips in mind. These tricks can make your crafting smoother and your final result more polished.
First, practice the magic ring technique. It can be tricky at first, but it creates a neat, tight starting point for amigurumi projects. If you’re struggling, there are plenty of video tutorials online.
Keep your tension tight. Amigurumi requires tight stitches so the stuffing doesn’t show through. If you see gaps in your work, try using a smaller hook or adjusting your grip.
Use a stitch marker to mark the beginning of each round. Since amigurumi is worked in spirals, it’s easy to lose track. A marker helps keep your rounds even.
Stuff as you go. It’s harder to stuff small parts like the legs and tail after they’re closed up. Add small amounts of stuffing during the final rounds to get even filling.
Don’t rush the assembly. Take time to place each piece and pin it in position before sewing. This helps ensure everything looks symmetrical and balanced.
Finally, be patient and enjoy the process. Mistakes are part of learning, and every turtle you make will get better with experience. Crochet is about creativity, relaxation, and having fun!
FAQ – Amigurumi Turtle Free Pattern
Q: Is this Amigurumi Turtle Free Pattern suitable for beginners?
A: Yes! The pattern is designed with beginners in mind, using basic stitches and easy-to-follow steps.
Q: How long does it take to finish the turtle?
A: On average, it takes 3 to 5 hours to complete, depending on your skill level and the time you spend on details.
Q: Can I use different yarn types?
A: Absolutely. While worsted cotton is recommended, you can use acrylic or velvet yarns for different textures and looks.
Q: What size will the finished turtle be?
A: With standard worsted yarn and a 3mm hook, your turtle will measure about 5 to 6 inches long.
Q: Is it safe for babies?
A: Yes, as long as you embroider the eyes instead of using plastic safety eyes and sew all parts securely.
Q: Can I sell turtles made from this pattern?
A: Generally yes, especially if the pattern is labeled for commercial use. Just credit the designer if required and avoid reselling the pattern itself.
Conclusion
Creating your own crochet turtle using the Amigurumi Turtle Free Pattern is a delightful and rewarding experience. From gathering your materials and learning to crochet each part, to customizing and assembling your adorable turtle, this project is perfect for crafters of all levels.
We covered all the essential steps, from selecting yarn and tools, following the pattern, adding your personal touch, and even applying smart tips to make the process smoother. Whether for fun or gifting, your handmade turtle is sure to bring smiles.
If you enjoyed this guide or tried the pattern, we’d love to hear from you. Leave a sincere opinion in the comments and share your thoughts, questions, or suggestions for future amigurumi projects. Let’s keep the creativity going!


