
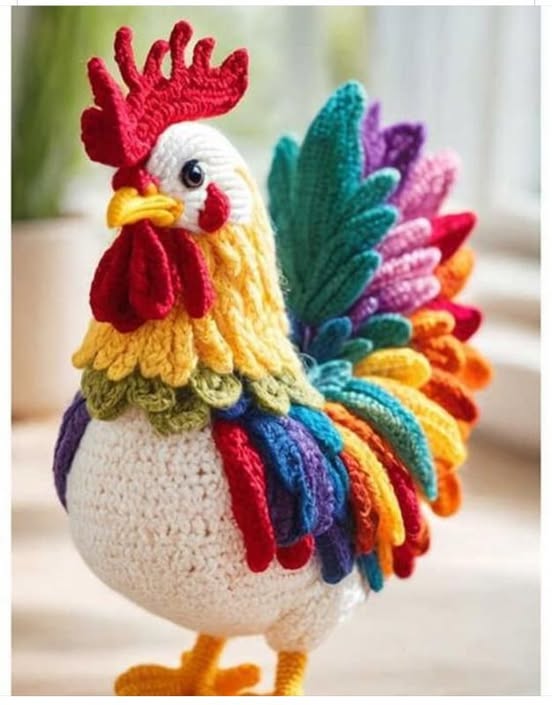
If you’re looking for a fun, vibrant, and decorative project, the Colorful Crochet Rooster – Complete Tutorial & Diagram is exactly what you need.
This delightful crochet pattern combines traditional techniques with creative flair, resulting in a handmade piece full of personality and charm.
Whether you’re new to crochet or an experienced crafter, this tutorial will guide you step-by-step through creating your very own crochet rooster.
The Colorful Crochet Rooster is more than just a craft—it’s a celebration of color, culture, and craftsmanship.
Roosters have long been symbols of good luck and energy in many cultures, and incorporating one into your home décor through crochet is a joyful way to express your creativity. With the detailed instructions and visual support provided, you’ll enjoy every stitch of this playful pattern.
In this guide, we’ll walk you through the materials, color planning, stitch techniques, and assembling your rooster. You’ll also get access to a handy diagram that breaks down the construction process, making it easier to follow along.
If you’re ready to bring a lively rooster to life with your crochet hook, let’s dive into the Colorful Crochet Rooster – Complete Tutorial & Diagram.
1. Materials and Tools You’ll Need
To begin your Colorful Crochet Rooster project, gather all the essential materials. You’ll need worsted-weight or DK yarn in a variety of vibrant colors—reds, yellows, greens, blues, oranges, and browns are ideal for capturing the rooster’s natural brilliance. Choose yarns with a soft texture and consistent thickness for best results.
Next, pick the right hook size. Typically, a 3.5 mm to 4.5 mm crochet hook works well, but make sure it matches the weight of your chosen yarn. You’ll also need a yarn needle for weaving in ends and some fiberfill stuffing if you’re making your rooster three-dimensional.
Don’t forget scissors, stitch markers, and possibly some safety eyes or black yarn if you plan to add facial details. A small comb or brush may come in handy to fluff the tail feathers if you’re using yarn fringe techniques.
Optional but helpful: keep a printed version of the Complete Tutorial & Diagram nearby for easy reference. Many crafters find visual aids extremely useful, especially when working with parts like the tail or crest.
Having all your materials ready at the start saves time and ensures a smoother creative process. Creating your Colorful Crochet Rooster should be a joyful and relaxing activity, and being organized helps that experience.
Finally, choose a clean, well-lit space to work. A small basket or box to hold your yarns and tools will keep things tidy and let you focus fully on bringing your rooster to life.
2. Starting the Body and Basic Shaping
The rooster’s body is the foundation of this project. You’ll usually start from the base and work your way up in the round using basic stitches like single crochet (sc), half double crochet (hdc), and increases. For flat versions, you might work in rows instead of rounds.
Begin with a magic ring and work your first round of single crochets into the center. This technique helps avoid a hole in the middle and gives your rooster a neat look. Use a stitch marker to keep track of your rounds if needed.
As you build the body, remember to stuff as you go if you’re creating a plush version. Keep your stuffing firm but flexible to avoid distortion. If you’re making a flat decorative rooster, like for a wall hanging or table centerpiece, there’s no need for stuffing.
Maintain consistent tension and follow your color changes as marked in the Complete Tutorial & Diagram. The body usually transitions from darker to lighter tones, giving it a natural feathered appearance. You can get creative with stripes or patterns too.
Don’t forget to shape the neck area. This section may require a few decrease stitches to help it narrow slightly, giving the rooster a more realistic silhouette. Check the diagram closely at this stage for accuracy.
Once you’ve completed the body and neck, fasten off your yarn and weave in any loose ends. This base will soon be joined with other parts, like the wings and head, to complete your Colorful Crochet Rooster.
3. Adding the Tail, Wings, and Head Features
The tail is one of the most striking parts of the Colorful Crochet Rooster. Use long strands of yarn in various colors to create a layered feather look. You can either crochet individual feather shapes or use fringe techniques to add volume and movement.
Attach the tail securely to the back of the body, ensuring it’s balanced and full. If you’re using fringes, brush them out lightly to give a fluffier effect. The tail is where you can really showcase your color choices and let your creativity shine.
Next are the wings. These can be crocheted flat or slightly rounded, depending on the desired effect. Position them on each side of the rooster and stitch them in place. Add a bit of texture using puff stitches or simple embroidery to mimic feather lines.
The head and crest (comb) require more detailed shaping. Use red or orange yarn for the comb, which usually sits on top of the head in a wavy or spiky shape. Follow the diagram to shape each crest point evenly.
The beak is typically a small triangle in yellow or orange, stitched or sewn onto the front of the head. For eyes, you can use black yarn to embroider small circles or attach safety eyes for a more polished finish.
Complete the head by shaping the wattle (the hanging part below the beak), usually in the same color as the comb. Attach all these features securely and check for balance and expression. Now your Colorful Crochet Rooster is starting to look alive!
4. Assembly and Finishing Touches
Now that you have all the parts made, it’s time to assemble your Colorful Crochet Rooster. Start by laying out each piece and using pins to test placement. Make adjustments as needed before stitching them in place.
Use a strong yarn or matching thread to sew the head to the body. Make small, tight stitches to keep the head stable and upright. Next, attach the wings and tail, making sure they’re symmetrical and aligned properly.
If you’re making a 3D rooster, take care to add your final bits of stuffing before fully closing the seams. Pay attention to shaping as you stuff—too much can distort the figure, and too little will make it saggy.
Add any final embellishments such as buttons, sequins, or embroidery to personalize your rooster. Some crafters like to add tiny flowers, ribbons, or even a miniature crochet basket at the base for a cute farmhouse look.
Block your finished piece if needed. Gently steam or shape it by hand to fix curves or folds. This final step helps set the stitches and ensures your rooster stands or hangs perfectly.
Your Colorful Crochet Rooster is now complete! Whether displayed as kitchen decor, gifted to a loved one, or used in seasonal arrangements, this rooster is sure to bring joy and charm to any space.
FAQ – Colorful Crochet Rooster – Complete Tutorial & Diagram
Is the Colorful Crochet Rooster suitable for beginners?
Yes! While it involves several parts, each section uses basic stitches. With the Complete Tutorial & Diagram, even beginners can follow along and complete the project successfully.
How long does it take to crochet a rooster?
On average, it may take 4 to 8 hours depending on your skill level and how detailed your rooster is. If you’re adding embroidery or embellishments, it may take a bit longer.
What type of yarn is best for this project?
Worsted-weight or DK yarn works best. Choose vibrant colors and soft textures to make your rooster stand out and feel nice to the touch.
Can I make a flat version instead of a 3D rooster?
Absolutely! You can crochet the rooster as a flat piece for wall décor, coasters, or placemats. Simply skip the stuffing and follow row-based instructions.
Do I need to follow the diagram exactly?
The diagram is a helpful guide, but feel free to customize. Adjust colors, shapes, or add unique touches—make the rooster your own!
Can I sell the crochet rooster I make?
Yes, you can sell handmade items based on this tutorial, but always credit the pattern source if required by the designer, and avoid mass production without permission.
Conclusion
We hope this step-by-step guide on how to make a Colorful Crochet Rooster – Complete Tutorial & Diagram has inspired you to try this joyful and decorative project. From choosing colors to shaping feathers and adding final touches, every step invites creativity and fun.
Whether you create a plush 3D rooster or a flat version for hanging, the end result is a charming piece filled with personality. The tutorial and diagram make it easy to follow, and the possibilities for customization are endless.
Have you made your crochet rooster? We’d love to hear from you! Leave a sincere comment below sharing your experience, questions, or suggestions for future tutorials. Your feedback helps build a community of crochet lovers ready to inspire each other.


