
If you’re looking to add a sweet, whimsical touch to your crochet collection, this Crochet Bumble Bee – Free Pattern is the perfect place to start.
These adorable bees are not only fun to make, but they also make great gifts, keychains, and nursery decorations. With just a few basic materials and stitches, even beginners can create a buzzing little friend in no time.
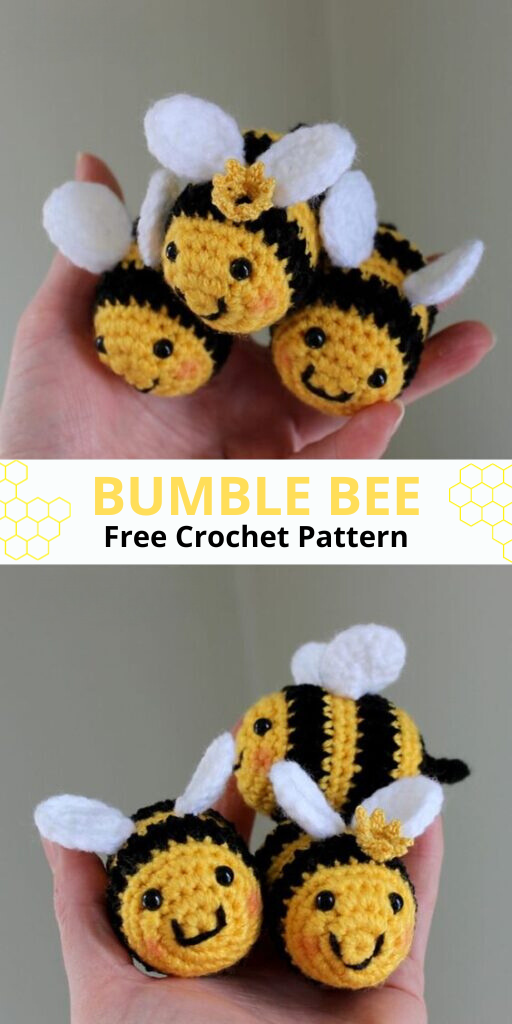
This Crochet Bumble Bee – Free Pattern is designed to be simple and accessible, making it an ideal project for crocheters of all skill levels. The soft body, vibrant stripes, and delicate wings give this bee its irresistible charm. Plus, since it doesn’t require a lot of yarn, it’s a fantastic stash-busting project.
In this guide, we’ll walk you through each step, from choosing your materials to assembling the final product.
Whether you’re crocheting one bee or a whole swarm, you’ll find everything you need here. Let’s get started and make this Crochet Bumble Bee – Free Pattern come to life!
1. Materials and Tools for Your Crochet Bumble Bee
To create your Crochet Bumble Bee – Free Pattern, start by gathering the right materials. Choosing the right yarn and hook size is essential for achieving the desired look and size.
You’ll need worsted weight yarn in three colors: yellow, black, and white. Acrylic yarn works well for this project, as it’s soft and holds its shape. For a more luxurious feel, you could try using cotton yarn.
A 3.5 mm (E) crochet hook is perfect for making a tight stitch, preventing stuffing from showing through. It also helps maintain the shape of your bee.
Polyester fiberfill is the best stuffing material. It’s light, washable, and easy to work with. Make sure not to overstuff, as it can distort the shape of the bee.
Other helpful tools include a yarn needle for sewing pieces together, stitch markers to track your rounds, and safety eyes or embroidery thread for the eyes.
Having these tools ready before you begin ensures a smooth and enjoyable experience with your Crochet Bumble Bee – Free Pattern.
2. Step-by-Step Instructions for Crocheting the Bee
Let’s dive into the fun part—crocheting the bee itself! Start with the body by making a magic ring using yellow yarn. The body is worked in continuous rounds to create a neat, seamless shape.
After a few rounds, switch to black yarn to begin the bee’s classic striped pattern. Alternate between yellow and black every couple of rounds. This gives your bee that iconic bumble bee look.
Once the body is complete, move on to the head. Continue with the yellow yarn and increase gradually to make it slightly larger than the body. Don’t forget to add your safety eyes before you finish stuffing and closing the head.
Next, crochet the wings using white yarn. They are typically made as two small oval shapes. Sew them securely to the top of the body, slightly behind the head.
Finish off by adding a little stinger using black yarn. This small touch adds character and authenticity to your Crochet Bumble Bee – Free Pattern.
Lastly, sew all the parts together and weave in any loose ends. Now your bee is ready to buzz around!
3. Creative Ideas for Your Crochet Bumble Bee
Your completed Crochet Bumble Bee – Free Pattern can be used in many creative ways. These bees make lovely gifts for kids, friends, or fellow crafters. Personalize each one with different facial expressions or accessories.
Turn your bee into a keychain by attaching a metal keyring to the top of its head. It’s a cute and portable way to carry your handmade art with you everywhere you go.
Add a string and hang the bee as a mobile in a nursery or child’s room. Combine several bees in different sizes for a truly magical look.
Make your crochet bee a part of a larger amigurumi collection. Add flowers, honey pots, or other animals to create a full scene.
Use the bee as a pin cushion or desk buddy for your crafting area. It’s both functional and fun!
You could even sell your bees at craft fairs or online shops—just remember to credit the original pattern if required. The Crochet Bumble Bee – Free Pattern is versatile and marketable.
4. Tips for Success and Pattern Variations
To get the best results from your Crochet Bumble Bee – Free Pattern, take your time with each step and don’t rush the assembly process. Neat stitching makes a big difference in the final look.
Make sure your tension is consistent throughout. If your bee looks too loose or too tight, try adjusting your hook size.
Experiment with yarn textures for unique effects. Fuzzy yarn can make your bee look extra soft and plush, while cotton gives a neat, structured appearance.
Try different color combinations if you’re feeling adventurous. Pastel bees, rainbow bees, or even sparkly bees can bring extra fun and flair to your project.
You can also scale the pattern by using thicker yarn and larger hooks for jumbo bees or finer yarn for mini bees.
Practice makes perfect! Don’t worry if your first bee isn’t flawless. Each attempt will help you improve and personalize your Crochet Bumble Bee – Free Pattern.
FAQ – Crochet Bumble Bee – Free Pattern
Q: Is this pattern suitable for beginners?
Yes! This Crochet Bumble Bee – Free Pattern is beginner-friendly. Basic stitches and simple shapes make it a great first amigurumi project.
Q: How long does it take to complete one bumble bee?
On average, it takes 2–3 hours for an experienced crocheter and about 4–5 hours for a beginner, depending on your pace.
Q: Can I use different yarns?
Absolutely. You can use cotton, acrylic, or even velvet yarns. Just adjust your hook size accordingly to maintain the shape.
Q: Are safety eyes necessary?
No, safety eyes are optional. You can embroider the eyes instead using black thread for a safer option, especially for baby toys.
Q: Can I sell the bees I make from this pattern?
Yes, you can sell finished items, but always check the pattern’s copyright and licensing terms if it’s not your original design.
Q: What if my bee looks lopsided?
It could be due to uneven tension or stuffing. Try to keep your stitches tight and consistent, and stuff gradually to shape the bee properly.
Conclusion
In this article, we explored the Crochet Bumble Bee – Free Pattern, from materials and step-by-step instructions to creative uses and helpful tips. Whether you’re making one for yourself or as a gift, these buzzing little bees are sure to bring smiles. With a bit of yarn and creativity, the possibilities are endless.
VIDEO TUTORIAL
We hope this tutorial inspired you to pick up your hook and try something new. If you gave this pattern a try, we’d love to hear about your experience! Leave a sincere opinion or suggestion in the comments—your feedback helps us improve and continue creating amazing free patterns for you.


