
The Crochet goose in a pumpkin – Pattern is one of the most charming seasonal projects that combines the cozy feeling of autumn with the joy of handmade creations. This adorable design blends the cuteness of a little goose with the festive look of a pumpkin, making it a delightful piece for decoration or gifting.
Whether you are an experienced crocheter or just beginning your journey with yarn, this pattern will provide a fun and rewarding experience.
Crocheting is more than just making stitches; it is about bringing imagination to life. With the Crochet goose in a pumpkin – Pattern, you get to work with textures, shapes, and creative details that make the project truly stand out.
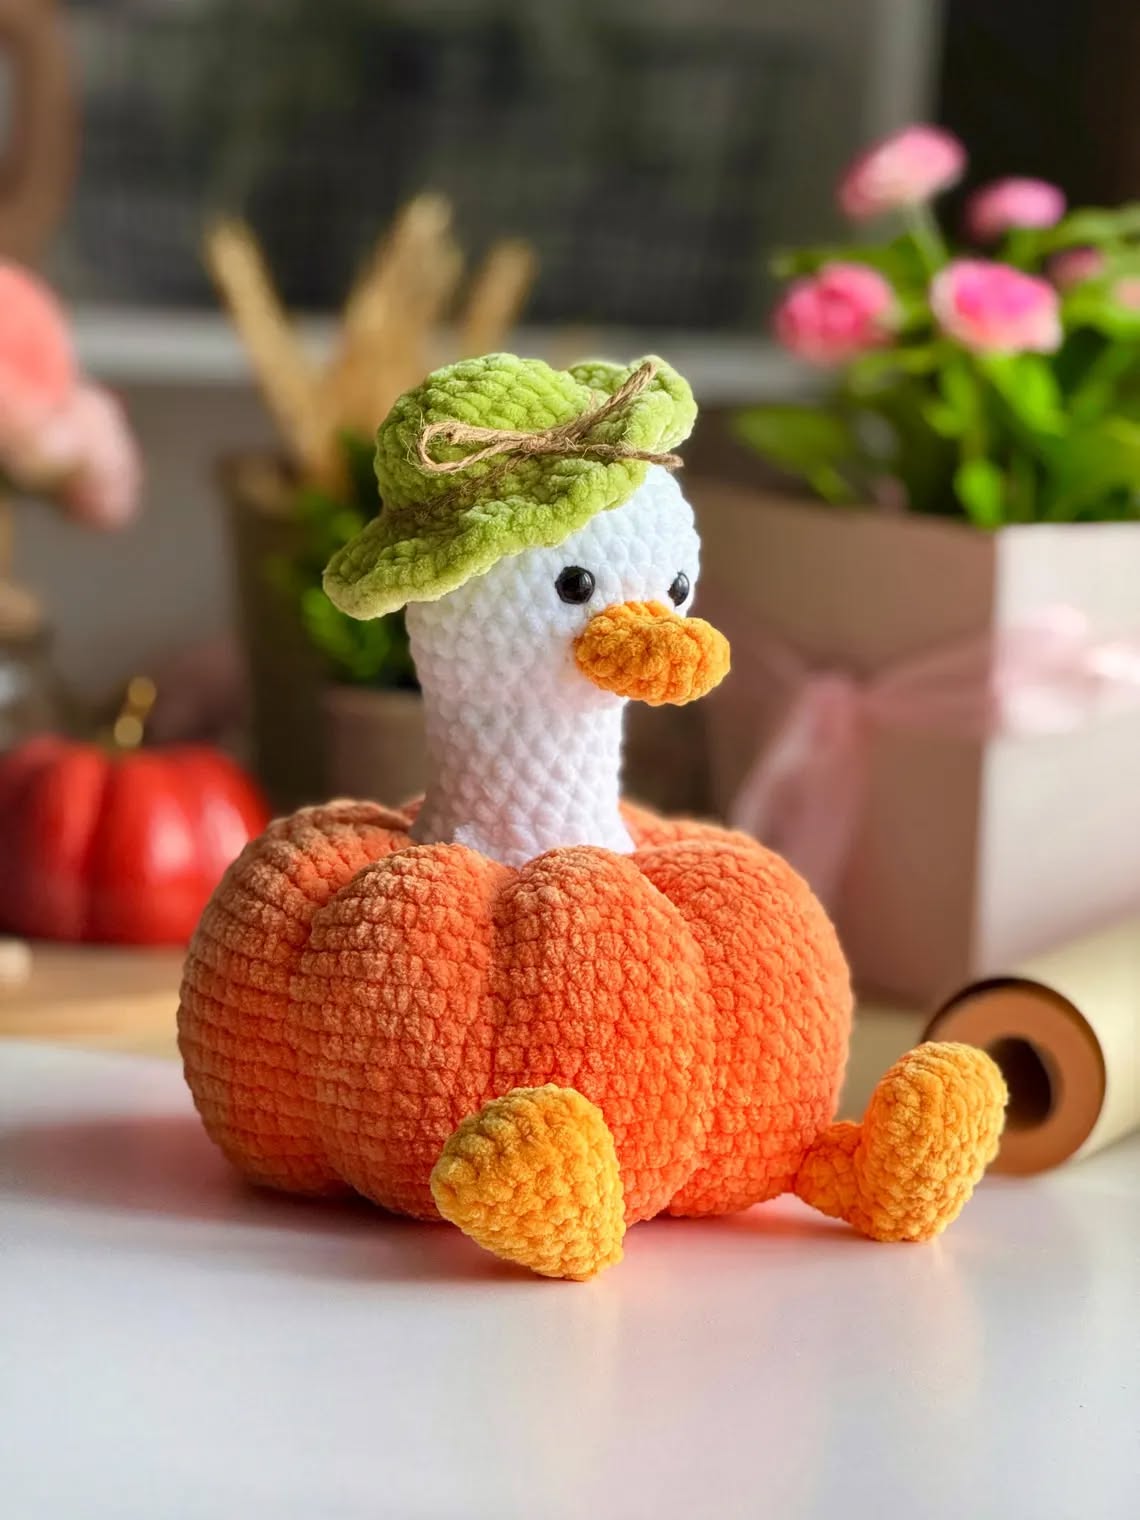
The pumpkin body creates a perfect base, while the little goose peeking out adds a touch of whimsy that captures hearts instantly. This is a pattern that balances seasonal charm with year-round appeal.
If you are looking for a project that can enhance your skills while giving you a beautiful handmade item, this is the one. The Crochet goose in a pumpkin – Pattern can be customized with different yarn colors, sizes, and even facial expressions for your goose.
It is perfect for home décor during fall, Thanksgiving, or even as a unique handmade gift. Let’s dive into the details of this enchanting project.
1. Materials and Tools Needed for the Crochet goose in a pumpkin – Pattern
To successfully create the Crochet goose in a pumpkin – Pattern, gathering the right materials is essential. Choosing the right type of yarn ensures durability and the desired texture. Most crafters prefer cotton or acrylic yarn for amigurumi projects because they hold shape well. A medium-weight yarn is usually recommended to give both the pumpkin and the goose a firm structure.
A good crochet hook size is also important. Depending on your yarn choice, a hook between 2.5 mm and 3.5 mm will usually give the best results. Using a smaller hook than recommended for your yarn can help create tighter stitches, which prevents stuffing from showing through.
In addition to yarn and hook, you will need stuffing material. Polyester fiberfill is the most common option for projects like this, as it is lightweight and easy to use. For the goose’s details, such as eyes and beak, you can choose between embroidery or safety eyes. Both work well, but safety eyes provide a polished look, especially for gifting.
Other essential tools include scissors, a yarn needle, and stitch markers. The stitch markers are particularly helpful for keeping track of rounds, especially when working on the pumpkin base. These small tools make the process smoother and more enjoyable.
Some makers also like to add small embellishments to their Crochet goose in a pumpkin – Pattern, such as tiny bows, ribbons, or even embroidered leaves. These additions are optional but can elevate the final result.
By having all your materials ready before starting, you create a stress-free crafting environment. Being prepared allows you to focus on enjoying the crochet process and watching your little goose in a pumpkin come to life.
2. Step-by-Step Guide to Making the Pumpkin Base
The pumpkin is the foundation of the Crochet goose in a pumpkin – Pattern, and creating it properly ensures the whole project comes together beautifully. Start with a magic ring and crochet in continuous rounds to build the base. Using increases and decreases strategically will give the pumpkin its rounded shape.
When shaping the pumpkin, it’s important to maintain consistent tension. Loose stitches can make the pumpkin floppy, while overly tight stitches can make it hard to insert stuffing. Aim for balanced stitches that create a firm yet flexible fabric.
Once the base grows to the desired size, it’s time to start shaping the pumpkin’s ridges. These are created using surface crochet or yarn wrapping around the stuffed pumpkin. This step gives it the classic segmented look that makes pumpkins so recognizable.
Adding stuffing gradually as you go ensures that the pumpkin maintains its shape. Don’t overfill, as this can distort the stitches, but make sure it is firm enough to support the goose that will sit inside.
The pumpkin’s top can be closed off with a few decreases, leaving a small opening for the goose’s body. This makes the project more dynamic, giving the impression that the goose is peeking out of its cozy pumpkin home.
Color choices play a big role in the final look. Classic orange is popular, but you can experiment with white, green, or even pastel pumpkins for a whimsical touch. The Crochet goose in a pumpkin – Pattern is versatile enough to adapt to your creativity.
3. Crafting the Goose for the Crochet goose in a pumpkin – Pattern
The goose is the heart of this project, and crocheting it is a fun process. Begin with the body using a smaller scale than the pumpkin. Typically, the body is worked in the round starting from the bottom up. This creates a compact, rounded shape that fits snugly inside the pumpkin.
For the goose’s head, you can create a slightly elongated oval shape. Adding details like a tiny orange beak and small eyes brings it to life. If you choose to embroider the face, you can experiment with expressions, giving your goose a sweet, sleepy, or playful look.
The wings and feet are crocheted separately and then sewn onto the body. These smaller parts are quick to make and add charm to the final design. You can position the wings as if the goose is waving or resting, which gives it character.
Once the body is complete, place it inside the pumpkin opening and secure it with stitches. This ensures that the goose stays in place and maintains the illusion of peeking out. The placement should look natural, as if the pumpkin is the goose’s little shelter.
Color selection is also key here. Most crafters use white or cream yarn for the goose, paired with orange for the beak and feet. However, adding a touch of pastel or neutral tones can create a more unique look. The Crochet goose in a pumpkin – Pattern gives room for personalization.
The combination of textures between the soft pumpkin and the smooth goose makes this pattern visually appealing and satisfying to complete. Each stitch contributes to a handmade treasure.
4. Tips, Variations, and Creative Uses for the Crochet goose in a pumpkin – Pattern
One of the best parts about the Crochet goose in a pumpkin – Pattern is the freedom to customize. While the standard design is adorable, you can add personal touches to make it unique. For example, you can crochet tiny leaves or vines to attach to the pumpkin for extra detail.
Another variation is to make the goose removable. Instead of stitching it permanently, create a snug but open pocket so the goose can be taken out. This makes the project interactive, especially fun for children.
You can also play with size. Using bulky yarn and a larger hook will create a big decorative piece, while fine yarn and a small hook will make a mini version perfect for keychains or ornaments. The adaptability makes it suitable for all types of projects.
This pattern also works beautifully as a seasonal gift. Handmade items are always meaningful, and this project brings warmth and creativity to any space. Whether for Halloween, Thanksgiving, or just autumn décor, it fits perfectly.
Adding scent sachets inside the pumpkin is another creative twist. With lavender or cinnamon inside, your Crochet goose in a pumpkin – Pattern can double as a festive air freshener. This small detail makes it even more functional.
Lastly, don’t forget to enjoy the process. Crochet is not only about the finished item but also about the calm and joy it brings while creating. This project is designed to bring smiles both during and after making it.
FAQ about the Crochet goose in a pumpkin – Pattern
1. Is the Crochet goose in a pumpkin – Pattern suitable for beginners?
Yes, this pattern is beginner-friendly with basic stitches. Some parts may require patience, but it’s a great learning project.
2. What type of yarn works best for this pattern?
Cotton or acrylic yarn works well, especially in medium weight. Cotton provides durability, while acrylic offers softness and flexibility.
3. Can I make the goose detachable from the pumpkin?
Yes, with minor adjustments you can create a removable goose, making it an interactive project.
4. How long does it take to complete this project?
Depending on your crochet speed, it can take anywhere from a few hours to a weekend to finish.
5. Can I customize the colors of the pumpkin and goose?
Absolutely! Orange and white are classic, but feel free to experiment with creative color combinations.
6. Is stuffing necessary for both the pumpkin and the goose?
Yes, stuffing ensures both parts maintain their shape and look full and polished.
7. Can this pattern be used as a toy for children?
It can, but if gifting to small children, avoid using safety eyes and opt for embroidered details for safety.
Conclusion
The Crochet goose in a pumpkin – Pattern is more than just a craft project; it’s a delightful expression of creativity and seasonal charm. From choosing yarn and colors to assembling the final design, every step is an opportunity to enjoy the art of crochet. With endless customization possibilities, it’s a pattern that can adapt to any style or purpose.
I hope this guide inspired you to try the Crochet goose in a pumpkin – Pattern and make it your own. If you’ve made this project or plan to start, I’d love to hear your thoughts. Share your honest opinion and suggestions in the comments—your feedback helps inspire even more creative ideas!


