If you’ve fallen in love with the iconic 6 Day Kid Blanket RESIZE, you’re not alone. This popular crochet pattern has captured the hearts of makers worldwide. Whether you’re resizing it for a baby, a toddler, or even a full-sized adult blanket, this guide is here to help.
Learning how to adjust the size without losing the beauty of the stitch pattern is a valuable skill for every crocheter.
The 6 Day Kid Blanket RESIZE allows you to customize your blanket to fit any purpose or person. Whether you want a small stroller blanket or a large throw for a couch, this pattern adapts beautifully.
With a simple yet elegant wave design, it’s perfect for beginners wanting to practice counting stitches while creating something practical and stunning.
In this tutorial, you’ll learn not only how to make the 6 Day Kid Blanket RESIZE, but also how to calculate stitches, adjust row counts, and maintain the perfect balance of texture and pattern.
This article is designed to help crocheters of all levels confidently resize their blankets while enjoying the creative process.
The first step in mastering the 6 Day Kid Blanket RESIZE is understanding how the pattern works. This blanket is known for its beautiful wave or ripple texture, created by strategically placed increases and decreases within the rows.
The magic of the pattern lies in its stitch repeat. Each wave consists of a certain number of stitches that are repeated across the row. This makes it easy to adjust the width by simply adding or subtracting groups of stitches based on the repeat count.
One of the best things about the 6 Day Kid Blanket RESIZE is that it doesn’t require advanced crochet skills. If you can double crochet and count stitches, you can make this blanket. It’s a great confidence-building project for beginners and a relaxing make for seasoned crocheters.
Many crafters love this pattern because it works up quickly. Depending on the yarn weight and hook size you choose, you can complete a small blanket in just a few days, making it ideal for last-minute gifts or charity projects.
Understanding gauge is also important when resizing. Even small changes in tension or hook size can affect the overall dimensions, so taking the time to create a gauge swatch is highly recommended.
In the following sections, we’ll walk through how to choose the right materials, calculate stitch counts for resizing, and assemble a blanket that fits your vision perfectly.
Selecting the right materials for your 6 Day Kid Blanket RESIZE ensures a successful and enjoyable project. The flexibility of this pattern allows for a wide variety of yarn weights and textures.
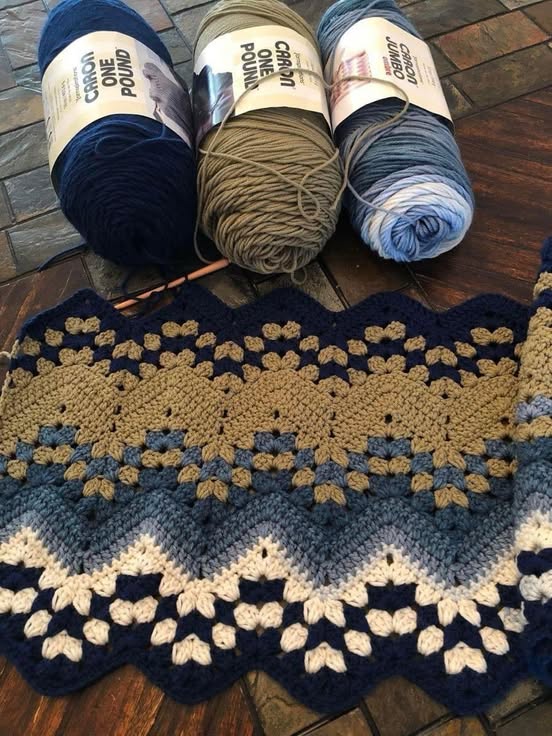
Start by choosing your yarn. Acrylic yarn is a popular choice because it’s soft, durable, and machine washable—perfect for kids. Cotton yarn is excellent for warmer climates or those looking for a natural fiber option. If you want something extra cozy, try a chunky or velvet yarn.
The hook size you use will depend on the yarn. Typically, worsted weight yarn pairs well with a 5.5mm to 6.5mm hook. Check your yarn label for the recommended size, but feel free to go up or down depending on your desired drape and texture.
You’ll also need standard crochet tools: scissors, a tapestry needle for weaving in ends, and stitch markers if you like keeping track of your rows or increases.
One important tip for the 6 Day Kid Blanket RESIZE is to buy enough yarn at the beginning. Because this is a striped or color-changing pattern for many, you’ll want to make sure you have consistent dye lots for each color.
If you plan to adjust the size dramatically, calculate your yarn needs based on the area. For example, doubling the width will require nearly twice the yarn, and the same goes for adding rows to increase the length.
Finally, consider choosing colors that bring joy. This blanket often looks best when made with playful, vibrant stripes, but monochrome versions also turn out beautifully.
Resizing the 6 Day Kid Blanket RESIZE is straightforward once you understand the math behind the stitch repeat. This section guides you through adjusting both width and length.
First, determine the stitch multiple. The blanket pattern works in a sequence of repeating stitches, typically a multiple of 12 plus an additional few stitches for the edges. Check your pattern instructions for the exact multiple.
To adjust the width, decide how many wave repeats you want. Multiply the stitch multiple by the number of repeats, then add the edge stitches. This gives you the total number of starting chains for your blanket.
If you want a blanket suitable for a crib, you may only need four or five wave repeats. For a full throw, consider eight to twelve wave repeats. The pattern scales easily without affecting the look.
Adjusting the length is even simpler. Crochet more or fewer rows based on how long you want the blanket. Because each row is a repeat of the previous, lengthening doesn’t require any additional math.
One common tip is to finish your blanket on a row that ends the wave at a balanced point. This gives the edges a neat appearance and ensures symmetry.
Always check your progress periodically. Measure your blanket after a few rows to make sure it’s reaching the intended width and adjust if necessary before committing to the full size.
A few helpful tips can make your 6 Day Kid Blanket RESIZE project more enjoyable and produce beautiful results every time.
Start with a gauge swatch. It’s tempting to skip this step, but it helps avoid disappointment if the blanket turns out smaller or larger than planned. This is especially true when resizing.
Consider using stitch markers at the beginning and end of each wave repeat. This helps keep your edges straight and your wave pattern consistent, especially if you’re watching TV or chatting while crocheting.
Pay attention to color changes. Many crocheters use a planned stripe pattern or even a gradient yarn for stunning effects. Changing colors at the end of a row rather than mid-row keeps the look clean and professional.
If you’re using heavier yarn or making a larger blanket, think about the weight. A very large blanket made with chunky yarn can become quite heavy. Test a small section to see if the finished weight will be comfortable.
Block your finished blanket if needed. While not always necessary for acrylic yarn, blocking can help the waves lay flat and give your blanket a polished look.
Most importantly, enjoy the process. The rhythmic stitching of the 6 Day Kid Blanket RESIZE is meditative and satisfying. Each row brings you closer to a cozy, handmade masterpiece.
Is the 6 Day Kid Blanket RESIZE good for beginners?
Yes! This pattern is very beginner-friendly. As long as you’re comfortable with double crochet and basic counting, you can successfully make this blanket.
How do I calculate the number of starting chains?
The pattern is based on a stitch multiple (usually 12) plus edge stitches (typically 3). Multiply the number of waves you want by 12, then add 3 for the edges.
Can I use different yarn weights for the 6 Day Kid Blanket RESIZE?
Absolutely! You can use worsted, bulky, or even lightweight yarn. Just adjust your hook size accordingly and check your gauge.
How much yarn will I need?
It depends on the size. A small baby blanket might use 1,000 yards, while a large throw could require 2,000–2,500 yards. Always buy a little extra to be safe.
Does this pattern work for making bed-size blankets?
Yes, it’s very scalable. You can resize it to a twin, queen, or king by increasing the number of wave repeats and rows.
How do I keep the edges straight?
Use stitch markers and always double-check that you’re not adding or missing stitches at the beginning and end of each row. Keeping a consistent stitch count is key.
In this guide to the 6 Day Kid Blanket RESIZE, we’ve covered everything you need to know to create a custom-sized blanket. From understanding the stitch pattern to choosing materials, calculating your starting chain, and adjusting both width and length, you’re now equipped with the tools to make the perfect blanket for any occasion.
This pattern is beloved not only for its beauty but for its versatility and ease. Whether you’re crocheting for a child, a gift, or yourself, the 6 Day Kid Blanket RESIZE delivers satisfaction with every stitch.
I hope this tutorial has been helpful to you. If you’ve enjoyed it or have any questions, please leave your honest opinion and suggestions in the comments below. Your feedback inspires future tutorials and helps build our crafting community. Happy crocheting!