Alice Slippers – Pattern is one of those comforting and charming projects that bring warmth to both your feet and your heart. Whether you’re a beginner in the world of yarn crafts or an experienced crafter looking for something cozy and quick, this design is perfect for all skill levels.
This Alice Slippers – Pattern is both practical and beautiful, offering a touch of handmade luxury to your everyday life.
Made with love, patience, and soft yarn, these slippers are designed to fit snugly and stretch comfortably as you walk. They can be made for any season—lightweight cotton for warmer weather, or a thicker wool blend for colder months.
What’s more, the Alice Slippers – Pattern can be easily customized in size, color, and embellishments, making them a perfect handmade gift.
In this guide, you’ll find all the steps you need to create your own Alice Slippers – Pattern, from choosing your materials to adding those delicate finishing touches. You don’t need any fancy equipment—just basic knitting or crochet skills, depending on your preference, and a bit of time and creativity.
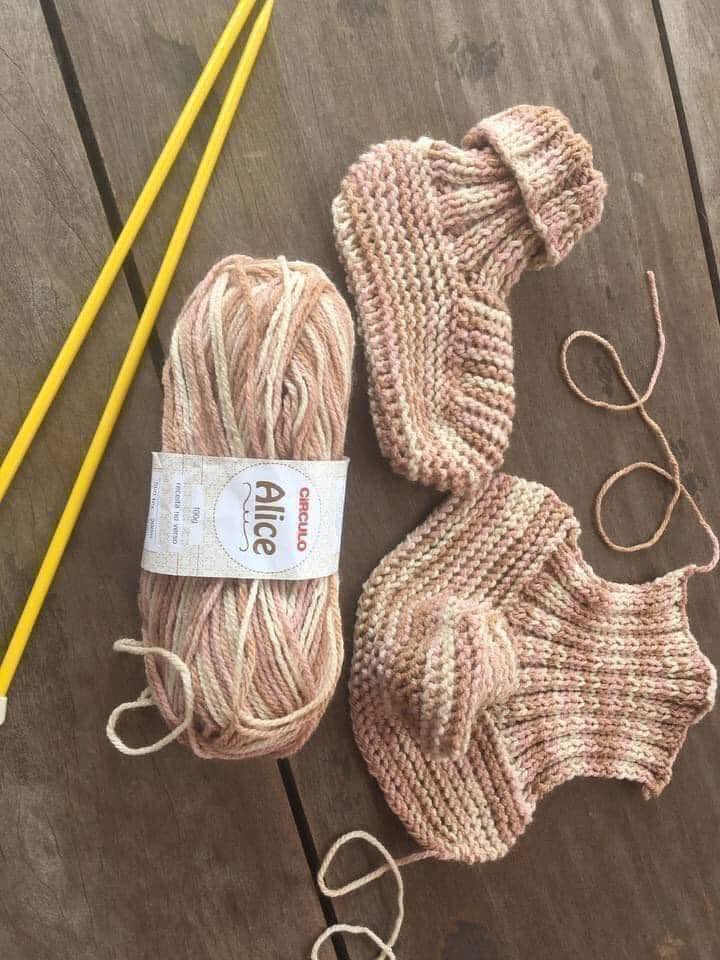
The first step in creating your Alice Slippers – Pattern is gathering the right materials. This pattern is forgiving, but starting with quality materials can really enhance your final product.
For yarn, opt for something soft yet durable. Cotton blends and acrylics work well for everyday use, while wool or alpaca offer more warmth for colder seasons. Try to choose a yarn with a smooth texture that glides easily through your fingers.
Hooks or needles will depend on the technique you’re using—knitting or crocheting. Check the yarn label for recommended sizes, but feel free to adjust based on your tension and desired slipper firmness. A tighter gauge often leads to longer-lasting slippers.
You’ll also want a yarn needle for weaving in ends and potentially some stitch markers to keep track of your rows or shaping. These small tools make a big difference, especially when following a more complex pattern like the Alice Slippers – Pattern.
Don’t forget to choose a color that inspires you. Neutral tones are timeless, but bright colors or multicolor yarns add fun personality. You can also consider stripes or contrasting soles for visual interest.
Lastly, think about non-slip soles. You can either crochet or knit a double sole for thickness or sew on some fabric with grip. Safety and comfort are always important when making slippers.
With your materials gathered and ready, you’re prepared to start bringing the Alice Slippers – Pattern to life. Now, let’s dive into the steps for creating the base of the slippers.
The base of your Alice Slippers – Pattern is where structure and comfort come together. It’s important to start strong, as this forms the foundation for the rest of the slipper.
Begin by creating a sole that matches the length of the foot. For crochet, this usually involves a chain that forms the foundation row. For knitting, you’ll cast on enough stitches to match the width of the sole.
Build the sole by working in rows or rounds, increasing and decreasing as needed to shape the toe and heel. Follow the Alice Slippers – Pattern to keep symmetry, and don’t rush this step—precision here ensures a better fit later.
Once the sole is complete, it’s time to start building upward. This is where the slipper begins to take shape around the foot, and the comfort of your slippers really begins to shine.
Continue working in rounds for crochet, or switch to stockinette or garter stitch if knitting. Pay attention to the pattern’s shaping around the toe box, as it contributes to the aesthetic and fit.
You might find the need to try on the slipper as you go. Don’t hesitate to do this. Adjustments made now—especially to length and snugness—will save time and effort later.
Remember, this step is the heart of the Alice Slippers – Pattern. Don’t be afraid to make it your own with little changes in stitch patterns or colors. Creativity is encouraged!
Once the base is solid, it’s time to add the upper section of the Alice Slippers – Pattern, which wraps around the foot and ankle for comfort and style.
Work upwards from the base, continuing in the round or in rows depending on your technique. This section is often shaped to snugly fit the curve of the foot, requiring occasional decreases or short rows.
One of the joys of the Alice Slippers – Pattern is that you can personalize the upper section with different stitch patterns. Try using shell stitch, ribbing, or simple texture to enhance the design.
The cuff is a key feature in this pattern. It can be made short like a ballet slipper or extended for more warmth and grip. Ribbed cuffs add elasticity, while scalloped edges give a decorative touch.
Now comes the fun part—adding embellishments! You can sew on buttons, crochet tiny flowers, or even use beads or ribbons for flair. These small details make your Alice Slippers – Pattern truly unique.
Be sure to secure all decorations tightly, especially if the slippers are intended for children or elderly recipients. Safety is just as important as appearance when finishing your handmade creations.
With the structure complete and embellishments added, it’s time to finalize your Alice Slippers – Pattern. These final touches ensure durability, cleanliness, and overall satisfaction.
Weave in all loose ends neatly using a yarn needle. This step polishes the project and prevents unravelling later. Tug gently to hide them between stitches for a clean look.
Check for symmetry between the two slippers. If one feels looser or tighter, add a border or extra rows to even them out. Little adjustments go a long way for wearability.
If you want added durability, consider reinforcing the soles. A double layer of yarn, felt fabric, or puff paint for grip will extend the life of your slippers.
Now wash and block your slippers. Gently hand wash in cool water and lay flat to dry, shaping them as they dry. This sets the stitches and improves overall fit.
Store your Alice Slippers – Pattern flat and in a dry space. If gifting, wrap them with care and maybe include a little card with wash instructions—it’s a lovely touch.
Finally, enjoy wearing your creation! There’s something so rewarding about slipping into handmade comfort, and your feet will thank you for it.
What size yarn is best for the Alice Slippers – Pattern?
A medium weight (worsted) yarn is ideal for most Alice Slippers – Pattern projects, as it offers the right balance of comfort and structure.
Are the Alice Slippers beginner-friendly?
Yes! While they have some shaping, they’re suitable for confident beginners. With basic skills and a little patience, anyone can make them.
Can I make these slippers in different sizes?
Absolutely. The pattern can be adjusted by changing your stitch count or yarn weight to make sizes for children, adults, or even extra-wide feet.
What stitches are used in the Alice Slippers – Pattern?
Basic stitches like single crochet, half double crochet, or knit stitches (if you prefer knitting) are commonly used, making them approachable for most crafters.
How do I make the soles non-slip?
You can use puff paint, suede patches, or add an extra layer of rubber or felt to the bottom to make the slippers more secure on smooth floors.
Can I wash the slippers in the machine?
Hand washing is recommended to preserve the shape and quality, especially if you’ve used embellishments or delicate yarn.
In this article, we explored the Alice Slippers – Pattern in depth, from selecting the perfect yarn to shaping the sole, adding decorative touches, and finishing off your project with care. This pattern offers a delightful blend of simplicity and creativity, making it ideal for makers at all levels.
Crafting your own slippers allows you to infuse every stitch with personality and comfort. Whether you’re making a gift or a treat for yourself, the Alice Slippers – Pattern is a joyful and rewarding project.
Now it’s your turn—give it a try! And don’t forget to share your thoughts below. What did you enjoy most? Do you have suggestions or a personal twist you added to the pattern? We’d love to hear from you!