
If you’ve ever searched for a simple and charming way to add personality to your home or gift list, this Crochet Cups – Quick and Easy Tutorial is the perfect project to start with.
These cute and functional pieces are ideal for beginners and experienced crafters alike, offering a satisfying crochet experience that results in something both decorative and useful.
Whether you’re crafting for fun or looking for something to sell or gift, crochet cups are a delightful option.
In this Crochet Cups – Quick and Easy Tutorial, you’ll learn how to make small cup shapes using basic stitches and minimal materials.
These mini cups can serve various purposes: from toy tea sets and kitchen décor to creative storage or table centerpieces. Their versatility makes them a favorite project among crocheters of all levels.
Throughout this article, we’ll guide you step-by-step, from the materials you’ll need to advanced tips for customization. With this easy-to-follow Crochet Cups – Quick and Easy Tutorial, you’ll be amazed at how quickly you can create charming handmade items that bring warmth and creativity into your life.
1. Materials You’ll Need for Crochet Cups
To begin your Crochet Cups – Quick and Easy Tutorial, gather all the necessary materials before you start. Having everything on hand makes the process smoother and helps you stay focused on the fun part—crocheting!
You’ll need worsted-weight cotton yarn, which is ideal for projects that require structure and shape. Cotton yarn holds its form well and is easy to clean, making it a great option for decorative or functional cups.
Choose a 3.5 mm or 4.0 mm crochet hook. A smaller hook size will make your stitches tighter, giving the cup a firmer shape. Be sure to match your hook size to the yarn weight for the best results.
You’ll also want a tapestry needle for weaving in the ends and a pair of sharp scissors. Optionally, you can use stitch markers to keep track of rounds, especially if you’re working in continuous spirals.
For added sturdiness, consider using a bit of stuffing or inserting a small plastic cup inside your crochet piece. This keeps the shape firm, especially if you plan to use the cups for display purposes.
Lastly, a hot glue gun or sewing needle may come in handy if you want to attach embellishments like buttons, bows, or small appliqués to give your crochet cups a personal touch.
2. Step-by-Step Crochet Cup Pattern
Start your Crochet Cups – Quick and Easy Tutorial with a magic ring. This is the best way to create a seamless base. Into the magic ring, crochet 6 single crochets (SC). Pull the ring tight and join with a slip stitch (SL ST).
In the next round, you’ll increase. Place 2 SC into each stitch around, ending with 12 SC. Continue increasing in each round by evenly spacing the increases. For example, in round 3: 1 SC, 2 SC in next stitch around to get 18 SC.
Once your base is the desired size, stop increasing and begin building the sides of the cup. To do this, work 1 SC in each stitch around without increasing. This will naturally start curving the fabric upward to form a cup shape.
Continue this for several rounds until the cup is the height you want. Typically, 6-8 rounds of SC are enough for a mini cup. You can switch colors in any round to add stripes or create fun designs.
To create the cup’s handle, chain 10 (or adjust based on your size preference), then SL ST to the side of the cup. You can secure the other end of the chain a few stitches apart to form a half-circle handle. Use SCs to cover the chain for a sturdier look.
Finish your cup by weaving in all the ends using a tapestry needle. Optionally, stuff the cup with filling or add a hard insert to maintain its shape. Now you have a completed crochet cup ready to use, gift, or display.
3. Customization Ideas and Decorative Uses
One of the best parts of this Crochet Cups – Quick and Easy Tutorial is how customizable it is. You can easily change the yarn color, add patterns, or modify the size to create a variety of styles.
Try using variegated yarn to add an interesting color effect without changing skeins. This technique gives your cup a marbled or striped appearance, adding character with minimal effort.
Add small motifs like crocheted flowers, hearts, or stars to decorate the outside of the cup. You can sew or glue these embellishments on after finishing the main body. This is perfect for themed decorations or gifts.
Want your crochet cup to have a lid? Crochet a flat circle that fits the opening and add a small loop on top. This transforms the cup into a mini container, ideal for holding trinkets, coins, or even tea bags.
You can also create seasonal versions. Use red and green yarn for Christmas cups, pastel tones for spring, or spooky patterns for Halloween. These themed crochet cups are wonderful for party decorations or festive displays.
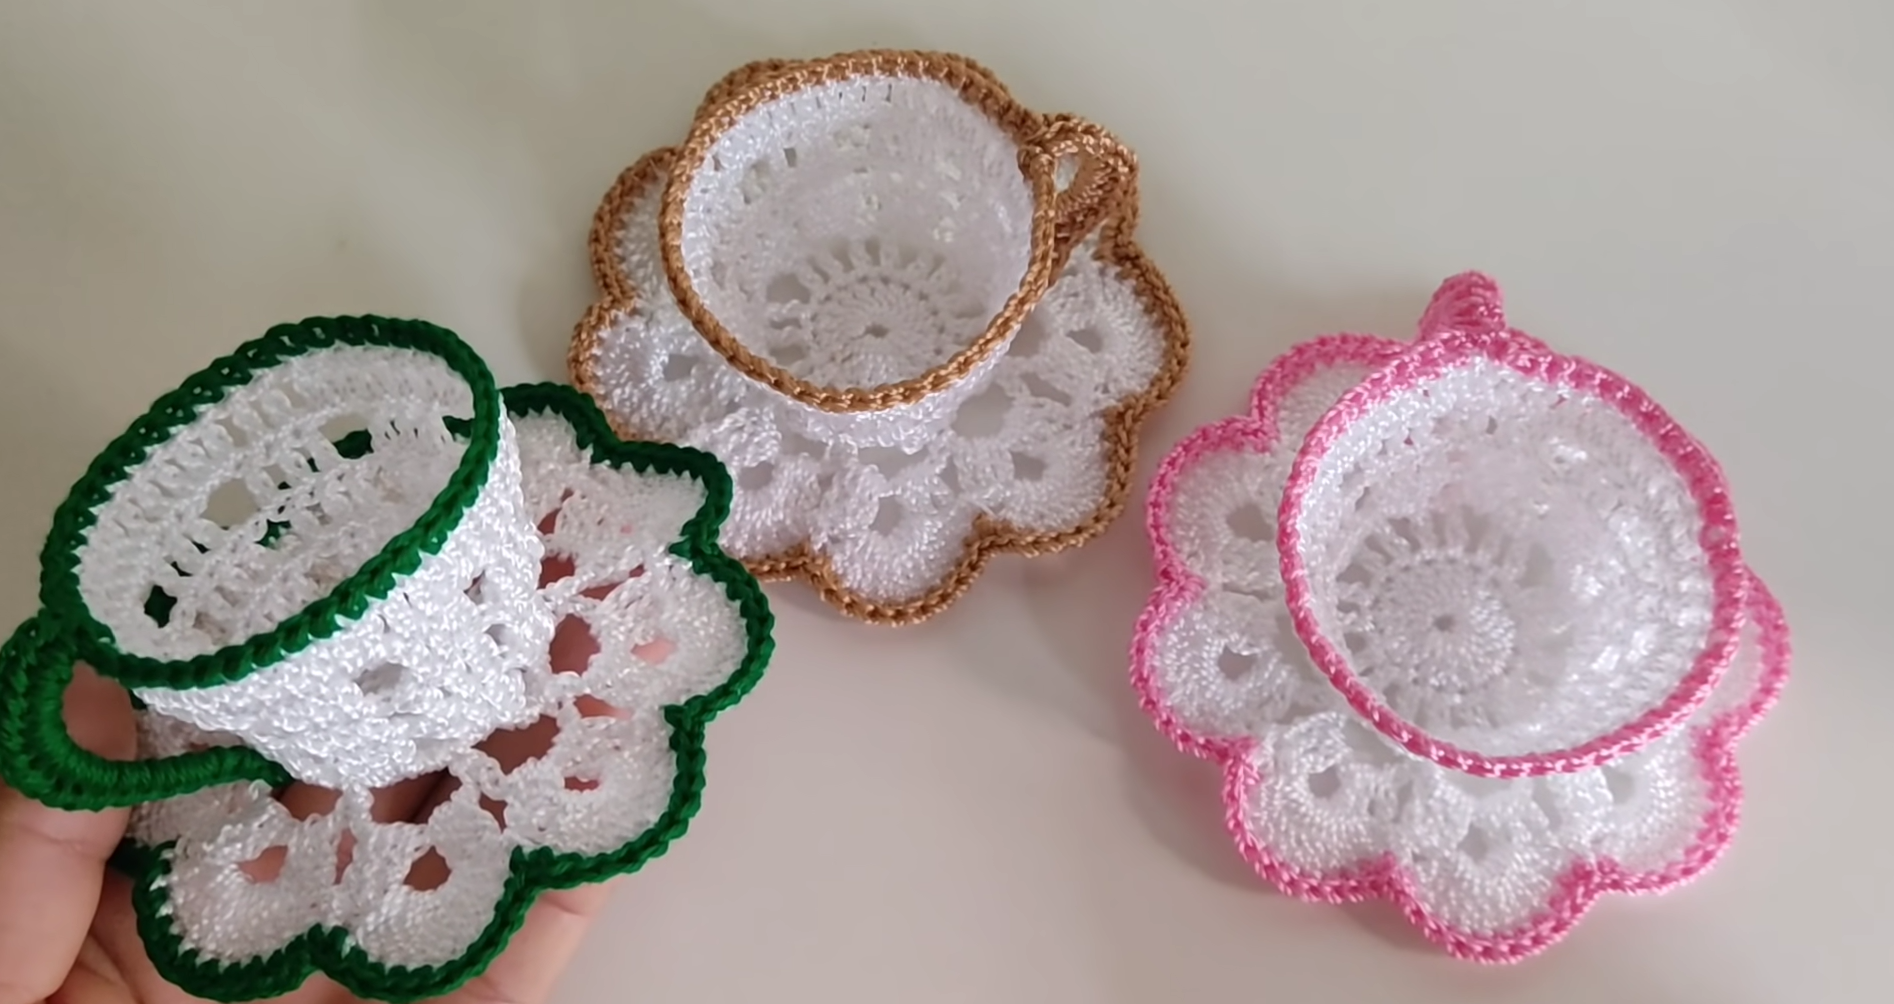
For a more interactive project, crochet matching saucers. Just follow the cup base pattern but make it slightly larger. Combine the cup and saucer for a delightful handmade tea set perfect for children or decorative shelves.
These crochet cups also make great favors or packaging ideas. Fill them with candies or small gifts and wrap them in clear cellophane for a charming and eco-friendly presentation.
4. Tips for Beginners and Common Mistakes
If you’re new to crocheting, this Crochet Cups – Quick and Easy Tutorial is an excellent introduction to 3D shapes. Here are some tips to help your project go smoothly and avoid common beginner mistakes.
Always count your stitches at the end of each round. Losing or gaining a stitch will change the shape of your cup. Using stitch markers can help keep track of the round start point and prevent confusion.
Be consistent with your tension. If your stitches are too loose, the cup will collapse. If they’re too tight, the fabric will curl. Practice on a swatch first to get comfortable with your yarn and hook.
Pay attention to the turning point when transitioning from the base to the sides. A sudden or uneven shift in stitch height can cause your cup to look uneven or floppy. Gently shape your work with your hands as you go.
If the cup isn’t holding its shape, try switching to a smaller hook or using a thicker yarn. This creates denser fabric that stands up better. Alternatively, insert a support inside like a small container or stuffing.
Don’t be afraid to unravel and start again if something looks off. Crocheting is forgiving, and ripping back a few rows is often faster than trying to fix a mistake in the middle of your work.
Finally, enjoy the process! Even if your first cup isn’t perfect, it’s a wonderful learning opportunity. Each try will improve your technique and build your confidence in 3D crochet projects.
FAQ – Frequently Asked Questions
1. What size should my crochet cup be?
The size is entirely up to you. A common mini cup size is around 2-3 inches tall, but you can scale the pattern up or down by using different yarn weights or adding more rounds.
2. Can I wash crochet cups?
Yes, if you use machine-washable yarn like cotton. Hand washing is recommended for decorated or stiffened cups to maintain their shape and embellishments.
3. Are crochet cups safe for kids to play with?
Yes, especially if made with soft yarn and no small parts. They’re great for pretend play. Avoid using buttons or hard embellishments for young children.
4. How long does it take to make a crochet cup?
On average, a small cup takes 30 minutes to an hour, depending on your speed and skill level. It’s a perfect project for quick crafting sessions.
5. Can I sell items made from this tutorial?
Yes! Handmade crochet cups are popular at craft fairs and online shops. Just be sure to credit original pattern creators if you use a published design.
6. What’s the best yarn for crochet cups?
Cotton yarn is preferred for its structure and durability. Acrylic can also work but may be less firm unless you stiffen the finished product.
Conclusion
In this Crochet Cups – Quick and Easy Tutorial, you learned how to create adorable mini cups using basic crochet techniques. From choosing the right yarn and tools to following step-by-step instructions, and even exploring fun variations, this project is perfect for anyone looking to create something quick, easy, and beautiful.
These crochet cups can be functional, decorative, or simply fun. They make great gifts, party favors, or home accents, and they’re a great way to use up leftover yarn while practicing essential skills.
VIDEO TUTORIAL
We hope you enjoyed this tutorial and feel inspired to make your own collection of crochet cups. If you try this project, please share your honest thoughts, experiences, or suggestions in the comments. Your feedback helps others and builds a stronger crafting community. Happy crocheting!


