
If you love combining creativity and cuteness in your crochet projects, then you’re going to adore this Crochet duck Pattern. This charming little design is perfect for beginners looking to explore amigurumi or for experienced crafters who want a quick and rewarding project.
Whether it’s for a child’s toy, a home decoration, or a handmade gift, a crocheted duck will bring joy to anyone who sees it. Throughout this guide, we’ll walk step-by-step through creating your own adorable duck, using clear instructions and beginner-friendly tips.
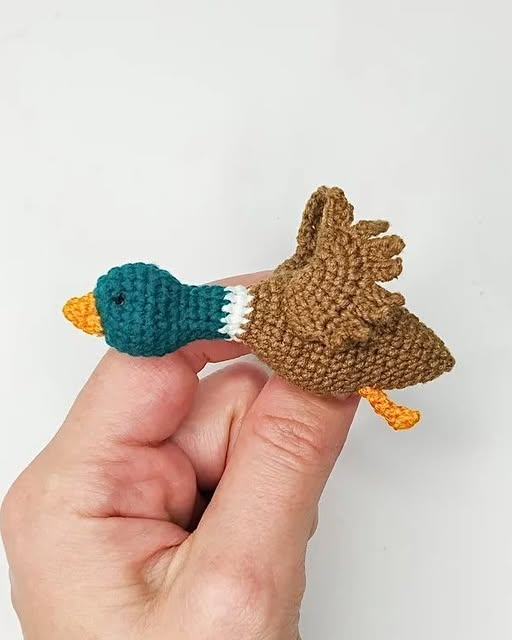
The beauty of a Crochet duck Pattern is its versatility. You can make it in realistic yellow with an orange beak, or experiment with whimsical colors for a playful twist. These ducks can be tiny keychain accessories or larger plush toys — the choice is yours.
By following the pattern carefully and practicing basic stitches, you’ll end up with a cute and cuddly result you can be proud of.
In this tutorial, you’ll also learn how to customize your duck with accessories like little scarves, hats, or bows, adding your personal touch to every creation.
You’ll gain confidence with shaping techniques, stuffing, and sewing the parts together neatly. Let’s dive in and start making your own crocheted duck from scratch!
1. Materials and Tools You’ll Need
Before starting your Crochet duck Pattern, it’s important to have all the materials and tools ready. Choosing the right supplies will not only make the process easier but will also ensure your duck turns out soft, durable, and perfectly shaped.
For most crocheted ducks, you will need a medium-weight yarn, usually acrylic or cotton, in the colors of your choice. Yellow is the classic choice for the body, with orange for the beak and feet, but feel free to mix it up with pastels or vibrant shades. You’ll also need a crochet hook that matches your yarn size, commonly between 2.5 mm and 4 mm for amigurumi projects.
Other essential materials include stuffing fiberfill to give your duck shape and softness, a yarn needle for sewing the parts together, and stitch markers to keep track of your rounds. Safety eyes or small black beads can be used for the duck’s eyes, though you can also embroider them for a baby-safe toy.
It’s worth investing in good-quality yarn to ensure your duck stays looking fresh even after lots of cuddles or washes. Soft, non-pilling yarn will make your creation more enjoyable to hold. For beginners, working with light-colored yarn can make it easier to see your stitches.
Before diving into the pattern, test a few stitches to get comfortable with your hook and yarn combination. Consistent tension is key to making sure your duck’s body is evenly shaped. Practice single crochets, increases, and decreases before you begin the main project.
Lastly, keep all your materials in a small project bag to avoid losing pieces or mixing up yarn colors mid-project. Being organized will make the crocheting process smoother and more enjoyable.
2. Step-by-Step Instructions for the Body
The body is the main part of your Crochet duck Pattern and will set the foundation for the whole project. It’s typically worked in continuous rounds using the amigurumi technique, which creates a smooth, seamless shape.
Start by making a magic ring and crocheting a small number of stitches into it. This creates a tight, closed center for the duck’s body. Gradually increase your stitches in each round to create a rounded base that will expand into the belly area. Use your stitch marker to keep track of where each round starts.
As you work upwards, keep your tension even to avoid gaps where the stuffing might peek through. If you notice holes forming, switch to a smaller hook size or crochet more tightly. The goal is to have a firm but flexible fabric.
Once you’ve reached the widest part of the body, you’ll begin decreasing stitches to taper toward the neck. This shaping gives the duck its rounded, charming silhouette. Remember to add stuffing gradually as you go, especially before the opening becomes too small to fill.
You can make your duck plump or slim depending on how many rounds you add before starting the decrease. Adjusting these proportions lets you create a family of ducks in different sizes.
Once the body is finished, fasten off your yarn securely, leaving a long tail for sewing. Keep the tail attached until all parts are complete so you can assemble everything easily.
3. Making the Beak, Wings, and Feet
Small details like the beak, wings, and feet bring your Crochet duck Pattern to life. These are usually quick to make but require careful shaping and placement.
The beak is often made by crocheting a small flat or slightly curved piece. Orange yarn is traditional, but you can experiment with pink, red, or even patterned yarn for a playful look. Attach the beak securely to the head, ensuring it’s centered and even.
For the wings, crochet two small oval shapes. These can be sewn flat against the body or slightly angled outward for a more dynamic appearance. You can even add a tiny feather texture by using back loop stitches.
Feet can be created with simple small rounds that are slightly flattened before sewing. For added cuteness, you can make webbed feet by adding small chain loops on the edges. Position them so the duck can sit upright without tipping forward.
It’s important to sew each part with strong, tight stitches so they withstand play and handling. A yarn needle and matching thread color will help hide the seams.
If you’re making the duck for a young child, avoid using small detachable pieces like beads for the eyes. Instead, embroider features directly with yarn or thread. This ensures the toy is completely safe.
Adding these parts carefully and with attention to detail will make your crocheted duck look polished and professional.
4. Adding Personality and Final Touches
One of the most enjoyable parts of creating a Crochet duck Pattern is giving it personality through accessories and finishing touches. This is where your creativity can shine.
You can add a small crochet scarf, a mini hat, or even a flower crown to your duck. Seasonal themes, like a Santa hat for Christmas or bunny ears for Easter, make your creation even more special.
Embroidering a small smile or blush on the cheeks can add a lot of charm. Use soft pastel yarn for cheeks and a thin black yarn for facial details. Remember to keep your stitches small and neat.
If you want your duck to stand up on its own, you can add a small weight, like plastic pellets, at the bottom before closing the body. This will give it stability.
For home décor, consider making several ducks in different sizes and colors to display together. They make adorable centerpieces for baby showers or springtime tables.
Once your duck is complete, give it a gentle fluff and shape the stuffing so it looks even. Snip any stray yarn ends and make sure all seams are tight.
Taking a few minutes for these final steps ensures your duck will look great and last for years to come.
FAQ
Q: Is this Crochet duck Pattern suitable for beginners?
Yes, this pattern is beginner-friendly, especially if you already know how to make basic stitches like single crochet, increases, and decreases.
Q: How long does it take to make a crochet duck?
It usually takes between 3 to 5 hours, depending on your skill level and the size of the duck.
Q: Can I use any type of yarn?
You can use any yarn, but acrylic or cotton works best for durability and ease of stitching.
Q: How do I make my duck baby-safe?
Avoid small parts like safety eyes and instead embroider features directly. Also, ensure all pieces are securely sewn.
Q: Can I sell ducks made from this pattern?
Yes, you can sell handmade ducks, but remember to credit the pattern source if applicable.
Q: How do I wash a crocheted duck?
Hand wash gently with mild soap and let it air dry to keep it looking new.
Conclusion
Creating a Crochet duck Pattern is a rewarding and enjoyable project that combines creativity, skill, and a touch of cuteness. We’ve covered everything from gathering materials to shaping the body, adding details, and giving your duck personality.
Whether you’re making it as a gift, for your home, or to sell, this pattern is versatile and fun. I’d love to hear your thoughts — leave a sincere opinion and any suggestions you have so we can make future guides even better!


