
The Crochet Halloween Wind Spinner with Spider Hanging Tutorial is a fun and creative project that brings movement, color, and spooky charm to your seasonal décor. This tutorial shows you how to crochet a spiraling wind spinner paired with a dangling spider, making it a perfect handmade ornament for porches, windows, or party decorations.
Not only is this project festive, but it is also beginner-friendly and highly customizable, allowing you to choose yarn colors and sizes that match your Halloween theme.
The beauty of the Crochet Halloween Wind Spinner with Spider Hanging Tutorial is that it combines playful design with easy crochet techniques. The spiral spinner gives a whimsical effect when it moves with the breeze, while the hanging spider adds the signature spooky detail of Halloween.
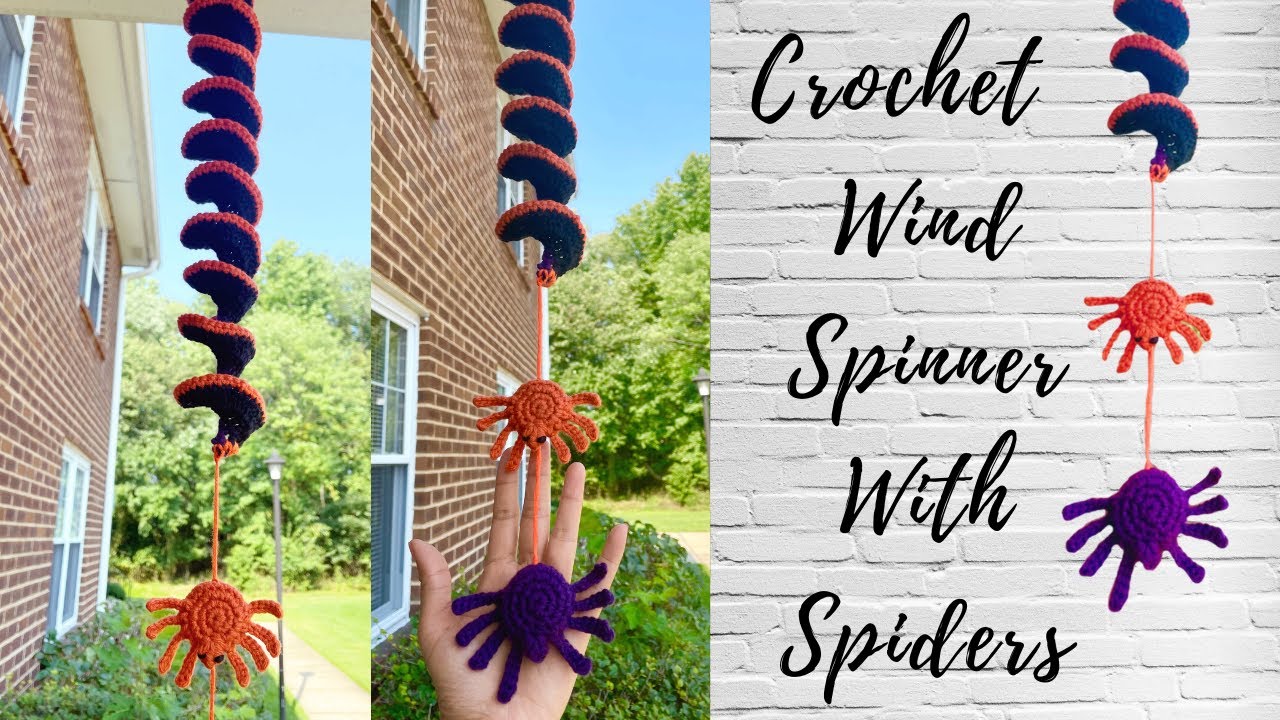
Whether you prefer traditional orange and black, or want to include purple, green, or metallic yarns, this project can adapt to your style. It’s a great way to decorate your space without spending much, since it only requires yarn scraps and basic tools.
For those who enjoy learning while practicing, the Crochet Halloween Wind Spinner with Spider Hanging Tutorial is an ideal project. It teaches the fundamentals of working in continuous rounds, shaping, and adding three-dimensional details like the spider.
You’ll also practice assembly skills, putting together the spinner and the spider in a cohesive design. By the end, you’ll have a durable, reusable decoration that can be displayed year after year.
1. Materials and Preparation
To begin the Crochet Halloween Wind Spinner with Spider Hanging Tutorial, gather worsted-weight yarn in festive Halloween colors like orange, black, purple, or green.
Use a medium-sized crochet hook suitable for your yarn, usually 4.0 mm or 5.0 mm.
Have scissors, a yarn needle, and stitch markers ready for managing rounds and finishing details.
Prepare fiberfill or yarn scraps for lightly stuffing the spider’s body if you want it to be more dimensional.
Choose whether you want your spinner to hang indoors or outdoors, as this may influence yarn type.
Optional extras include beads, sequins, or googly eyes to enhance the spider’s look.
2. Crocheting the Wind Spinner
Start the wind spinner by creating a chain of the desired length; longer chains produce longer spirals.
Work double crochets or half-double crochets into each chain, adding two or three stitches per chain to form a curl.
Continue down the chain, and watch the spinner naturally twist into a spiral.
Use multiple yarn colors to create a striped or variegated effect for more visual interest.
Finish off the end neatly and weave in loose yarn to maintain structure.
Block gently if needed to set the spiral shape more permanently.
3. Making the Spider
Begin with a magic ring to create the spider’s round body, working in continuous rounds.
Stuff the body lightly with fiberfill or yarn scraps for shape and sturdiness.
Crochet smaller circles or ovals to form the spider’s head and attach them securely.
For the legs, crochet chains or use pipe cleaners wrapped in yarn for a more flexible effect.
Attach the legs symmetrically to the body to ensure balance.
Finish by sewing or gluing small beads, safety eyes, or crocheted eyes to give the spider personality.
4. Assembling and Hanging the Decoration
Attach the spider to the end of the wind spinner with a secure stitch or a length of yarn.
Test the hanging balance to ensure the spinner turns freely without tangling.
Use a sturdy loop or ring at the top of the spinner to hang it from hooks, doors, or ceilings.
Experiment with multiple spinners hung together for a fuller Halloween display.
Adjust yarn lengths to vary the spider’s position for a dynamic effect.
Store the decoration flat after the season to reuse it for many Halloweens to come.
FAQ – Crochet Halloween Wind Spinner with Spider Hanging Tutorial
1. Is this project beginner-friendly?
Yes, the stitches used are simple, making it suitable for crocheters of all levels.
2. How long does it take to complete?
On average, 3–5 hours, depending on spinner length and details added to the spider.
3. Can I make the spider without stuffing?
Absolutely, you can keep it flat if you prefer a lighter ornament.
4. Which yarn is best for outdoor use?
Acrylic yarn works well for durability, but if outdoors, consider weather-resistant yarn.
5. Can I make multiple spiders per spinner?
Yes, adding more spiders creates a more dramatic and festive effect.
6. Is blocking necessary for the spinner?
Not always, but blocking helps maintain the spiral if you want a permanent curl.
Conclusion
The Crochet Halloween Wind Spinner with Spider Hanging Tutorial is a delightful way to bring handmade charm to your spooky season décor. With its playful spiral and creepy-cute spider, it’s a project that combines fun, learning, and festive creativity. Whether you’re decorating for a Halloween party or simply want to add seasonal flair to your home, this pattern will become a favorite.
VIDEO TUTORIAL
Have you ever tried making a crochet wind spinner before? Share your experiences, suggestions, or creative ideas in the comments—I’d love to hear how you bring Halloween magic into your crochet projects!


