
Macrame Heart Bracelet - Free Tutorial

If you’ve been looking for a cozy and stylish accessory, this CROCHET HEADBAND – FREE PATTERN is the perfect project for you. Whether you’re a beginner or experienced crocheter, making a crochet headband allows you to combine comfort, fashion, and creativity.
You can create them for yourself, as gifts, or to sell—all while enjoying the soothing rhythm of crochet stitches.
The beauty of the CROCHET HEADBAND – FREE PATTERN lies in its simplicity and versatility. You can make them in various sizes, textures, and colors to match any outfit or season.
Plus, this project uses only a small amount of yarn and can be completed quickly, making it a great option for stash-busting and practicing new stitches.
Another reason why the CROCHET HEADBAND – FREE PATTERN is so loved is that it’s a practical item. It keeps your ears warm in the winter and can be worn as a hair accessory year-round. Once you try this pattern, you might find yourself making more than one in different styles and stitch variations.
Before starting your CROCHET HEADBAND – FREE PATTERN, make sure you gather all the necessary materials. Most crochet headbands require minimal supplies, which makes them an accessible project for everyone.
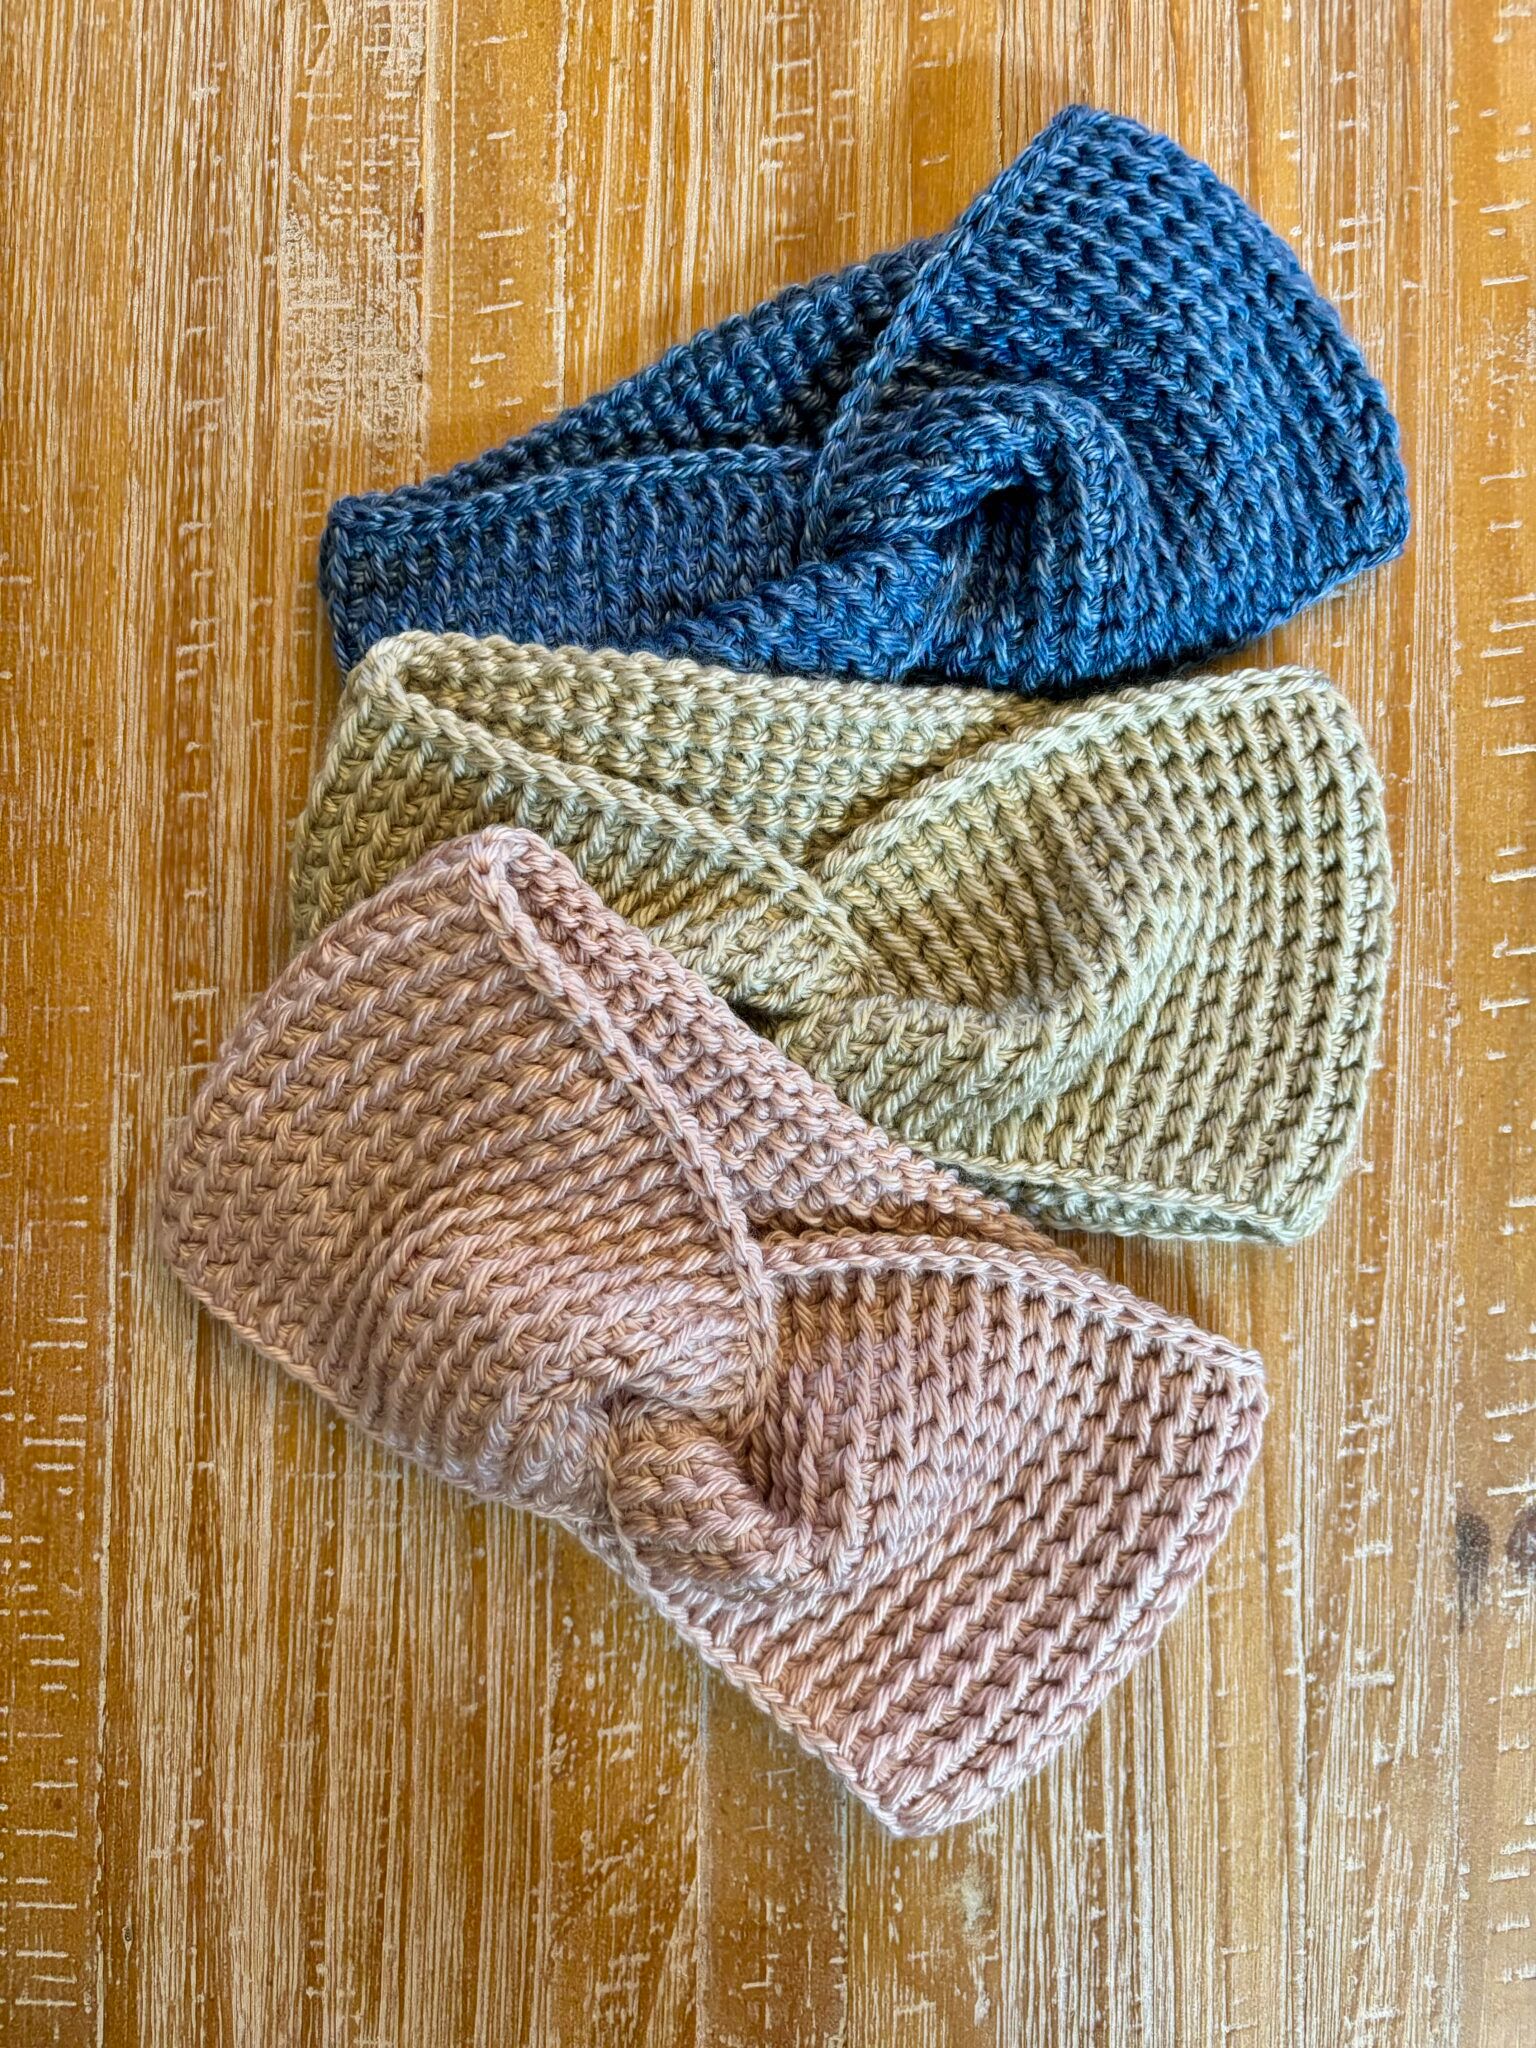
You’ll need worsted weight yarn or cotton yarn, depending on your preferred texture. Acrylic yarn is also a popular choice, especially for beginners due to its flexibility and affordability. Choose a soft and stretchy yarn to ensure a comfortable fit around the head.
Select the appropriate crochet hook size recommended for your chosen yarn. Common sizes for crochet headbands range from 4.0 mm (G) to 5.5 mm (I). You might also need a yarn needle to weave in ends and a pair of scissors to trim excess yarn.
If you’re planning to add decorative elements such as buttons, bows, or beads, have those ready as well. These little touches can add personality to your headband and make it uniquely yours.
Having a measuring tape on hand is also helpful. It allows you to measure the head circumference so the headband fits snugly without being too tight.
Keep in mind that gauge is not always critical for a headband, but it’s good practice to crochet a small swatch if you’re unsure about sizing. Adjust your hook or tension as needed.
To begin your CROCHET HEADBAND – FREE PATTERN, start with a foundation chain that matches the length needed to wrap around the head. Usually, that’s between 18 and 22 inches, depending on size and stretch.
Once your chain is complete, join it into a round or continue in rows, depending on whether you want a seamless or seamed headband. For a seamless look, join the last chain to the first with a slip stitch and be careful not to twist your chain.
Next, choose your stitch pattern. The single crochet stitch is great for a tight and dense texture, while the half double or double crochet stitch offers more flexibility and a looser feel. You can also mix stitches for visual interest.
Continue crocheting your rounds or rows until the headband is about 3–5 inches wide, or your preferred width. Remember to keep your tension consistent throughout the project to ensure a smooth and even finish.
Once the desired width is achieved, fasten off and weave in the ends using your yarn needle. If you worked in rows, you’ll also need to seam the ends together to complete the headband.
For added detail, you can sew on a decorative button, bow, or crochet flower. This is your chance to personalize your headband and match it to your style.
To achieve the best results with your CROCHET HEADBAND – FREE PATTERN, it helps to keep a few tips in mind. The first is consistency in stitch size and tension. This ensures that the headband doesn’t end up uneven or wavy.
Blocking your finished headband can make a big difference in its final appearance. Lightly steaming or laying it flat to dry after shaping can help define the stitches and even out any inconsistencies.
Experimenting with stitch patterns is also highly recommended. Textured stitches like the moss stitch, puff stitch, or cable crochet add visual interest and a more professional finish.
If you’re unsure about sizing, make your headband slightly smaller than the head measurement. The stretch of the crochet fabric will naturally make it fit more comfortably.
Practice invisible joins if you’re working in the round. This technique helps to make your seam nearly undetectable and creates a more polished look.
Finally, keep your ends clean and tidy. Use a yarn needle to weave them back and forth through several stitches to secure them and prevent unraveling over time.
There are countless ways to customize your CROCHET HEADBAND – FREE PATTERN. For a boho look, you can use open lace stitches or add fringe on the ends. These styles are especially popular during summer and festival seasons.
If you want something cozier for the colder months, opt for chunky yarns and tighter stitches. Consider a twisted headband design or ribbed texture to add warmth and visual interest.
Color changes can also transform the entire appearance of your headband. Try stripes, ombré effects, or color blocking to create eye-catching accessories.
Adding embellishments like wooden buttons, metallic charms, or crocheted appliqués can elevate a simple headband into a trendy statement piece.
Another creative idea is to make matching headbands for family members or friends. It’s a thoughtful handmade gift that can be customized for each person’s style and size.
You can also experiment with different fiber types such as bamboo or alpaca yarns. These alternative fibers can change the texture and functionality of your headband, from lightweight and breathable to plush and insulating.
What size should I make a crochet headband? Typically, a crochet headband should be 1-2 inches smaller than the actual head circumference to allow for stretch. Adult headbands usually measure 18 to 22 inches in length.
What yarn is best for crochet headbands? Worsted weight or cotton yarn is commonly used. Soft acrylic yarn also works well and provides good elasticity for everyday wear.
Do I need to know advanced stitches? Not at all. The CROCHET HEADBAND – FREE PATTERN is perfect for beginners and only requires basic stitches like single crochet, half double crochet, or double crochet.
Can I sell headbands made from this pattern? Yes, handmade headbands are great items to sell at craft fairs or online. Just be sure to give credit if you’re using someone else’s original design.
How long does it take to crochet a headband? Most headbands can be completed in under two hours, making them an ideal quick project for any level of crocheter.
How do I make the headband stretchy? Using ribbing patterns such as front post and back post double crochet creates a stretchy texture. Also, the yarn choice and hook size affect elasticity.
The CROCHET HEADBAND – FREE PATTERN is a wonderful project for crafters of all levels. From selecting the yarn to adding final touches, every step allows you to be creative and enjoy the process. Whether you’re making it for warmth, fashion, or gifts, this pattern is both functional and fun.
We hope this guide helped you understand how to successfully create your own crochet headbands. If you’ve tried the pattern or have tips of your own, we’d love to hear from you. Please share your thoughts and suggestions in the comments!


