
Crochet Oval Rug – Free Pattern is a charming and practical project that brings warmth, texture, and handmade beauty to any space in your home.
Whether you’re new to crochet or an experienced crafter, making your own rug is a satisfying experience that blends creativity with functionality.
This Crochet Oval Rug – Free Pattern guide will walk you through everything you need to know to start your next favorite project.
What makes a Crochet Oval Rug – Free Pattern so special is its versatility. You can customize the size, color, and yarn type to match any room—be it a cozy corner of your bedroom, the entryway, or even your kitchen. It’s an ideal beginner-friendly pattern that helps build skills while producing a stunning finished item.
In this article, you’ll learn the step-by-step process to create a beautiful Crochet Oval Rug – Free Pattern, from choosing materials to finishing touches.
We’ll also cover helpful tips to make your project smoother and more enjoyable, all while keeping your content optimized for SEO and aligned with Google AdSense policies.
1. Choosing the Right Materials for Your Oval Rug
The first step in creating your Crochet Oval Rug – Free Pattern is selecting the right yarn. Since rugs need to be sturdy and durable, consider using thick cotton or a bulky-weight yarn that can handle foot traffic and cleaning.
Color choice plays a big role in the final look of your rug. Solid tones give a minimalist vibe, while multicolored yarns or planned color changes can create stripes or gradients that add visual interest.
You’ll also need a suitable crochet hook, usually ranging from 6.5 mm (K) to 9 mm (M/N) depending on your yarn’s thickness. A larger hook helps keep the stitches loose and flexible, which is great for rugs.
Consider using non-slip backing or rubber rug spray on the underside, especially if the rug will be placed on hardwood or tile floors. This makes the rug safer and more functional.
You’ll also want to have stitch markers on hand to track the beginning of your rounds and avoid losing count. Measuring tape is useful too, so you can ensure your rug reaches the desired size.
A tapestry needle is helpful for weaving in ends neatly. This simple tool ensures your Crochet Oval Rug – Free Pattern looks professional and tidy once completed.
2. Understanding the Basic Oval Rug Construction
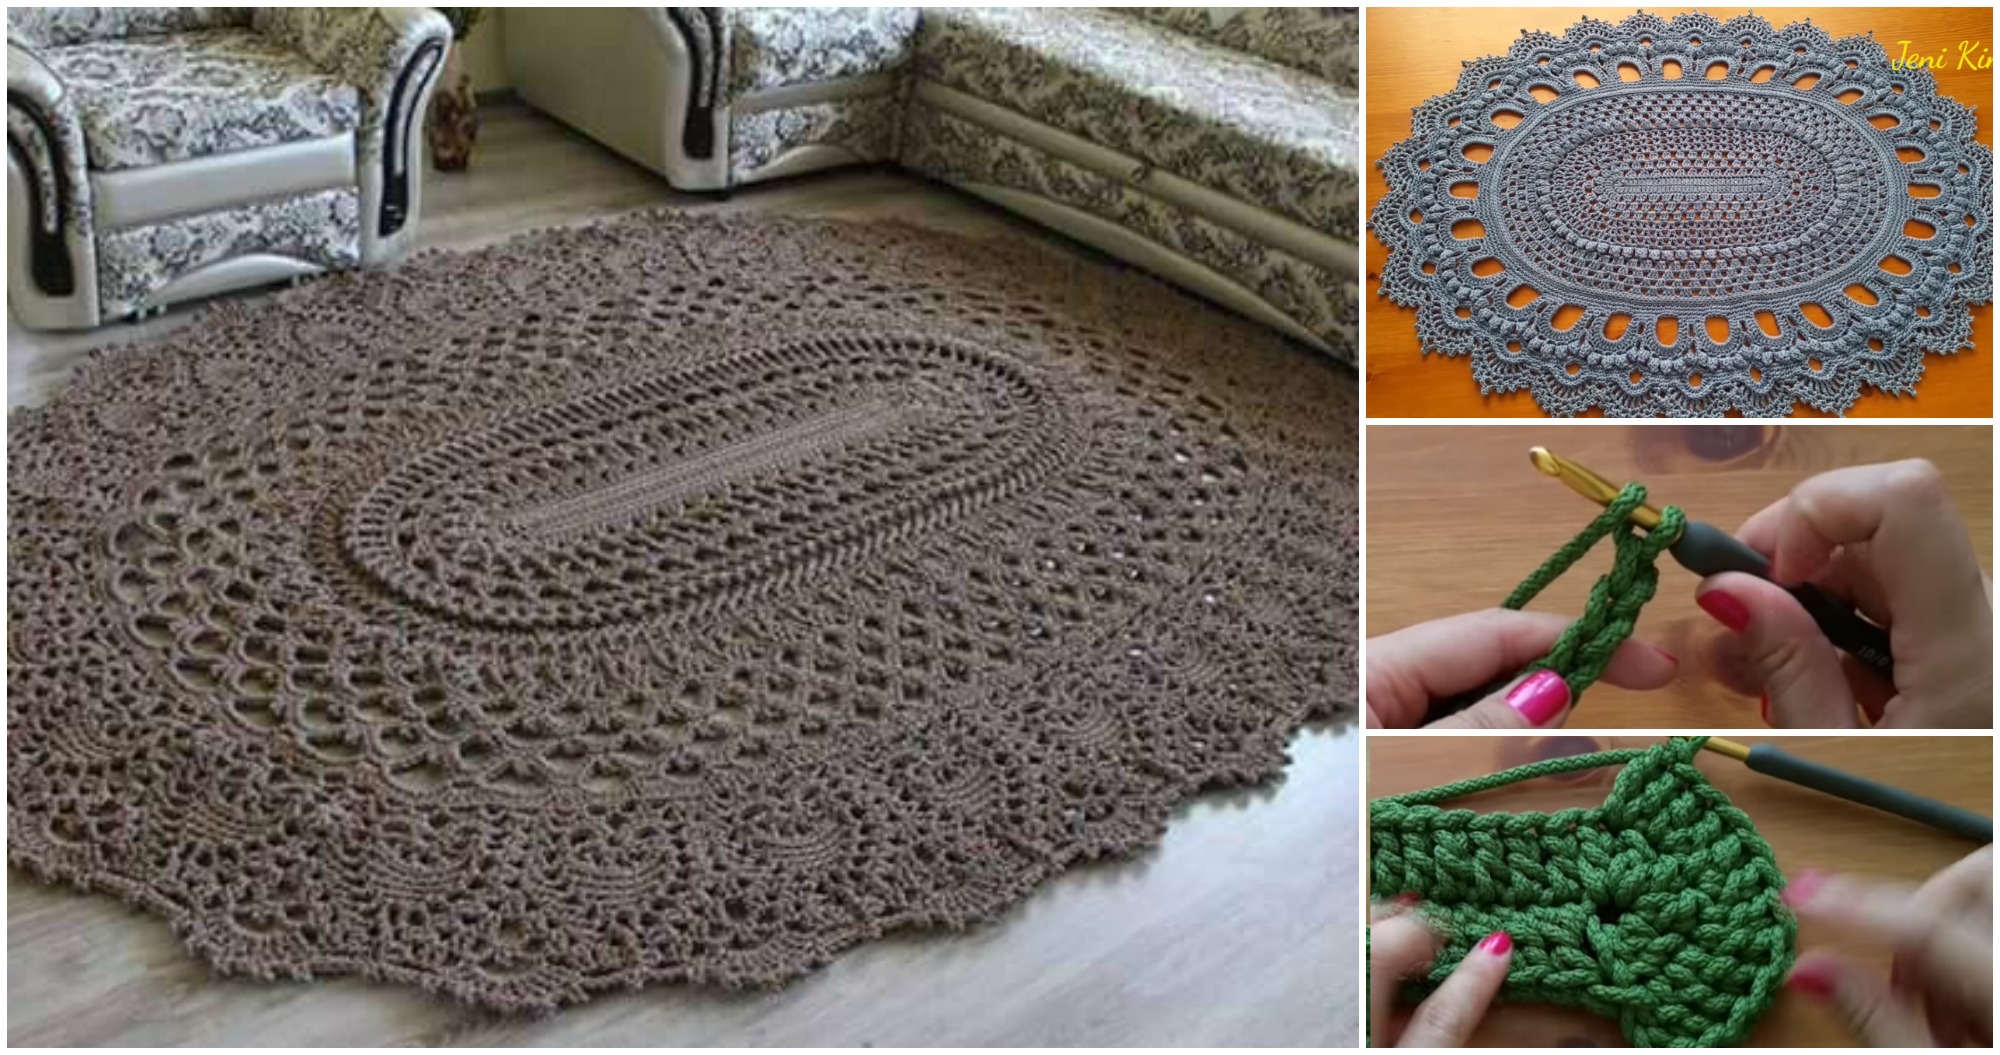
The magic behind a Crochet Oval Rug – Free Pattern lies in how it’s built. Instead of starting with a circle, you begin with a chain that forms the center of your oval, then crochet in the round using increases at both ends.
The rug begins with a foundation chain, often about 12–20 chains long, depending on how wide you want the center to be. This part of the rug will determine the entire length when it’s finished.
After the first round, you’ll work around both sides of the foundation chain, increasing stitches at each end to form the oval shape. The rest of the rounds build on this base.
The increases are crucial for keeping the rug flat. Without them, your rug may start to curl or become bowl-shaped. Carefully following stitch counts will help avoid these issues.
Using simple stitches like single crochet or half double crochet keeps the structure strong and gives a classic look. You can also try textured stitches like the moss or granite stitch for a bit more flair.
As your rug grows, it’s important to keep checking the shape. If you notice puckering or uneven edges, you might need to adjust your stitch tension or add a few more increases.
3. Tips to Customize Your Crochet Oval Rug
A big advantage of the Crochet Oval Rug – Free Pattern is how easy it is to customize. You can adapt the size, pattern, and design to fit your personal style or the needs of your home.
To change the rug’s size, simply begin with a longer or shorter foundation chain. A longer chain makes an elongated oval perfect for hallways or kitchens.
You can also switch stitch types to create texture. Try alternating rows of single and double crochet or using front and back post stitches for a ridged effect.
Color changes are another fun way to personalize your rug. Use self-striping yarn for a blended look or change colors manually every few rounds for stripes or blocks.
For a boho-inspired design, add fringe to the short edges of the rug. This decorative touch is easy to apply and makes your handmade piece look even more special.
If you’re making a rug for a child’s room, consider using bright colors or even incorporating fun shapes using tapestry crochet techniques.
When gifting a Crochet Oval Rug – Free Pattern, wrap it with a handmade tag or label. It adds a personal touch and lets the recipient know the love and effort you put into it.
4. Finishing Touches and Care Tips
After completing your Crochet Oval Rug – Free Pattern, it’s time to add the finishing touches that will make it look polished and last longer.
Start by blocking your rug if needed. Gently dampen it, lay it flat, and shape it to the correct dimensions. Let it dry completely to lock the stitches in place.
Use your tapestry needle to weave in all the loose yarn ends securely. This ensures your rug won’t come undone and looks neat on both sides.
Add a non-slip grip if your rug will be used on slick surfaces. You can purchase non-slip rug pads or use a special rubber coating made for crochet and knit rugs.
To keep your rug fresh and clean, spot clean with mild detergent and warm water. For larger rugs made of cotton, some can be machine washed on gentle—but always check your yarn label.
Store your rug flat or rolled up when not in use. Avoid folding it to prevent permanent creases in the fabric.
If your rug starts to stretch over time, lightly wetting and reshaping it can help restore its original form. Taking care of your Crochet Oval Rug – Free Pattern ensures it will stay beautiful and useful for years.
FAQ – Frequently Asked Questions
What kind of yarn is best for a crochet oval rug?
Thick, durable yarn like cotton or bulky-weight acrylic is best. These hold up well under foot traffic and frequent use.
Can beginners make a crochet oval rug?
Yes! This pattern is ideal for beginners. It uses basic stitches like single and half double crochet and provides a great way to practice working in the round.
How big should I make my rug?
That depends on where you want to place it. Smaller rugs (24″–36″) work well in bathrooms or entryways, while larger ones (over 60″) are great for living rooms or bedrooms.
Do I need a pattern or can I freehand it?
You can certainly freehand, but following a Crochet Oval Rug – Free Pattern helps you keep your shape consistent and avoid curling or puckering.
How do I stop my oval rug from curling at the edges?
Make sure you’re increasing correctly at the ends of each round and not pulling your stitches too tightly. Blocking the finished rug also helps it lay flat.
Can I make this pattern with recycled yarn or t-shirt yarn?
Absolutely! T-shirt yarn is especially popular for rugs. It’s thick, sturdy, and adds a fun modern touch to your project.
Conclusion
Creating a Crochet Oval Rug – Free Pattern is a rewarding and creative journey that adds personality and warmth to your home. From choosing the perfect yarn and colors to understanding how the oval shape is formed and customizing the final design, each step lets you express your unique style while building useful crochet skills.
We explored how to choose materials, construct the rug’s shape, personalize your project, and care for the finished piece. Whether you’re making one for your own home or as a thoughtful handmade gift, this project is both fun and functional.
Have you tried making your own Crochet Oval Rug – Free Pattern yet? We’d love to hear your thoughts, experiences, and suggestions! Please leave a sincere comment below and let us know how your project turned out or what you’d like to learn in future tutorials. Your feedback helps us grow and serve the crochet community better!


