
Creating a unique and adorable accessory for babies can be both fun and rewarding. The Crochet Pattern: Baby’s Dino Hat with Cape is a delightful project that combines creativity with functionality.
This charming set keeps little ones warm while adding a playful touch to their outfits. Whether you’re a beginner or an experienced crocheter, this guide will help you craft a beautiful dino-themed hat and cape with ease.
Crocheting this set allows for customization in colors, sizes, and embellishments, making it a perfect handmade gift for newborns and toddlers alike.
By following this tutorial, you will learn the essential stitches and techniques needed to complete the project. Plus, it’s an excellent way to enhance your crocheting skills while creating something truly special.
Let’s dive into the steps to make this delightful Baby’s Dino Hat with Cape, ensuring your little one looks adorable and stays cozy.
1. Materials Needed for the Baby’s Dino Hat and Cape
Choosing the right materials is crucial for creating a comfortable and durable crochet project. The yarn type, hook size, and additional accessories all contribute to the final look and feel of your piece.
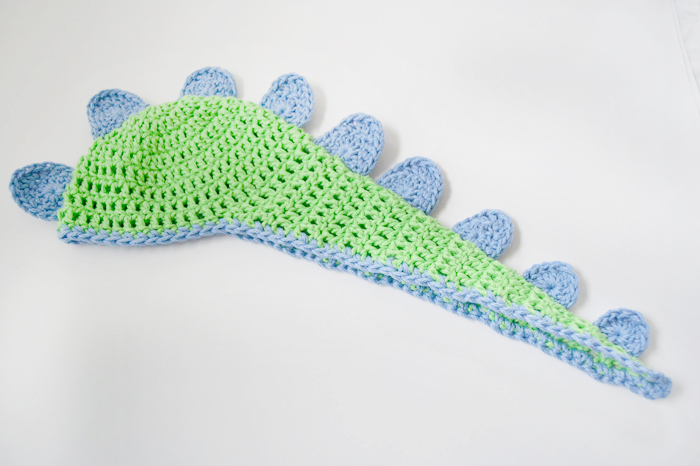
- Yarn Selection: Soft and warm yarn, such as acrylic or cotton blends, is ideal for baby wear. Opt for vibrant colors like green, blue, or yellow for a classic dinosaur look.
- Hook Size: A 4.0 mm to 5.5 mm crochet hook works best for this pattern, depending on the yarn weight.
- Additional Supplies: You will need scissors, a yarn needle, stitch markers, and stuffing material if you plan to add 3D details like spikes.
- Measuring and Sizing: Ensure you follow a size chart to match the baby’s head circumference and cape length for a perfect fit.
- Buttons or Ties: Secure the cape using buttons or crochet ties to make it adjustable and easy to wear.
- Customization Options: You can add felt eyes, embroidered details, or pom-poms for extra charm and uniqueness.
2. Step-by-Step Instructions for the Dino Hat
The hat is the centerpiece of this crochet pattern, designed to fit snugly while showcasing cute dino features. Follow these steps to create the base hat and embellishments.
- Start with the Magic Ring: Create a magic ring and crochet 6-8 single crochet stitches to form the base.
- Increase Rounds: Work in continuous rounds, increasing stitches evenly to shape the crown.
- Adjusting Hat Size: Continue crocheting until the hat reaches the desired circumference for the baby’s age.
- Adding Earflaps: To provide extra warmth, create earflaps by crocheting short rows on each side.
- Dinosaur Spikes: Crochet small triangular pieces and attach them securely along the top of the hat.
- Finishing Touches: Weave in loose ends, and if desired, add eyes and nostrils using embroidery or felt.
3. Crafting the Cozy Dino Cape
A cape adds an extra touch of cuteness and warmth to this dinosaur-themed crochet set. Here’s how to make it:
- Foundation Chain: Start with a foundation chain that matches the width of the baby’s shoulders.
- Building the Cape: Use half-double crochet or double crochet stitches to create a flowing fabric.
- Tapering the Edges: Gradually decrease stitches on the sides to give the cape a rounded look.
- Attaching Spikes: Just like the hat, add crochet spikes along the center of the cape for a complete dinosaur effect.
- Creating the Fastening Mechanism: Sew buttons or crochet ties at the neckline to keep the cape secure.
- Final Adjustments: Check for symmetry, secure loose ends, and block the cape if necessary for a neat finish.
4. Tips for Customization and Care
To make your Baby’s Dino Hat with Cape even more special, consider these customization ideas and care tips.
- Color Variations: Mix and match colors to create a unique look. A pink dino set for girls or a neutral-tone set for a modern twist.
- Adding Textures: Use bobble stitches for a textured effect or fuzzy yarn for extra softness.
- Personalization: Embroider the baby’s name on the cape or add appliqués for extra charm.
- Washing Instructions: Hand wash gently or use a delicate machine cycle to preserve the yarn quality.
- Storage Advice: Store in a cool, dry place to prevent stretching or losing shape over time.
- Gift Packaging: Wrap the set in a cute, handmade bag for a thoughtful and personalized baby gift.
FAQ: Frequently Asked Questions
Q: Is this pattern suitable for beginners?
A: Yes! With basic crochet skills and patience, beginners can follow this tutorial successfully.
Q: What yarn is best for baby projects?
A: Soft, hypoallergenic yarn such as cotton blends or baby-friendly acrylic is best.
Q: Can I adjust the hat size for different ages?
A: Absolutely! Follow standard baby head size charts to modify the pattern accordingly.
Q: How long does it take to complete this project?
A: Depending on your skill level, it can take 3-6 hours to complete both the hat and cape.
Q: Can I sell items made from this pattern?
A: Yes, but always credit the pattern source if required by the original creator.
Q: How do I make the spikes stand upright?
A: Use stiff stitches or lightly stuff them to ensure they hold their shape.
Join our VIP broadcast list and gain access to exclusive patterns, all for free. As a VIP member, you’ll receive the best patterns daily, delivered directly to your device. ✨📱 It’s a unique opportunity to stay up-to-date with the latest trends and designs, curated just for you. Don’t miss out on enhancing your projects and discovering new inspirations with the best patterns every day! 🎨🔝
Conclusion
The Crochet Pattern: Baby’s Dino Hat with Cape is an adorable and practical project that makes for a great gift or a fun DIY baby accessory. With detailed instructions, customization tips, and helpful FAQs, this tutorial ensures you can create a charming and comfortable set.
Whether you make it for your own baby, as a baby shower gift, or to sell, this crochet pattern is sure to bring joy.
What do you think of this pattern? Share your thoughts and suggestions in the comments below!


