
If you are looking for a small yet stylish project, the Crochet Puff Wristlets – Pattern is a wonderful option to explore. This handmade accessory is both practical and beautiful, allowing you to add a touch of creativity to your wardrobe.
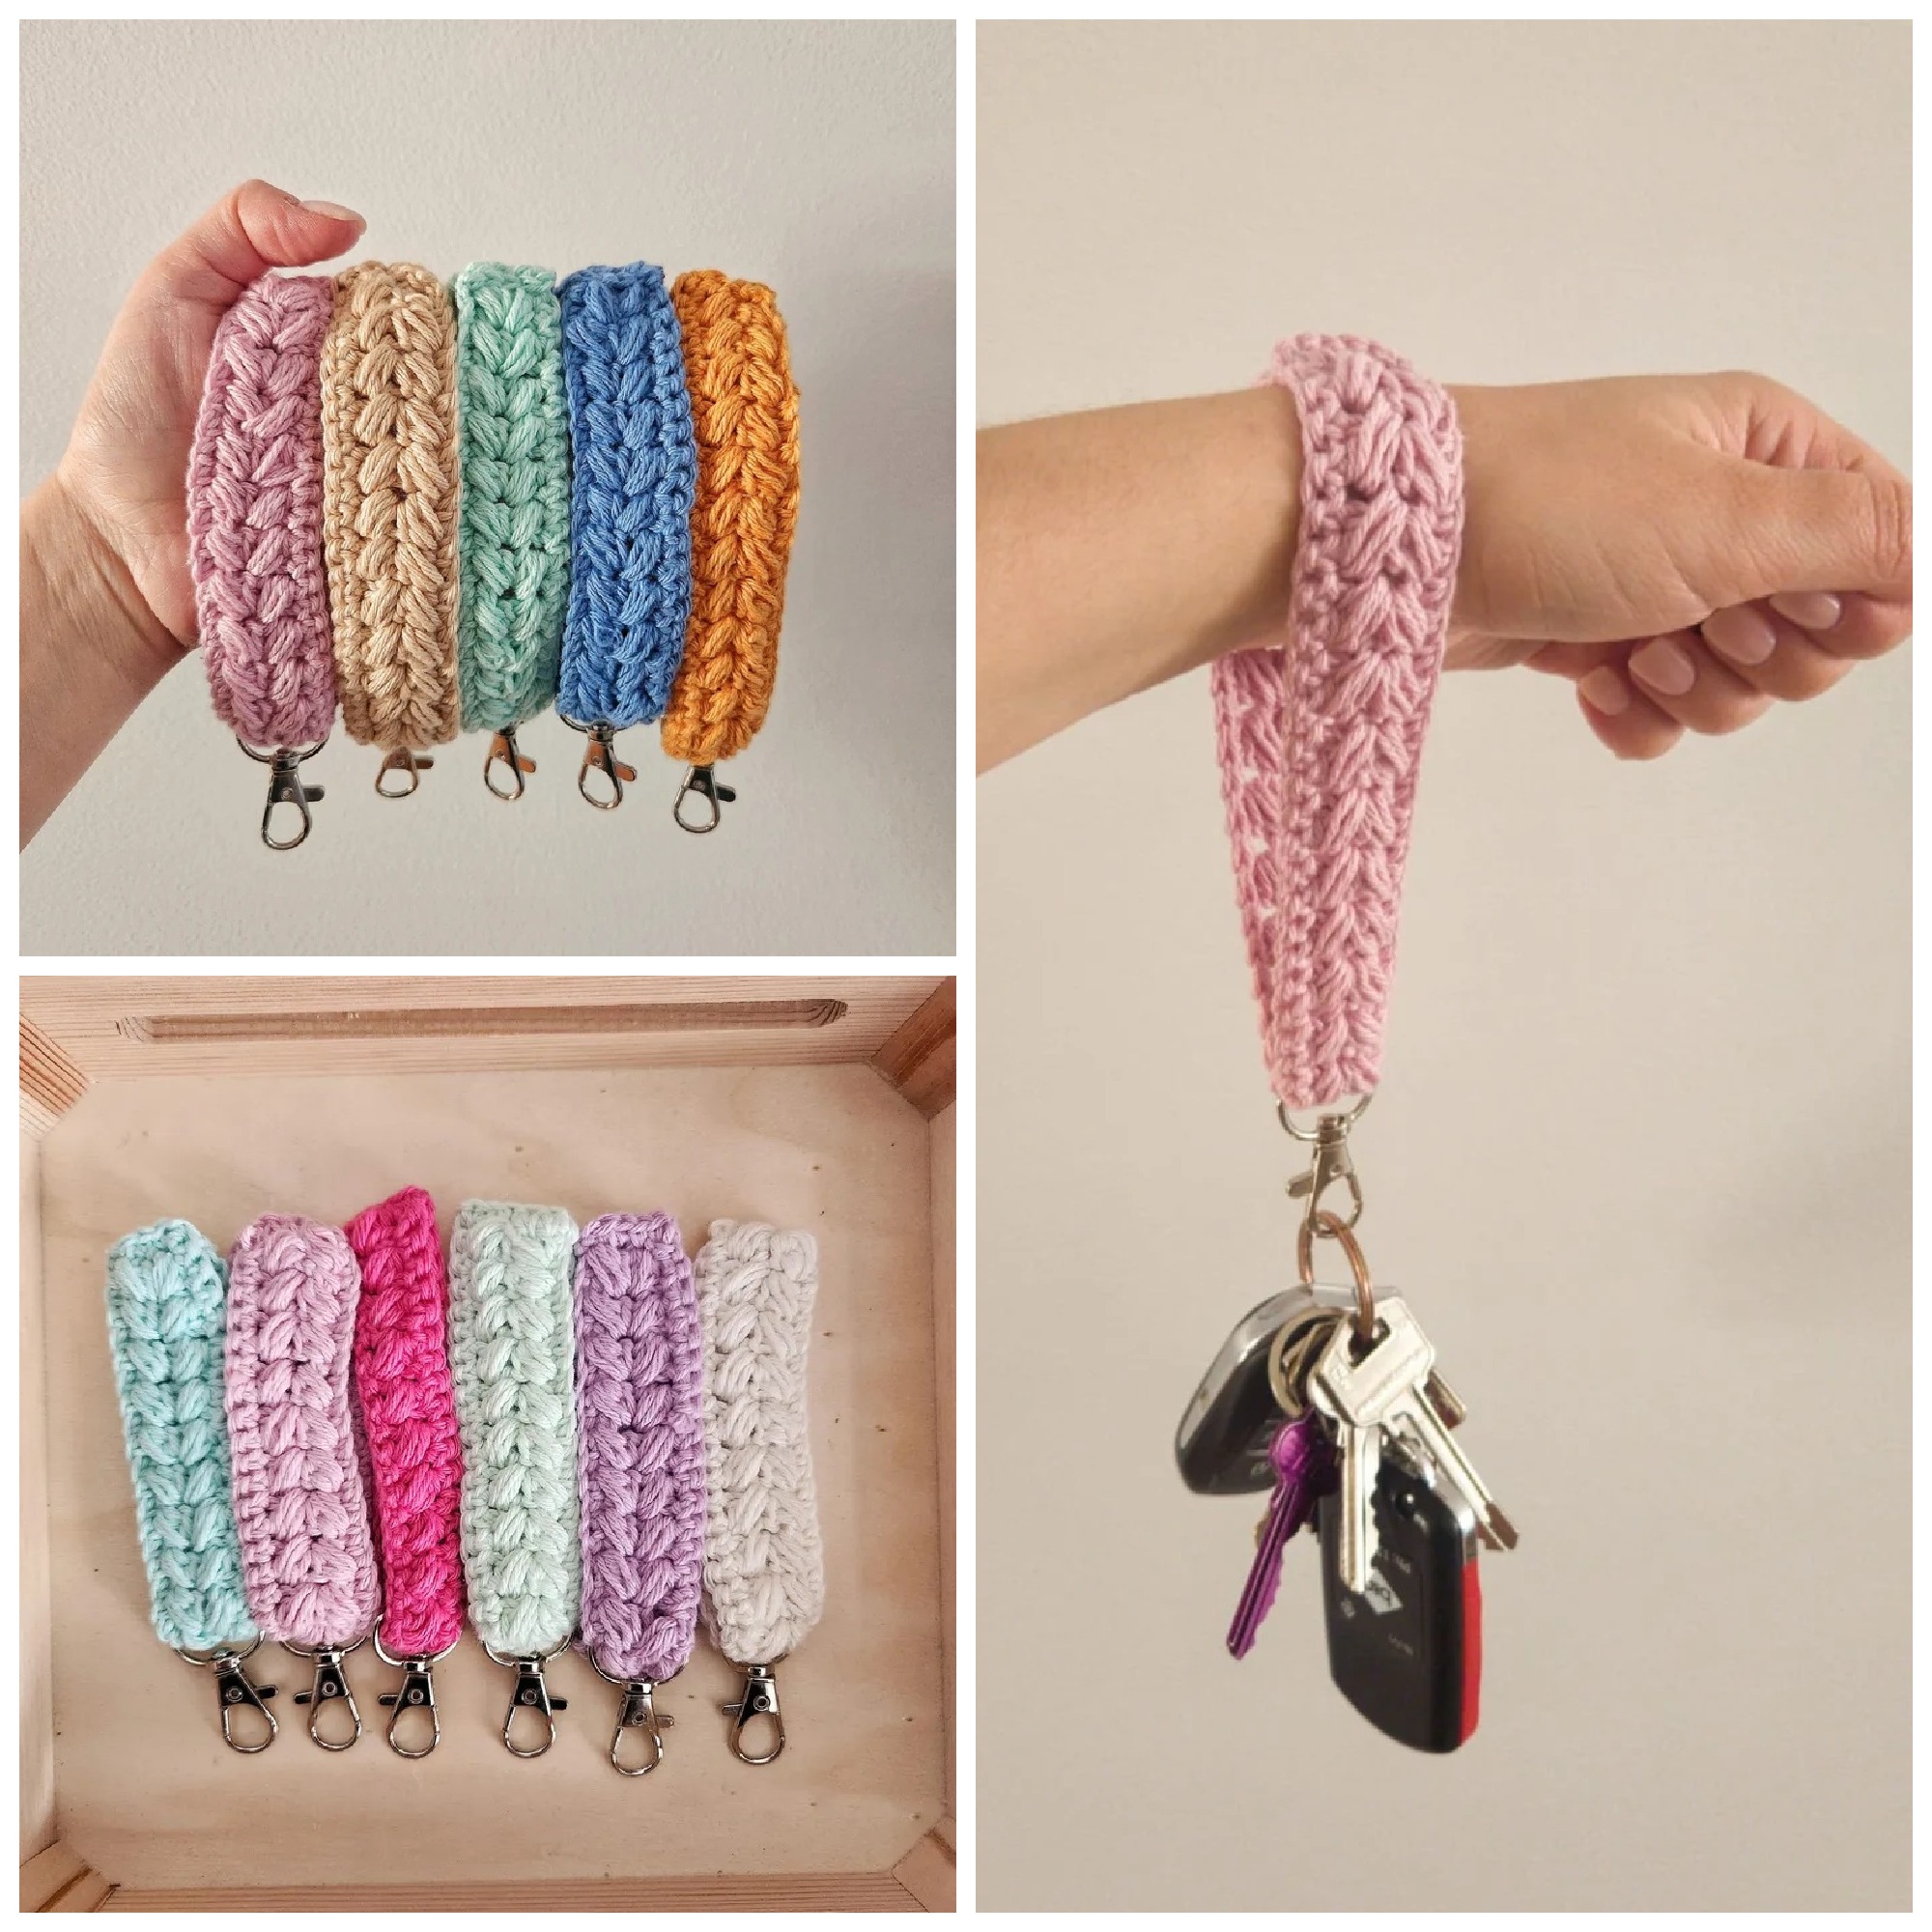
Wristlets are small bags or pouches designed to be worn around the wrist, making them perfect for carrying essentials like keys, phone, or cards when you don’t want to bring a larger handbag. When made with the puff stitch, these wristlets gain extra texture and charm, turning a simple accessory into something unique and fashionable.
The appeal of the Crochet Puff Wristlets – Pattern lies not only in its stylish look but also in its versatility. You can create them in neutral tones for everyday use or choose bright, festive colors for special occasions. Because of their compact size, these wristlets make an excellent project for both beginners and advanced crocheters.
They work up quickly, provide instant satisfaction, and can be customized endlessly. Whether you make them for yourself, as gifts, or even to sell, this pattern offers countless creative possibilities.
Beyond their beauty, Crochet Puff Wristlets are also very practical. Unlike larger bags, they are lightweight and easy to carry. They are great for days when you want freedom of movement without sacrificing style.
This combination of function and design makes wristlets one of the most loved crochet accessories. In the sections below, we will explore the steps, tips, and variations for making these wristlets, so you can dive into your next crochet project with confidence.
1. Understanding the Crochet Puff Wristlets – Pattern
The Crochet Puff Wristlets – Pattern is centered around the puff stitch, which is one of the most decorative crochet stitches. The puff stitch creates a soft, raised texture that resembles little clusters of yarn, giving the fabric a plush and elegant appearance. It’s easy to learn and adds character to any project. Wristlets made with puff stitches stand out for their texture and design, making them more stylish than plain crocheted pouches.
When you follow a wristlet pattern, you usually begin with a base chain that determines the width of your pouch. The puff stitch is then worked in rows or rounds to create the main body. Once the pouch is completed, it is folded and seamed, leaving an opening at the top. Many patterns also include instructions for adding a wrist strap, either crocheted or using a ready-made handle, making the wristlet functional and easy to carry.
What makes the Crochet Puff Wristlets – Pattern accessible is that you can easily adapt it to your needs. For instance, you can make a small version to carry coins or lip balm, or a larger one that fits your phone and cards. By experimenting with yarn thickness, you can create delicate wristlets for evenings out or sturdy ones for everyday use. This flexibility is what keeps crocheters coming back to this project.
Another benefit is that the puff stitch uses more yarn than a standard stitch, making the fabric thicker and more durable. This ensures that your wristlet will not only look beautiful but also last longer. Durability is an important factor, especially if you plan to use your wristlet frequently. With careful attention to tension and finishing, you can make a professional-looking accessory even as a beginner.
Additionally, puff wristlets are great practice for improving stitch consistency. Since the puff stitch requires pulling up multiple loops, it helps crocheters train their hands to maintain even tension. Over time, you’ll notice that your stitches become smoother and more uniform. Practicing with a project like this can help you develop skills for larger, more advanced projects.
Finally, this pattern allows you to experiment with closures. Many crocheters like to add zippers, buttons, or drawstrings to their wristlets. Each choice gives the bag a different look and functionality, and you can pick whichever best suits your personal style. This means that no two Crochet Puff Wristlets have to look the same, even if they are made from the same pattern.
2. Materials and Tools for Crochet Puff Wristlets
To create a Crochet Puff Wristlets – Pattern, you don’t need a large number of supplies, which makes this project budget-friendly and accessible. The most important choice is yarn, and for wristlets, a medium-weight cotton or acrylic yarn works best. Cotton yarn provides sturdiness and holds its shape well, while acrylic offers softness and a wide variety of colors. Depending on your preference, you can also combine yarns to achieve unique effects.
Next, you will need the right crochet hook size. Most patterns recommend a hook between 4mm and 5mm, depending on your yarn weight. Using a smaller hook will create tighter stitches and a sturdier fabric, while a larger hook will make the wristlet softer and looser. Testing a swatch before starting is always a good idea to ensure that you are happy with the texture and durability.
In addition to yarn and hook, you may want to use a lining fabric. Lining your wristlet gives it extra structure and prevents small items from poking through the stitches. A simple piece of cotton fabric, cut and sewn to fit the inside of the wristlet, can make a huge difference in quality. Even if you are not experienced with sewing, this step is simple enough and adds a professional finish.
For closures, zippers are the most popular choice. They provide security and a polished appearance. However, buttons and magnetic snaps are also options if you prefer a simpler finish. Whichever closure you choose, make sure it complements the overall design of your wristlet. Choosing metallic or wooden buttons, for instance, can give the wristlet a rustic or modern touch.
Other optional tools include stitch markers, which help you keep track of your rounds, and a yarn needle for weaving in ends. These small tools may seem minor but make the process smoother and more organized. Investing in quality crochet accessories can make your crafting experience much more enjoyable.
Lastly, don’t forget the wrist strap. You can crochet one using the puff stitch or a simpler stitch for contrast, or you can attach a pre-made strap for convenience. The strap not only makes your wristlet functional but also adds another decorative element.
3. Step-by-Step Guide to Crochet Puff Wristlets
The first step in creating a Crochet Puff Wristlets – Pattern is to start with the base chain. This chain should measure the width you want for your wristlet. For example, if you want a pouch that fits a smartphone, make sure your chain is wide enough to cover its length comfortably. Once your base is ready, you can begin working rows of puff stitches.
To crochet the puff stitch, yarn over and insert the hook into the stitch, yarn over again and pull up a loop. Repeat this process several times, usually four to six, until you have multiple loops on your hook. Then, yarn over one final time and pull through all loops. This creates the puff effect that makes the stitch so decorative. Continue this process across the row, and repeat until you reach your desired height.
After completing the body of the wristlet, fold the piece in half and seam the sides together using a slip stitch or whip stitch. This forms the pouch shape. At this stage, you can add a lining if you wish. Place the lining inside and sew it securely to the edges, leaving the top open. This step helps reinforce the wristlet and ensures durability.
The next step is to add a closure. If you are using a zipper, hand-stitch or machine-stitch it carefully along the top opening. For buttons, crochet a loop at the center top of one side to secure the button. A magnetic snap can be sewn onto the lining for a clean and modern finish. Each closure option gives the wristlet a unique look.
Once the closure is in place, it’s time to add the strap. Crochet a small band using puff stitches or single crochet stitches, depending on the style you want. Attach the strap securely to one side of the wristlet. For added strength, consider double-stitching the ends to make sure the strap will hold up with regular use.
Finally, weave in all yarn ends neatly with a yarn needle. Trim any excess fabric from the lining if necessary. Give the wristlet a gentle press with a steam iron if the yarn allows, and your project is complete. With practice, you’ll be able to make these wristlets quickly and even create multiple variations for different occasions.
4. Creative Variations of Crochet Puff Wristlets
One of the joys of making a Crochet Puff Wristlets – Pattern is the opportunity to personalize it. A simple change in yarn color can transform the entire look of your wristlet. Solid colors highlight the texture of the puff stitch, while variegated yarns create a playful, multicolored effect. You can also alternate colors row by row to create stripes for a bold and modern design.
Another way to customize your wristlet is by adding embellishments. Consider sewing beads or sequins into the puff stitches for a glamorous touch. Embroidery is another option; simple floral or geometric designs stitched onto the fabric can make your wristlet one-of-a-kind. These details not only add beauty but also allow you to express your personal style.
You can also experiment with wristlet sizes. A smaller version works great as a coin purse, while a larger one can hold essentials for a night out. By adjusting the base chain and number of rows, you can create wristlets that fit different purposes. This makes the pattern highly adaptable and practical for every occasion.
Some crocheters like to combine different stitches with the puff stitch for contrast. For example, alternating rows of puff stitch with rows of double crochet creates a textured yet structured fabric. This technique not only adds interest but also allows you to control how thick or flexible the fabric becomes.
Another fun idea is to make themed wristlets. For example, you could use red and green yarn for a Christmas wristlet, pastel shades for spring, or metallic yarns for festive celebrations. Themed wristlets make thoughtful handmade gifts and can be tailored to the personality of the recipient.
Lastly, wristlets are wonderful projects for using up leftover yarn. Because they are small, you don’t need large amounts of yarn to complete one. Mixing leftover yarns into stripes or color blocks is a creative and eco-friendly way to make use of scraps while producing something stylish and functional.
FAQ About Crochet Puff Wristlets – Pattern
1. Are Crochet Puff Wristlets suitable for beginners?
Yes, this project is beginner-friendly. The puff stitch may take a little practice, but once you master it, the rest of the pattern is very simple.
2. How long does it take to make a crochet puff wristlet?
Depending on your speed, a wristlet can be finished in just a few hours. With practice, you may be able to complete one in a single evening.
3. What yarn works best for Crochet Puff Wristlets?
Medium-weight cotton or acrylic yarn is recommended. Cotton provides structure, while acrylic offers softness and a wide variety of colors.
4. Can I add a lining to my wristlet?
Yes, lining your wristlet is optional but highly recommended. It adds structure, durability, and prevents small items from slipping through the stitches.
5. What closure is best for puff wristlets?
Zippers are the most secure and polished option, but buttons or magnetic snaps also work well, depending on your style preference.
6. Can I sell the wristlets I make from this pattern?
Absolutely. Handmade wristlets are popular at craft fairs and online shops. Just make sure to credit the original pattern designer if required.
Conclusion
The Crochet Puff Wristlets – Pattern is a beautiful, practical, and versatile project that combines style with functionality. Whether you are a beginner looking to practice stitches or an experienced crocheter seeking a quick and creative accessory, this pattern is an excellent choice. With countless customization options, from colors to closures, every wristlet you make can be truly unique.
I hope this article has inspired you to try making your own wristlets. Now I would love to hear from you—what colors, styles, or variations would you like to try? Share your thoughts, experiences, and suggestions in the comments. Your feedback helps us all grow as crafters and keeps the crochet community vibrant and creative.


